Google recently released a new version of Gmail with various new features for managing your inbox, in addition to some changes to the interface. Although it is now available for everyone, you have to activate the update manually. Here we explain how to do it step by step.

The new inbox allows you to divide your incoming email into different tabs depending on their nature. So, you can have your personal emails in one tab, notifications from social networks in another, and promotional emails in another.
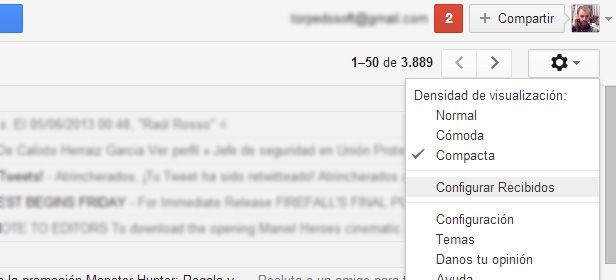
The first thing you have to do to activate it is access Gmail from your desktop just as you normally would, then click on the settings button (the gear icon) located in the upper-right of the inbox. From the dropdown menu, click on Configure Inbox.

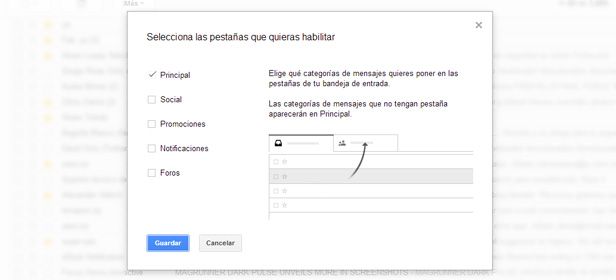
Next, you have to choose the amount of tabs you want your inbox to have. By default, Gmail suggests you divide them into Primary, Social, Promotions, Updates, and Forums. The algorithm used to categorize them is very efficient, and generally speaking, the emails will be properly located in the corresponding tab.
You can later “teach” Gmail so that it automatically sends a certain type of email to the tab you tell it to by dragging it into the corresponding tab. You can also create customized sections according to your needs.

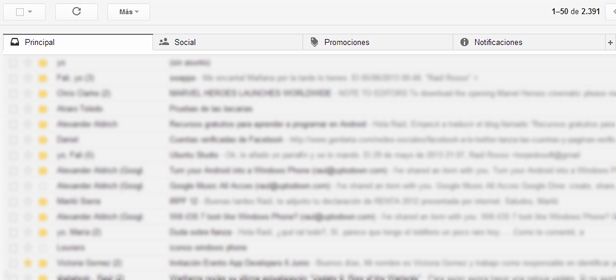
After deciding how your inbox will look, click on the Save button, and you will immediately be able to see the changes you made. You will now see all the different tabs in your inbox, so when you get a new email in any one of them, a notification with the numbers of unread messages will appear, along with a different color for each category.


