We’re big Raspberry Pi fans here at Uptodown. Some of the most popular uses for this low-cost micro PC include serving as a multimedia center or game emulation platform. But what if you want everything in one place without having to jump through too many hoops to install it and set it up? Well, for that there are things like the RecalBox, an impressive prebuilt distribution for Raspberry Pi that includes both the popular KODI Media Center and the EmulationStation frontend configured with a full array of the must-have emulators courtesy of the RetroArch/Libretro API. But don’t let the fancy names scare you – this is all much easier than it appears.

What can you do with the RecalBox and Raspberry Pi?
Just hook it up to your TV to get a super-complete media and gaming center without needing any other external hardware and at a minuscule energy consumption. You can watch videos by connecting any USB device to the RasPi, so it can serve as a bridge to a hard drive containing your movie collection. All that with the benefit of running over KODI, whose endless features make it the BEST media center out there today. (My apologies to fans of Plex.)
But the main appeal of the RecalBox/RasPi combo is that you can easily jump from KODI to the aforementioned game launcher, where you have instant access to your collection of ROMs from classic consoles (with support for both 8- and 16-bit machines like Super Nintendo and Master System and more modern systems like the first PlayStation and Nintendo 64.) This is possible thanks to the potential of the recent Raspberry Pi 3, which can handle the knocks of more demanding emulations.
Un #RaspberryPi3 con #Recalbox es la plataforma de emulación definitiva. N64 y PSX a pleno rendimiento. AHORA SÍ. pic.twitter.com/2Mlj4Np75T
— Raúl Rosso (@ElRoSSo) April 5, 2016
This doesn’t mean you have to fight with cables and connections. Besides all the above, the RecalBox comes preconfigured so that from any other machine connected in the same place you can send games to the RasPi over a browser client connected by Samba. Such a pleasure. And best of all, when using RetroArch in the background you don’t have to fight with each emulator separately when setting them up as the whole process, from the controls to the graphics, is handled together. A full-fledged For Dummies here.
What you need to run RecalBox
- Obviously a Raspberry Pi, if possible version 3 B, which you can get from one of the many distributors who carry it.
- A micro-USB charger to power the RasPi. Any one that supplies at least 1.5A to 5V will do, meaning mostly any tablet or smartphone cable you probably have lying around your house should work. (Although if you really don’t want to skimp and not risk an energy shortage corrupting the SD, best to opt for one that reaches 2.5A—the official one is available on Amazon.)
- A keyboard, and not because you’ll need it later (with a gamepad for your games and for KODI the TV’s own remote control should be fine if it uses HDMI-CEC technology), it’s to make it much more comfortable to set everything up at the start. You can use either a USB keyboard connected to the RasPI or a Bluetooth one if you have a USB dongle.
- A gamepad. Here’s where the magic comes in. If you connect an Xbox 360 controller (whether with a cable or using a charge-and-play) or a PS3 Sixaxis they’ll be auto-detected without any prior setup. If it’s a different gamepad you can configure the equivalencies over the EmulationStation. And note that the RasPi 3 works with Bluetooth.
- A MicroSD card. Raspberry Pi has no internal memory, so you’ll have to connect a memory card where you install the necessary files to run the RecalBox. While any old SDHC will do, it’s a good idea to check out this wiki to see which ones work well and which ones don’t.
- If you’re not going to connect it to your network by cable you’ll need a USB WiFi receiver, super-necessary if you’re going to send movies and games from your local network.
How to install Recalbox
Once you have your MicroSD, you’ll connect it to a PC so you can copy the files you need for RecalBox, but first you need to get it into the right format. To do so, the tool SD Formatter should work like a charm. Just select the drive in question and click Format and you’ll have it ready and formatted in just a few seconds.

The good thing about the RecalBox is that you don’t have to mess with the Linux terminal as is usually the case with these types of distributions, since the basic structure generated is Fat32 and when it’s run for the first time it creates the file structure on a new partition on the card by itself. In other words, just by unzipping the contents of the ZIP folder on the SD (you can download those files here), you’ll have everything ready. The rest of the internal maneuvers are totally opaque, at least at the get-go.
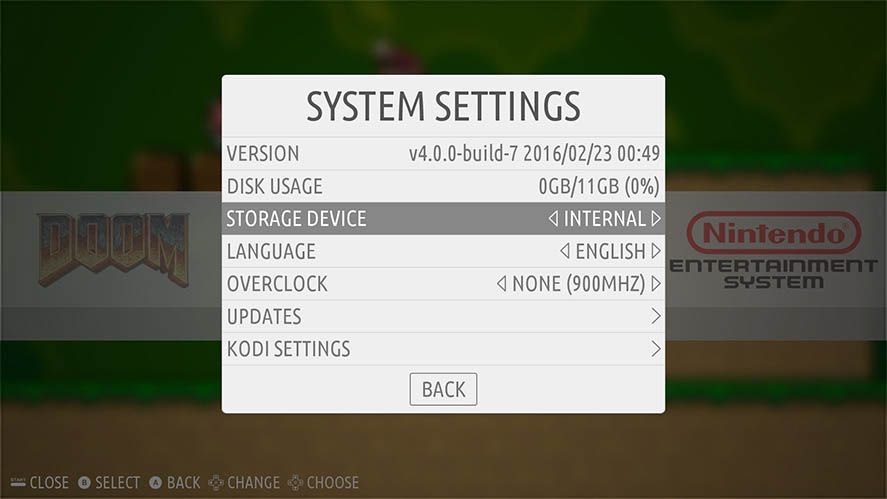
Now insert the MicroSD into the RasPi, connect it, and wait for the necessary files to be copied and the file structure created. That done, you’ll be looking at the RecalBox main menu, where several freeware games come preinstalled for you to try out (and yes, one of them is an emulator for classic id Software game with which you can play Doom on your TV). With the keyboard arrows you can move through the menus, with A you move forward, and with S you go back. From there, the next steps will depend on your personal preferences. Some options to mess with:
- Set up the WiFi in the network section. If you’re not connected by cable and you’re going to send games over the local network, go to the corresponding section, activate it, and insert your network SSID and password.
- Scrape the games. Another super-interesting feature is that besides auto-detecting and cataloguing the games you add, the RecalBox can download game info and covers from the Internet to set up an adorable database for your collection. Sometimes it doesn’t work right from the Scraper section of the main menu and you have to do the search manually. The official RecalBox site explains how.
- Give priority to KODI. From the RecalBox menu you can jump to KODI, and if you close that you’ll jump back to RecalBox, that simple. Still, if you’re using the media center more than gaming you can give KODI preference so that when you turn on the RasPi it auto-activates the media center.
How to transfer files from your local network
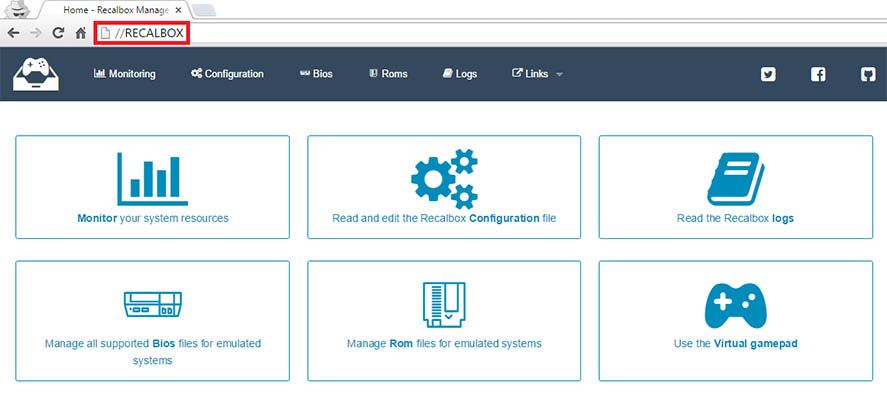
Although there’s nothing to stop you taking out the MicroSD and adding games to it ‘by hand,’ there are lots of facilities to simplify the process. If you type //RECALBOX into the browser bar from any PC connected to the same local network, you’ll access a remote client that lets you drag and drop folders into the corresponding folder so that they’re copied into that slot on the SD card. You can also use any USB device connected to the RasPi as the default location for your games. Change that location as needed from the System settings submenu.
Now, one snag does arise if you’ve got your games on one drive and your movies on a different one, as the appeal of KODI is that you can use it remotely to copy movies from another PC to an external drive connected to your RasPi in a different part of your house so you’re not having to disconnect and reconnect bits and bobs all the time. The easiest solution involves using the same hard drive to store both your movies and your games. In fact, the RecalBox’s own file structure is designed for that purpose, to the point that from Windows’ own file explorer you can browse the folders of the drive you’ve selected as your game source.
If not, and you find yourself in the same pickle as Your Correspondent (with games on your MicroSD and movies on an external hard drive), there’s nothing else to be done but use a client for Samba (the preintegrated protocol for exchanging files over the network) to move your files. WinSCP is unquestionably the best option for this, letting you access the hard drive hooked up to your RasPi from any PC connected to your network. The data to enter to gain access are:
- IP: The IP address assigned to your RasPi, which you can check in the RecalBox network configuration section.
- user: root
- password: recalboxroot
From the subfolder /media/usb0/ you’ll have full read and write privileges to remotely copy everything you want. The other option, not so recommended if you’re not super skilled on the terminal, is to get access via Putty/WinSCP and edit the Samba.conf file with the parameters of the new shared folder. But as I say, the appeal of Recalbox is its ease. Okay, yes, I’ve now written 1500 words about it, but seriously, it’s dead easy!
More information | Official RecalBox website


