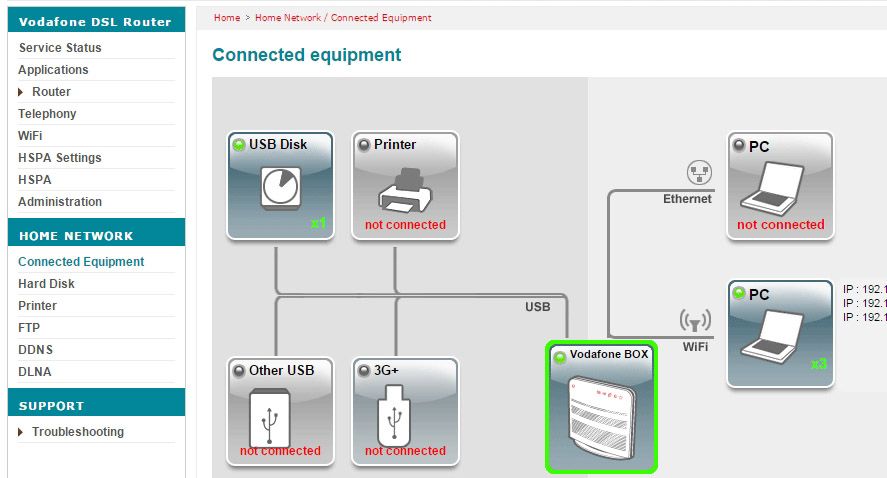
While there certainly are external hard drives out there capable of being connected right to your router via a network cable, there’s also another method that many users don’t know about that lets you share any external drive so that it’s accessible from any device that uses that same access point. Many routers include a USB input in their back ends that, besides its various uses during maintenance tasks and firmware updates, lets you connect a disk drive and easily share it on the network.
What can you do with a network drive?
The advantage of using your router instead of just creating a shared drive on any computer is that it doesn’t depend on the machine it’s connected to, meaning as long as the router is working, you can connect to the drive from any device. In fact, the router’s web administration panel usually includes a specific section to configure shared resources, allowing you to make disk drives as well as printers available to anyone connected to the network. In any case, the tutorial that follows is generic and independent of all brands and service providers.
The usefulness of this process is immeasurable. Imagine you have another computer or a MicroPC such as a Raspberry Pi connected to your living room TV using the XMBC/Kodi player, but the films and series you want to watch are stored on your desktop computer. To avoid having to mess with pendrives, you can simply put the things you want to watch on your shared disk. You could also use it as a local network to share documents without needing to use cloud services or any other unnecessary intermediaries.
Creating a network USB drive, step by step
- With the router switched on and running, connect your USB drive to the router (and to a power source, if necessary).
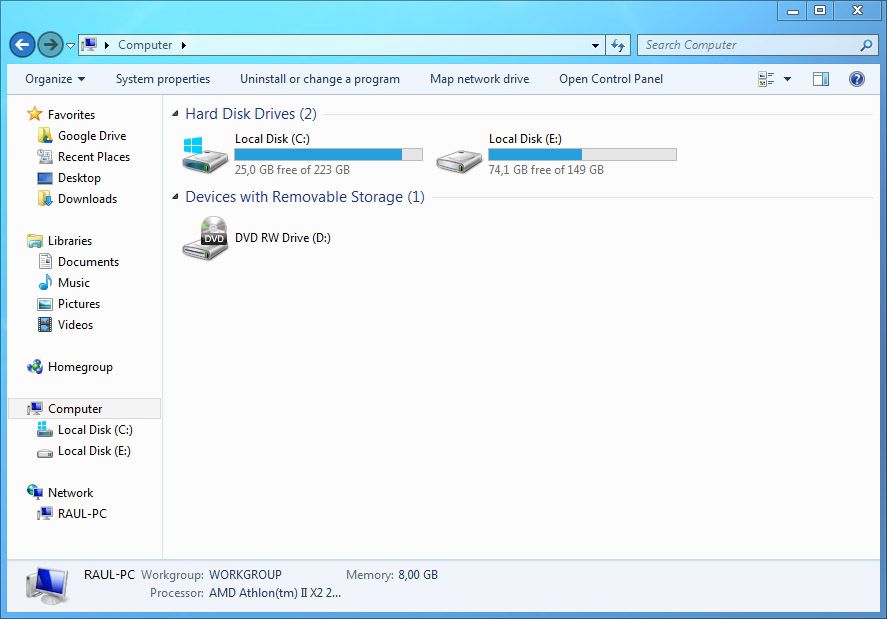
- In Windows, go to the My PC browser, in particular to the root where you can view all the connected units. Search in the upper menu for the Connect a network drive
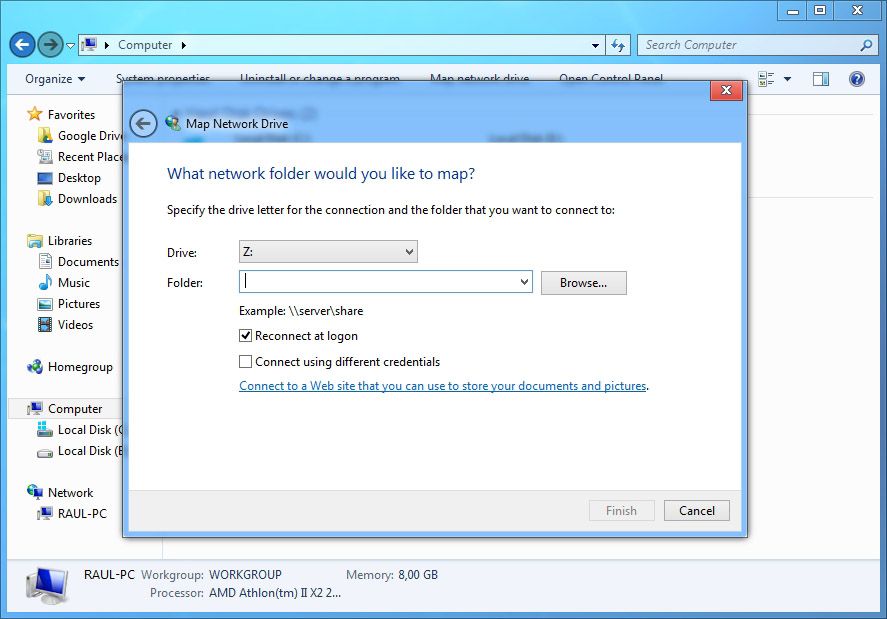
- In the window that appears you’ll set a letter to identify the drive as well as the file path where it’s found. To find the latter, you’ll need to check the IP of your router. The easiest way to do this is via the command line. To access it, type in CMD or System Symbol in the Run field (Windows 7) or in the smart search menu on the Metro interface (Windows 8).
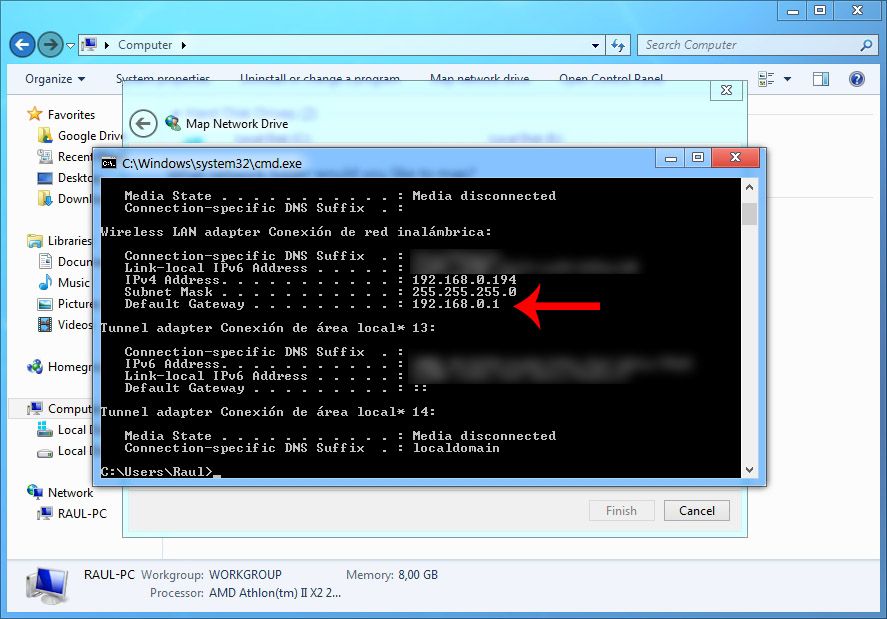
- When the command line appears, type ipconfig and press the return key. Among all the data that appears, look for the one that says Connection port and note down the IP in question.
- You’re going to return to the Run field and put in the router IP that you’ve just found, preceded by two backslashes (eg, \\192.168.0.1). When you do that and press Finalize a folder will appear with the name of the drive connected to the router, which will serve as the much-awaited file path that you’ll need to insert. (For example\\192.168.0.1\share\USBDisk_1).
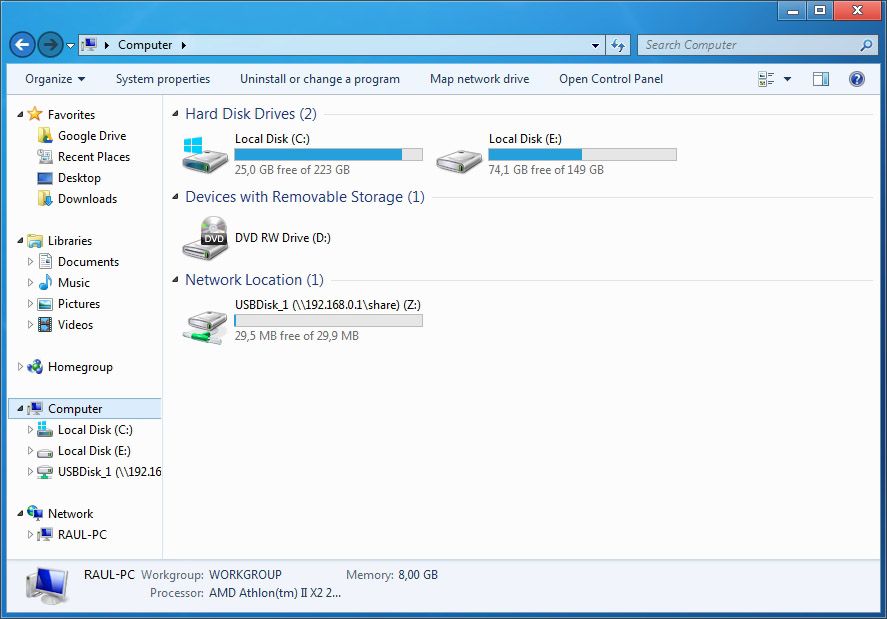
- After this procedure, if you return to My PC you’ll have your snazzy new disk drive now completely accessible for your needs.
Things to keep in mind
- Although here we’ve just used a single USB port in the router, nothing stops you from using a HUB and connecting several at the same time, stacking up several different network identifiers and splitting off or limiting the access range for each of them.
- In certain cases, above all when using small USB units, the amount of free and occupied space on the drive might display incorrectly, although the files should appear just fine.
- Keep in mind that this drive will only be accessible from a computer connected to the network of the router in question, meaning you can’t view it via the Internet. If you want to do that easily without having to delve into setup processes that might be too complicated for rookies, take a spin with TeamViewer or any other remote desktop service.


