As of a good while ago, Steam has allowed players to create several different routes to install games on different disk drives. However, if you want to move them once they’re already installed, you’ll have to turn to Steam Mover, an external tool that lets you change the filepath for the files of each of your installed games. Here we explain how to do it.
How to change the install filepath in Steam
By default, all the games will be installed in a subfolder in Program Files/Steam on the main drive where you’ve installed the client, but you can add more and select what you want during the install process. To do so, we have to go to Steam > Parameters > Downloads > Steam Library Folders, where you can create or remove alternative routes. When you go to install a game, right in the confirmation window that specifies how much space it will take up you can drop-down a menu of all the created routes. Once installed, though, you can’t move it again unless you use Steam Mover, as explained next.
How to move already-installed games
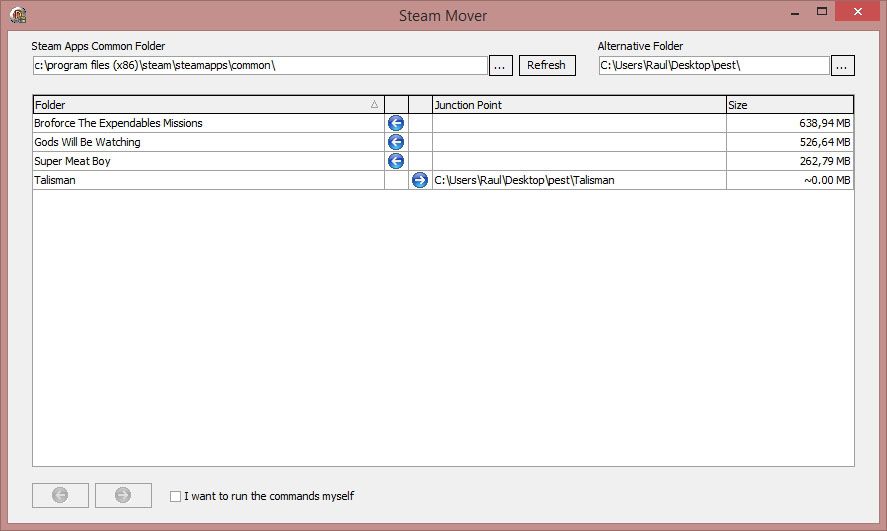
The program couldn’t be simpler. When you start it you’ll see a list of all your installed games on the computer alongside the space they take up. In the upper part of the window you’ll see the current directories for each of your installed games, while on the right in the Alternative Folder space you can specify any alternative location.

Clicking on the game in question lets you select it (you can also hold down the Shift button to tick several at the same time), and if you click the arrow icon toward the right in the lower part of the screen you’ll proceed to move the ticked content to the new route. The process can be reversed with the same procedure but by ticking the button in the opposite direction. The system is very intuitive and you can see the changes made to each title at all times.


Wwwwwwww
Awfully interesting short article