Uploading videos to YouTube is very simple, meaning anyone with a PC or mobile device and an Internet connection can easily share her multimedia clips with the rest of the world. What’s more, the advanced configuration options that the platform offers will let you connect the videos to your own channel and increase its number of views, provided that you know how to make good use of these option. There are an infinite number of ways to completely customize all of the videos that you upload.
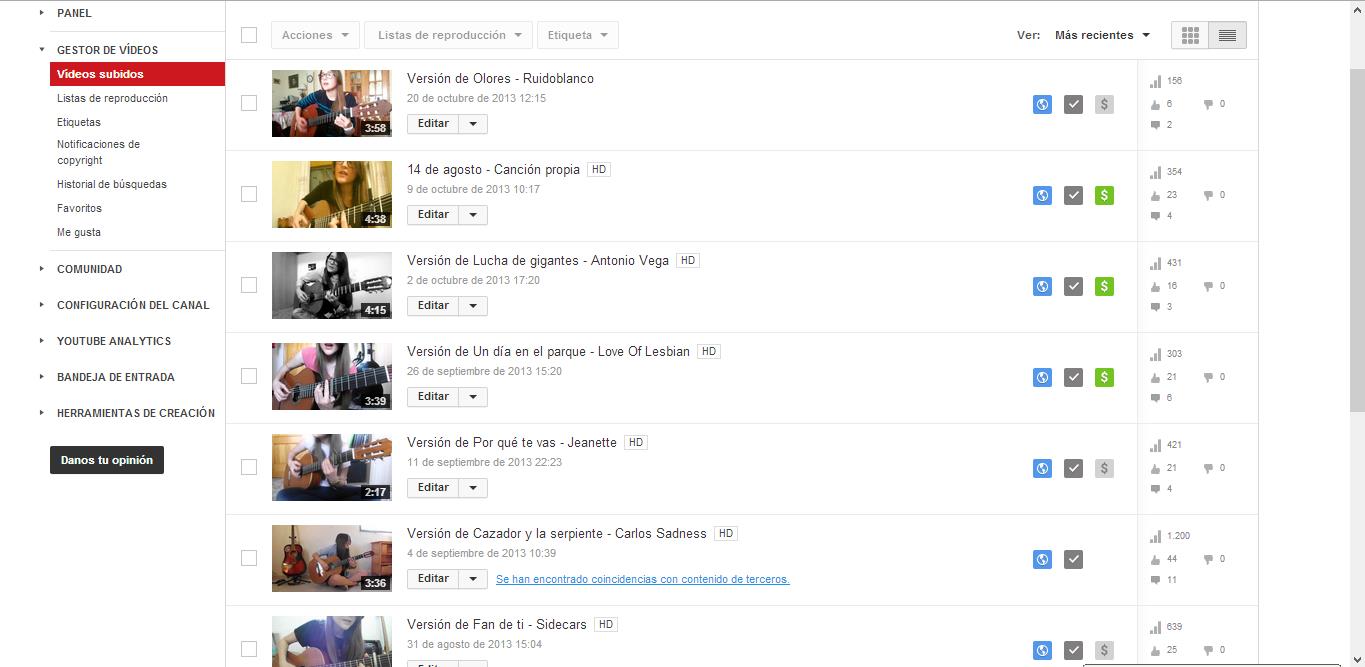
Customizing a video is as simple as using the options that YouTube supplies after you upload your video. First, once you have the video already uploaded (by using the “Upload video” option alongside the top search bar), you should navigate to Video Manager > Edit on the video that you want to personalize.
Once you’re there you’ll see several options: “Information and configuration,” “Improvements,” “Audio,” “Notes,” and “Subtitles.” In the first tab are the basic options that you’ll have had access to during the upload, as well as some simple info including the number of views, comments, and likes the video has received and the option to include your personalized thumbnail; that is, the small preview image that will appear alongside your video in search results or when your video is paused.
You can use either a frame from the video itself or an image you’ve uploaded yourself, which will alow you to include phrases or other attention-grabbers to make your video stand out and give more info than a simple screenshot can provide.
Customize playback
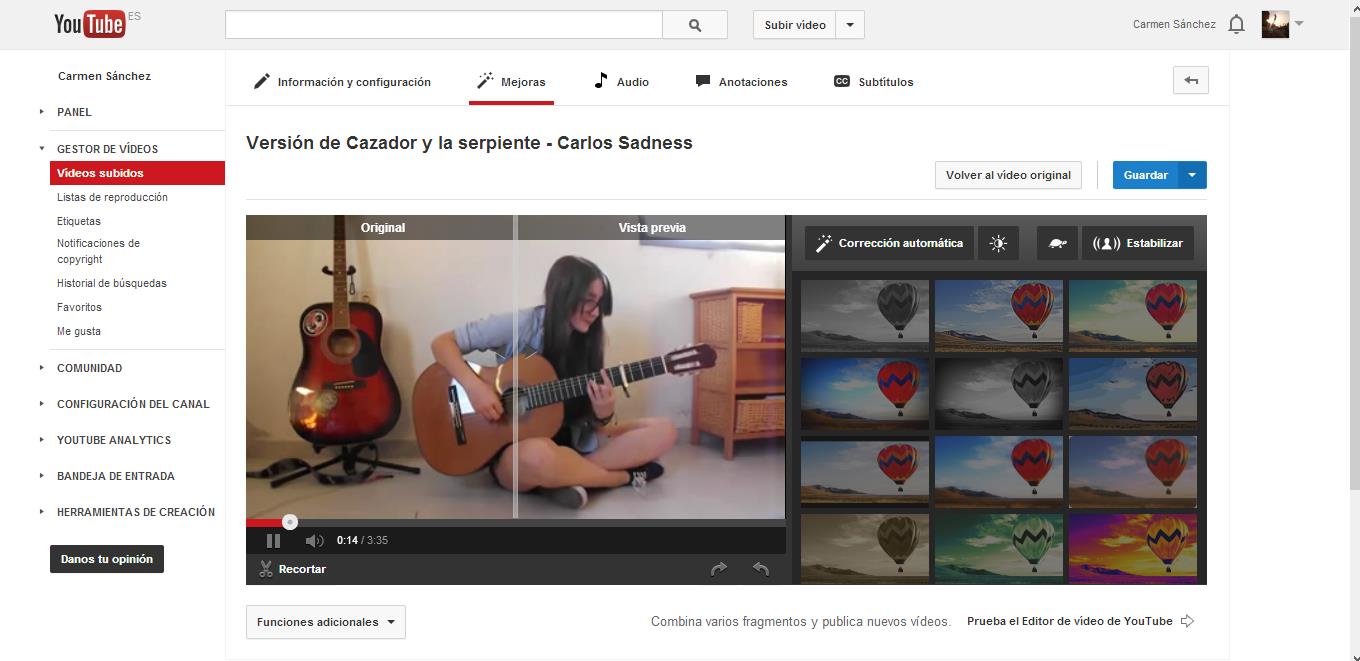
The Improvements tab will let you apply different styles that you can fiddle with to find out which one is best suited to your needs. This tab also lets you improve the lighting and color, slow down the playback speed, eliminate shaking of the camera, or even blur all the faces. You can apply various filters similar to the ones used on Instagram.
Add audio
The Audio tab will let you add a song over your clip that plays during the video; you can choose from more than 150,000 tracks that are free to use and in the public domain. The length of each is shown, so you can find loads of songs that suit the length of your video.
Create dialogue balloons and links
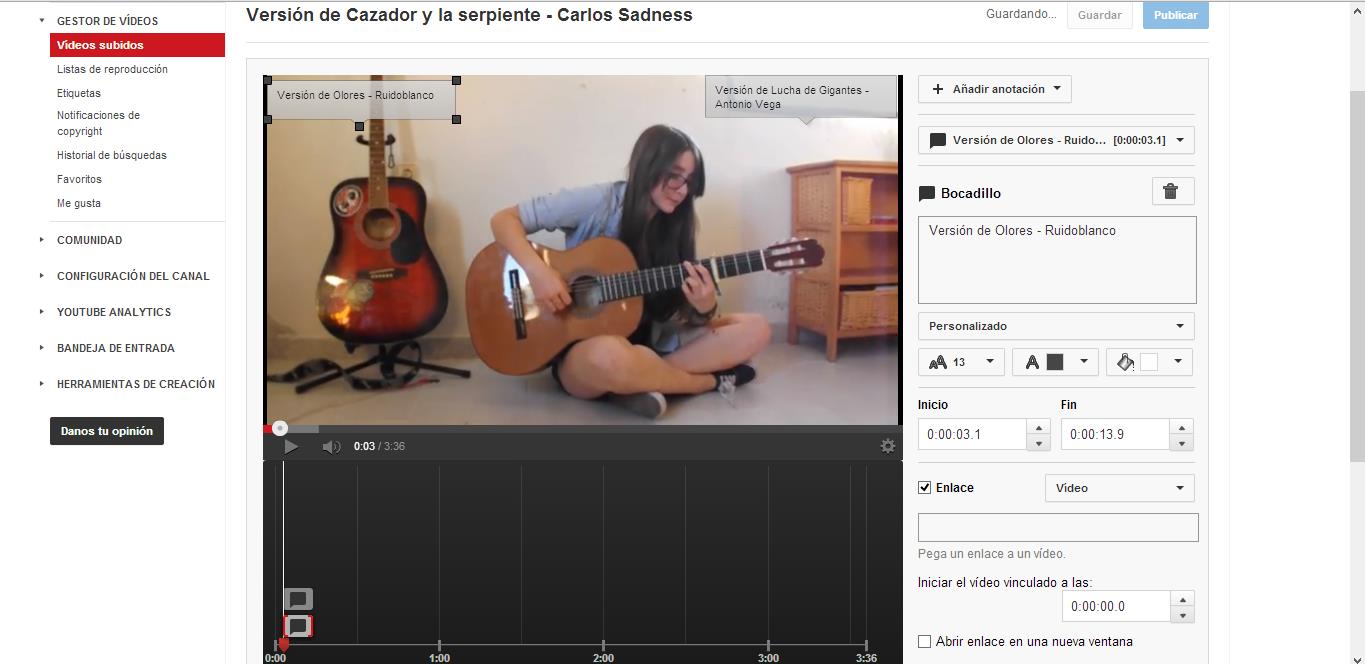
Some of the most-used features of the YouTube video are speech bubbles or notes where you can add links or headers. You can do this directly in the “Notes” tab. There you’ll find various types of balloons and positioning options. Adding the text and the exact time when you want it to appear is as easy as filling out the corresponding fields. You can sychronize everything using the time bar, similar to the ones used on any semi-professional video editor. Finally, to add a link in these balloons, you can tick the link box located below the other fields.
Add subtitles
Lastly, the final advanced option YouTube offers is to add subtitles to your clip, whether you need to add a translation, include the lyrics of a song, or clarify an unclear speech fragment.
There are certainly many tools here to make your video a totally personalized file with almost innumerable options to improve the look of the video. This will go much further in improving your channel and increasing your views than simply adding a video without doing any sort of tweaking.

