Although many people write off the free image editor Gimp as annoying and restrictive in certain regards, what’s certain is that it has nothing to envy to commercial alternatives when it comes to importing and applying effects to images. In this case, we’re going to do a Gimp tutorial to simulate the look of an old-school Game Boy on a photo by rescaling it, giving it a pixellated look, and limiting the color palette.
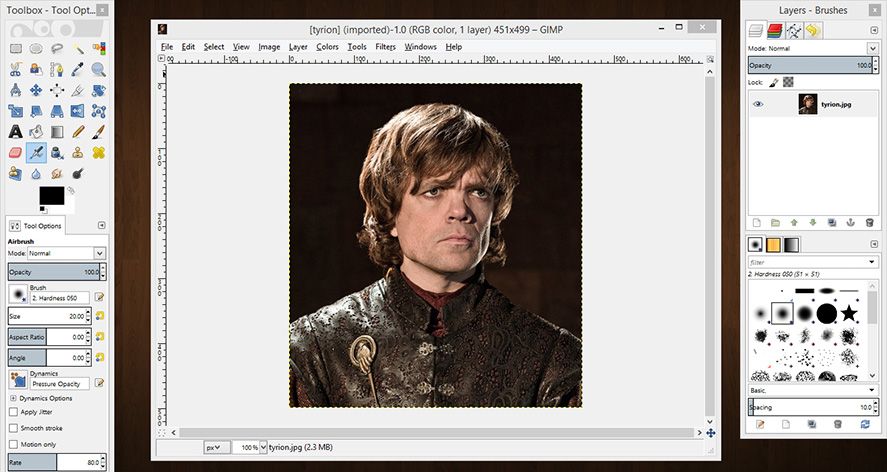
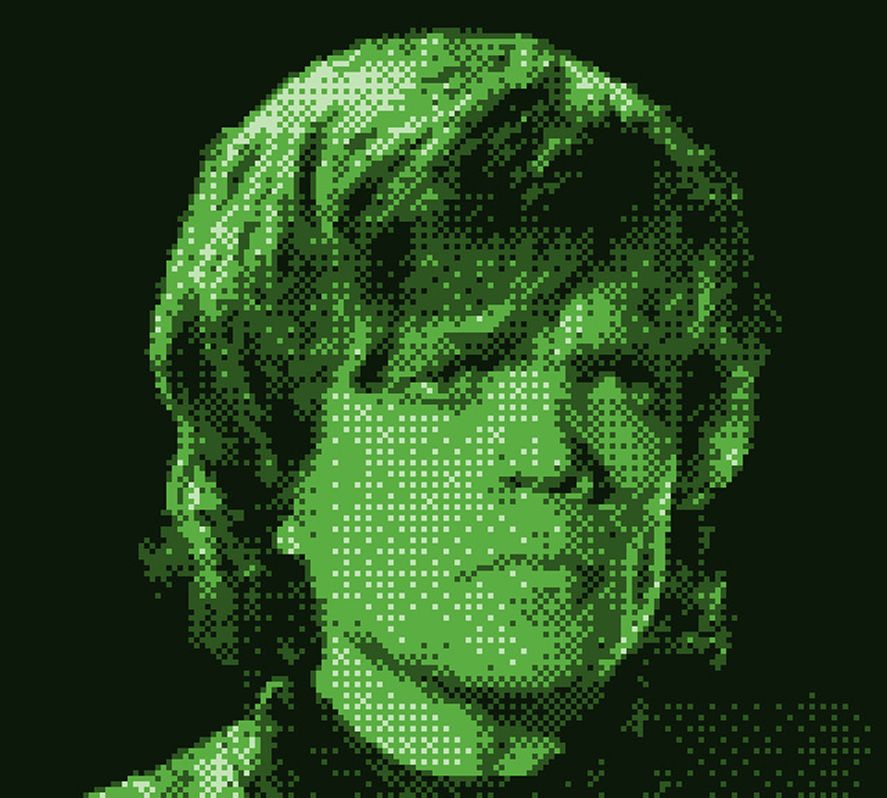
We’re going to test this process using a photo of the actor Peter Dinklage as Tyrion Lannister, the character from the Game of Thrones series. You can use whatever image you want, but to achieve the best possible results it’s a good idea for the background of the image you wish to transform to be as uniform as possible, with a single color predominating. In this case we don’t have to make any changes since the outline of the silhouette is well-defined, but in certain cases you might need to adjust the brightness or contrast to highlight different tones.
- Once we’re in Gimp, we’ll open the image from File > Open.
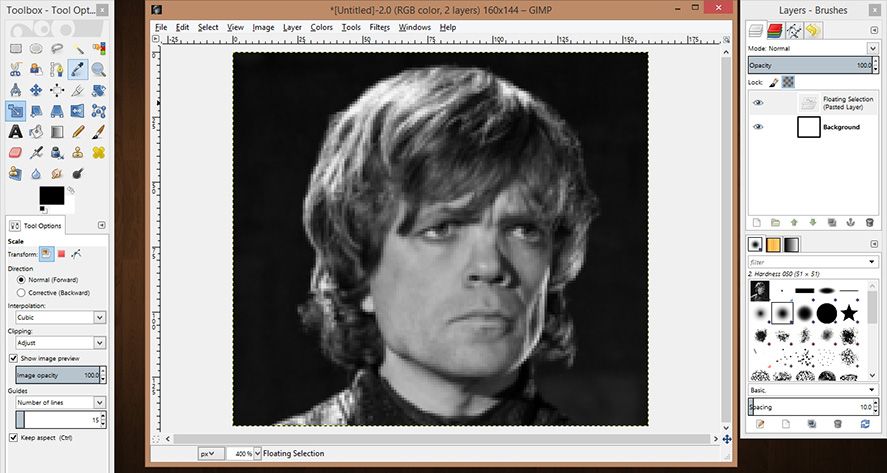
- We’ll limit the color palette by changing the properties of the image in Image > Mode > Greyscale. (As we’re going to give it some color, we’ll later convert it into RBG in Image > Mode > RGB.)
- The next step is to scale the image to adapt it to the screen resolution of a Game Boy. The original resolution of the handheld console was 160×144 pixels, so a good way to set your image is to create a new one of that size and scale your photograph to fit it.
- To do so you’ll create a new image from File > New, setting the width and height to the values mentioned.
- Now we go back to the original image and press CTRL + C to copy it to your clipboard. We’ll return to the empty image created in the previous step and paste it in with CTRL + V.

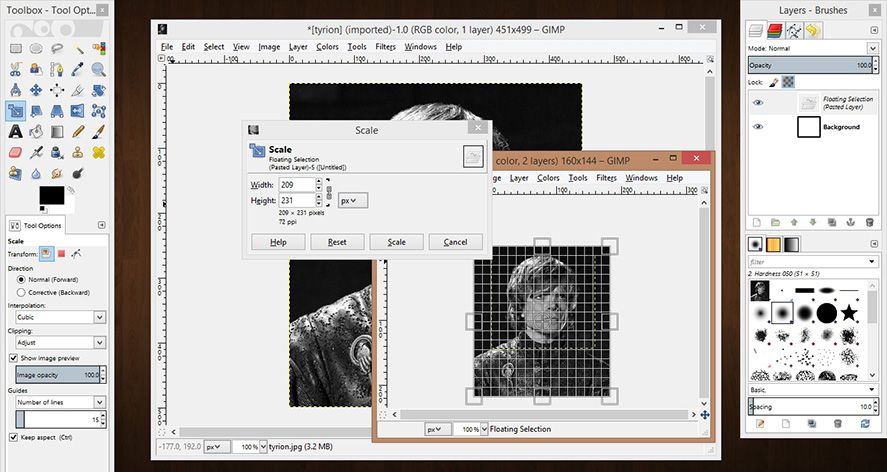
- Now we’ll proceed to the resizing proper. Select “Scale tool” from the toolbox to the left. When you click on the image a grid will appear where you can modify the size as desired by dragging the borders in any direction. To maintain the aspect ratio you’ll click on the chain links icon just to the right of the Width and Height fields in the context menu. Now you can center your photo in the new window without it losing its proportions. When you’ve finished, click the “Scale” button to apply the changes.
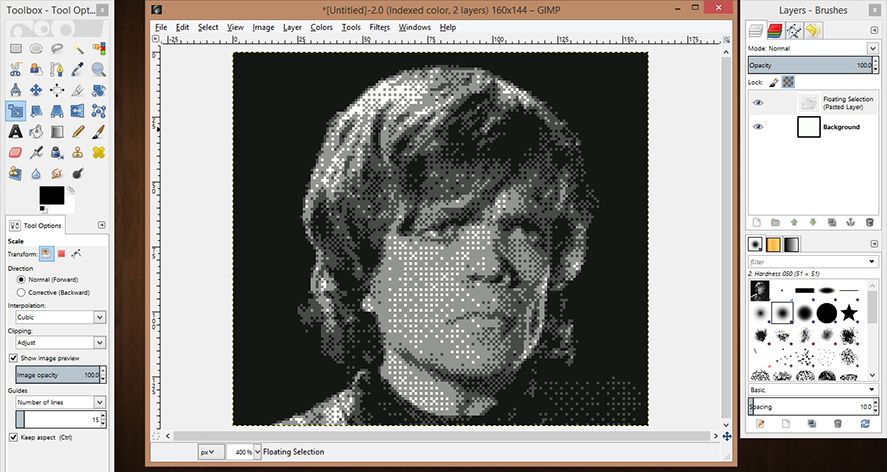
- The next step is to limit the color palette and modify the color index to simulate the recognizable shaded-dot effect from the Nintendo console. To do so, go to Image > Mode > Indexed. Select the “Generate optimal palette” option and set 4 as the maximum number of colors. In the Blur menu select the Positional option and then tick the Enable blur transparency
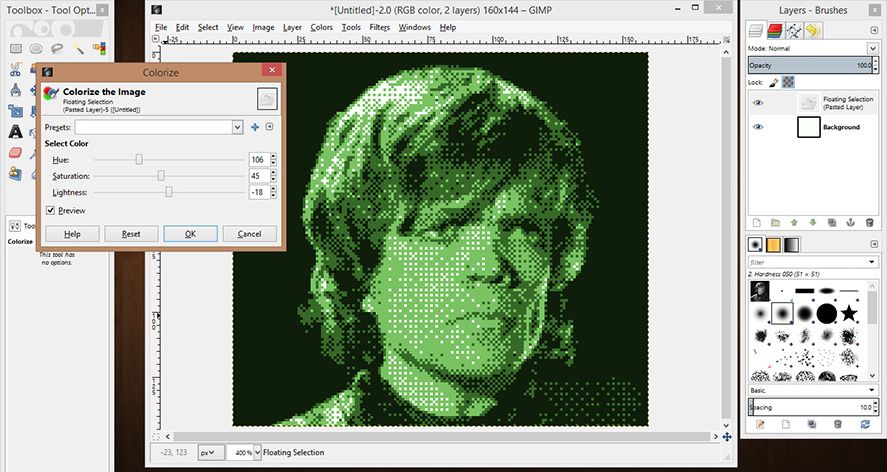
- The last step is to set the color palette to the greenish tones of an old LCD screen. To do so you’re going to return the image to RGB from Image > Mode > RGB so you can later click Colors > Colorize. Here you can change the tone as desired by sliding along the bars for tone, saturation, and brightness as desired. The console’s 4-color palette is highly variable depending on the condition of the screen, but a good equilibrium might be the one shown in the image below (106, 45 and -18).
- Your image is now ready, and you can save it in the desired format from File > Export. Given the small resolution of the resulting image, it might be a good idea to rescale it so you can see the cool pixellation. To do so, go to Image > Scale Image and change the size (don’t forget to maintain the aspect ratio). The final result is sure to bring on the nostalgia!


cool