Creating a three-dimensional version of a logo or corporate image can be a rather complicated endeavor, but we’re going to show you how. First of all, although there are countless paid design tools out there, you can always turn to free software to do projects like this one. In this case, we’re going to learn how to make 3-D logos from flat images using two well-known freeware programs: GIMP and Blender.
Preparing the flat image in GIMP
The first thing we’ll need is the image that we’re going to use as our base. The only requirement for it is that a single color must predominate, which can be done easily using the crop and paint bucket tools in GIMP or any other 2-D image editor that you like to use. In this case, we’ve used the Uptodown logo and painted it completely black. It doesn’t matter if the background is transparent or not (you’ll see why here in a second).

The next step in GIMP is to export a vector image from the logo so we can import it later into the 3-D editor Blender. To do this, once we’ve opened the image, we’ll have to click on the Select by color button, located on the upper part of the icon grid in the toolbox. Next we’ll left-click inside the logo to select the entire solid area. If the logo is formed by several different parts that aren’t connected to each other, we’ll have to hold down Shift and select the rest of the pieces as well.
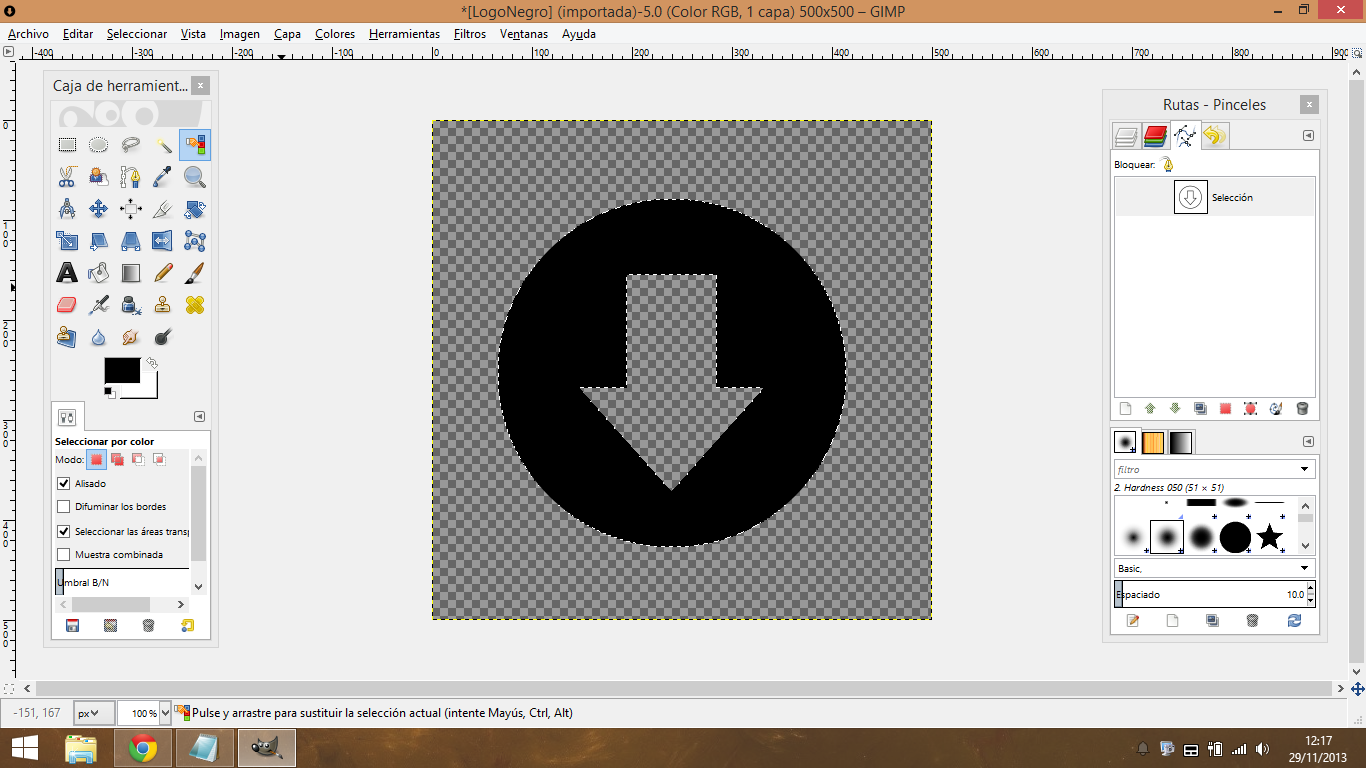
Then, we’ll go to the tools module on the right and click on the third tab in the upper part, the Paths > Brushes section. Here we’ll click on the lower icon that says Selection to path. After this, a Selection Editor window should pop up with a selection layer showing the image of the logo before vectorization. To export it, we’ll click on that layer in the Paths section and click on Export Path, selecting the place on our hard drive where we want to save it and—don’t forget this!—giving it the extension .SVG after the name.
Extracting the flat image in Blender
So we’re finished with GIMP and now it’s time to work with Blender. The well-known 3D modelling and editing tool is enormously comprehensive, but we’re going to try to be as concise as possible in this first lesson. When we open it for the first time, we’ll see in front of us a sample project with a three-dimensional cube in the center of the screen. To delete it, we’ll click to select it and then press the X key on our keyboard.
To add the vector image we’ve created to our screen, we click File > Import > .SVG Image and navigate to where we’ve saved our image. Then we’ll see a very small version of our image in the preview window. To expand it, we’ll edit the scale of the object itself. To do so, we’ll search in the right toolbar for the Object panel, represented by a small 3-D orange cube. Here we’ll also find the Scale tool next to the rotate button, as well as the object’s position and the three constraint axes we can transform. If the left tool column is too narrow, we can always hover our mouse over the edge and stretch it to make it wider.
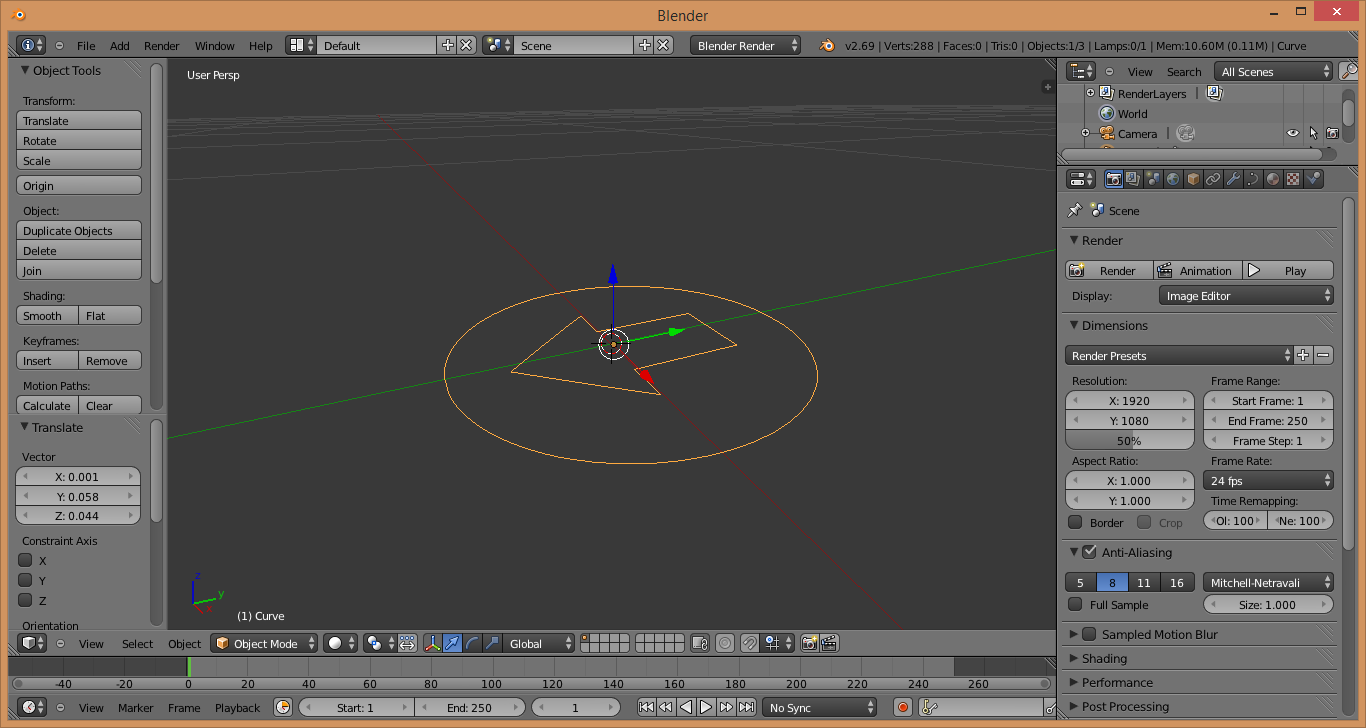
Keep in mind that what we see on the screen will not be the final image that we’ll export when we finish our project. To calibrate the position and the size of the logo we’ll have to go to the View > Camera section. This lets us see the scene from the virtual camera included by default wth every project started in Blender from scratch. To make this process a bit easier, we can move the logo to the center of the scene’s axes by accessing Origin > Origin to Geometry in the menu at the left of the screen. But for non-expert users it will definitely be easier to keep the default camera orientation and increase the size of the object or move it rather than to move the camera to the desired position.
Now comes the moment where we give our logo some volume. To do so, we’ll go to the Data section, which sits among the icons on the same bar as the Object menu that we went to before. Once there, in the Shape sub-section, we’ll click on the 2-D button (3-D will already be ticked), and see how our object “inflates.” Now we’re going to raise it up—that is, based on the vertices of the vector image, we’re going to create a new vertical axis to give it volume.
In the Geometry sub-section we’ll find the tools we need. With Extrude, we’ll calibrate the logo’s height, with Depth we’ll round the corners of the edges, and with Resolution we’ll add greater definition to the finish.
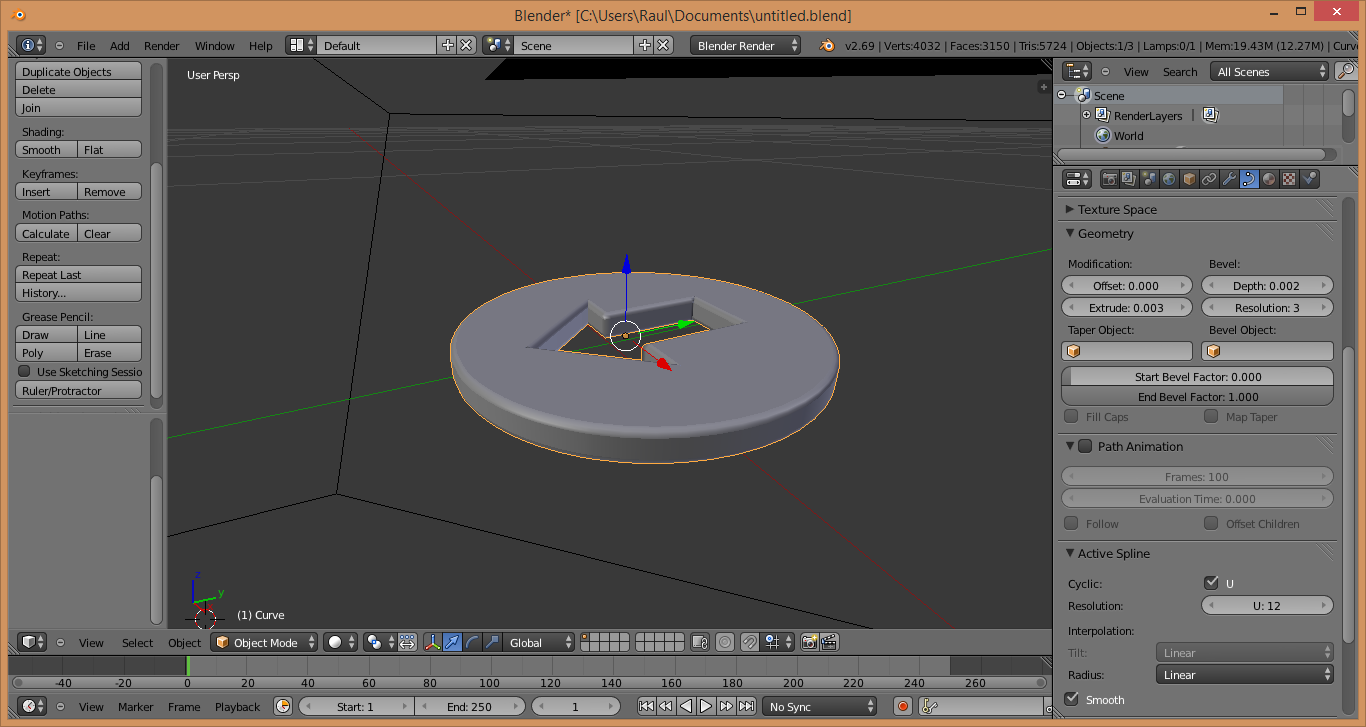
As we make changes, we can check how the final result will come out by pressing F12 to see a renderized image of the project. You can then save that image if desired. To do so, go to Image > Save Image in the window that opens to display the renderized image. To return to the work interface, we just have press Esc.
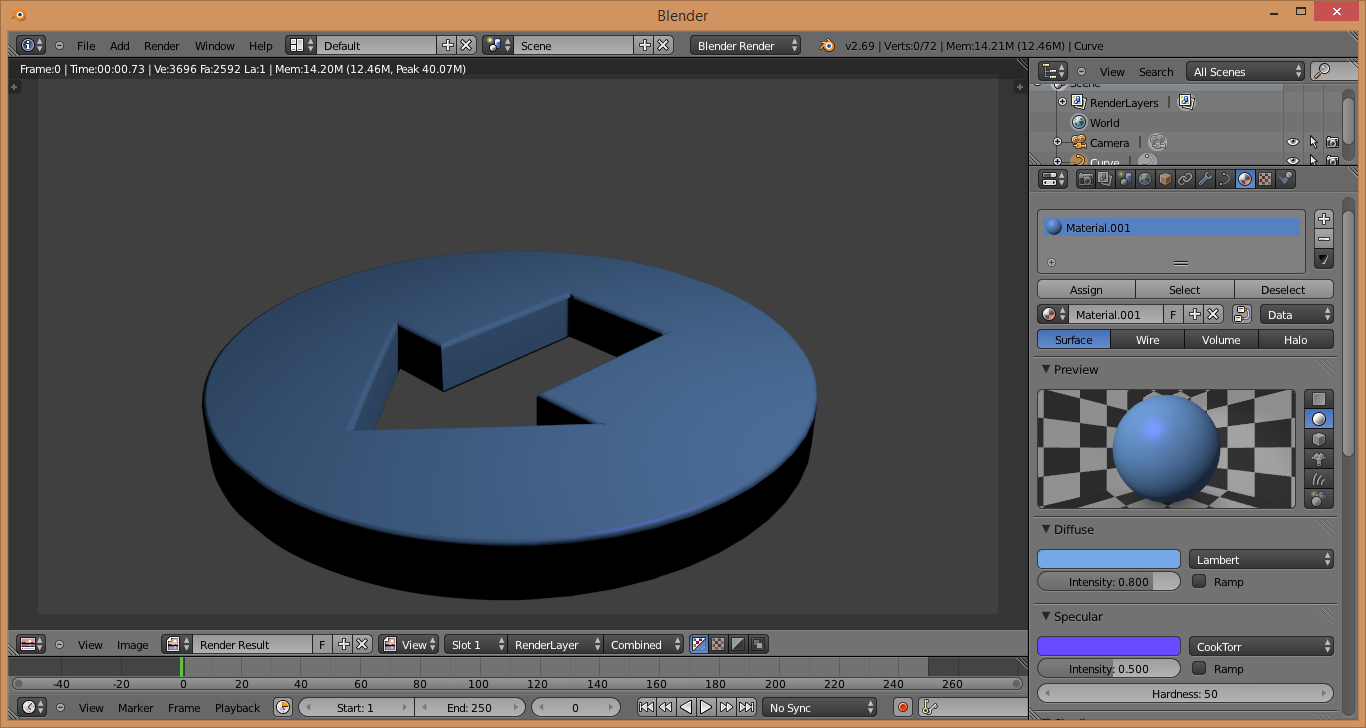
But we’re not quite there yet, since our 3-D model is still lacking any kind of color or texture, so let’s get to it. In the Material sub-section (represented by a translucent sphere) next to the Object and Data sections that we’ve already used, we can choose our color. To do so, we’ll click “New Material” and a palette of options will pop up for us. In Diffuse and Specular we can refine the project’s colors to give it exactly the look we want.
Finishing touches
The possibilities obviously open up massively as you begin to discover all the different functionalities in Blender, although with this basic tour you can already start to experiment. For example, if your logo is made up of several different parts, you can import them in separate pieces to give each one a unique texture or height, treating each as a different object. Or you can place a background image instead of that sad grey background, add and modify light sources to the scene, and even record a video instead of a static image.
We obviously won’t be able to explain all of these tricks one by one, but Blender has a comprehensive help manual, and if you look online you can find all sorts of tutorials to build on these baby steps into the world of 3-D design. So there you go. Now you have exactly what you need to make the perfect logo!


Totally useless tutorial . The stopper is
“Then, we’ll go to the tools module on the right and click on the third tab in the upper part, the Paths > Brushes section”. What module is this tab in? If specific modules are required for this task you should say so and describe how to open them.
1. Your pic shows that a number of Gimp modules are already open. You actually have two modules open “on the right”. Which one do you refer to? Leading to my next point …
3. You create a tutorial in English yet all the graphics show non-English software. If it was the English version I may have been able to figure out what you mean.