When it comes to designing logos or needing certain images for use on web projects, vectorized images tend to be highly preferred over bitmaps given the obvious limitations of the latter when it comes to resizing them without losing resolution. You don’t need to turn to paid software like Adobe Illustrator or Corel Draw for that purpose, however, since there are free alternatives like Inkscape. This tutorial explains the basic concepts surrounding vectorizing an image.
Vector image vs. bitmap
To drastically simplify, we could say that a ‘flat’ image is made up of a matrix of pixels, with each of them storing a corresponding color value. The number of horizontal and vertical pixels in the image is its resolution, and as you already know, applying zoom to an image of this sort is not an elegant technique for certain design tasks.
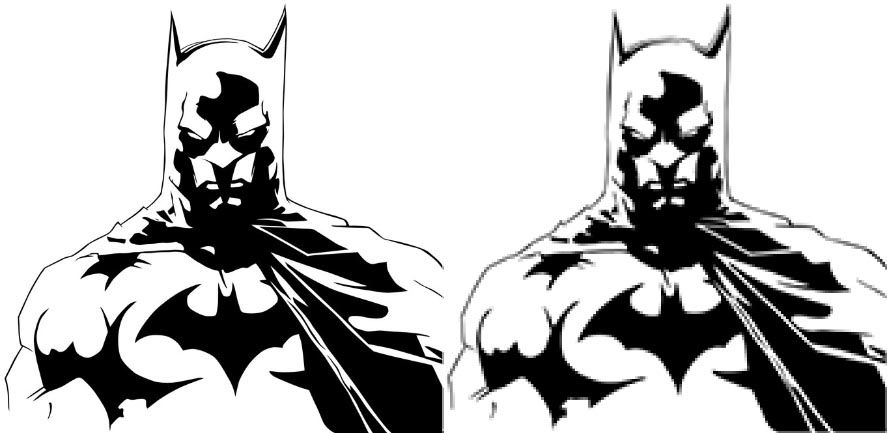
A vector image does not store colored pixels, but rather geometric figures located on their own coordinate plane, such that, because they’re connected to a fixed mathematic formula, no matter how much you increase the size of the image, you’ll always see the details clearly. The only problem with this system is how laborious it is to do it, particularly if you need to vectorize a flat image. To do so there are various methods and tools, but we’re going to focus on two main alternatives that can both be used from Inkscape.
Automatic vectorization with Inkscape
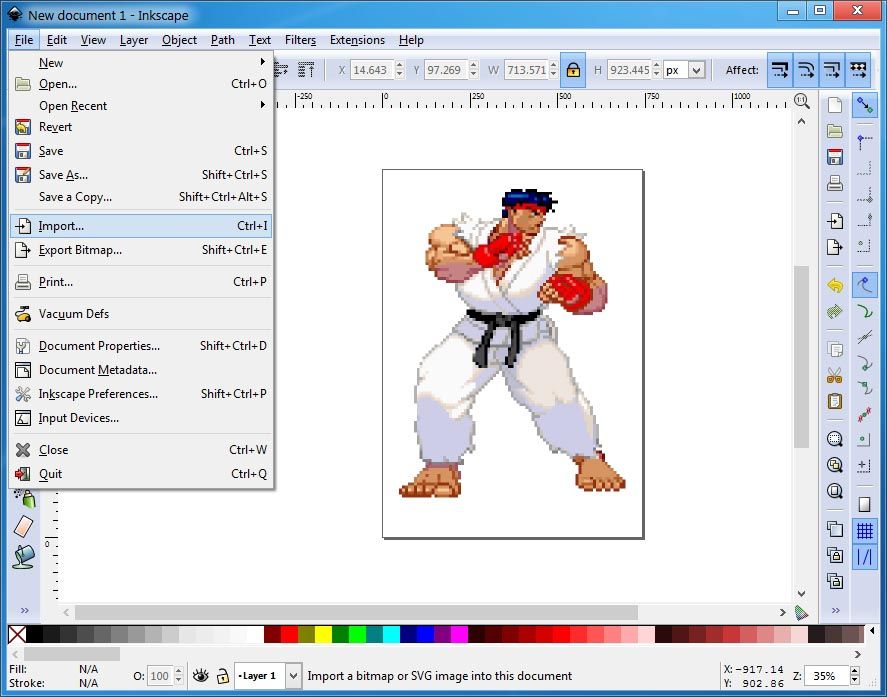
If the image isn’t very detailed and you don’t need to take it apart into separate pieces (one of the cool things about vectorization is that you can slice off any geometric figure to later manipulate it without altering the rest of the composition), you can turn to Inkscape’s own wizard. To do so, go to File > Import to select the image you want to convert, which should appear on your project canvas.
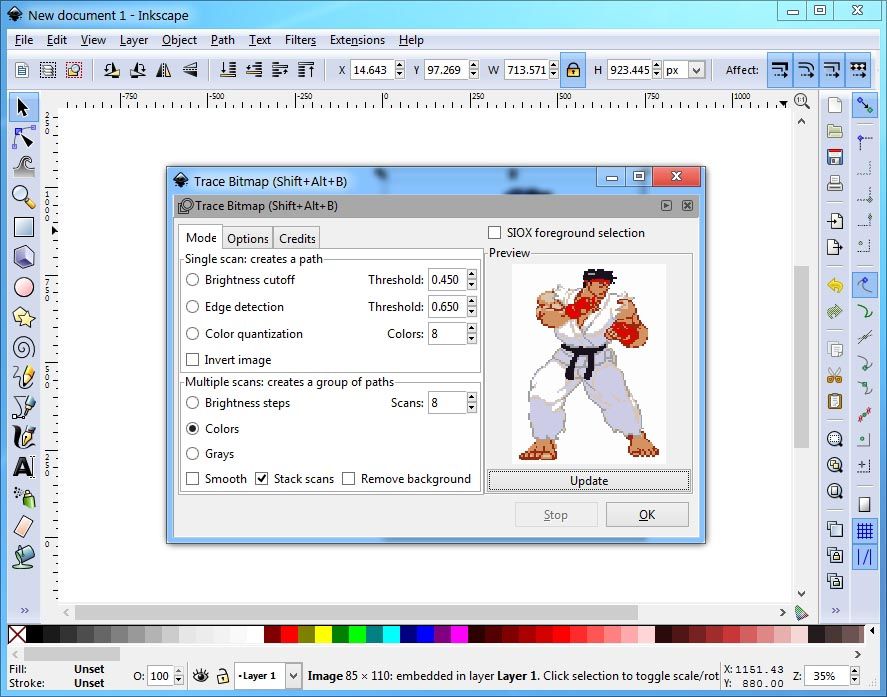
Next, you’ll click on Path > Trace bitmap, which will take you to a submenu where you can modify certain parameters of the conversion. These are divided into two groups, one to create ‘paths’ (the silhouette of the image to be vectorized) or groups of paths to capture all the details and colors in the source figure. Each of these has several variants to work with, based on the level of luminosity or the most highlighted borders.
You can modify your parameters and click every now and then on the update button to view a preview of the changes you’re making. When you finish, click on the small ‘Play’ icon at the right of the upper gray bar in the window.
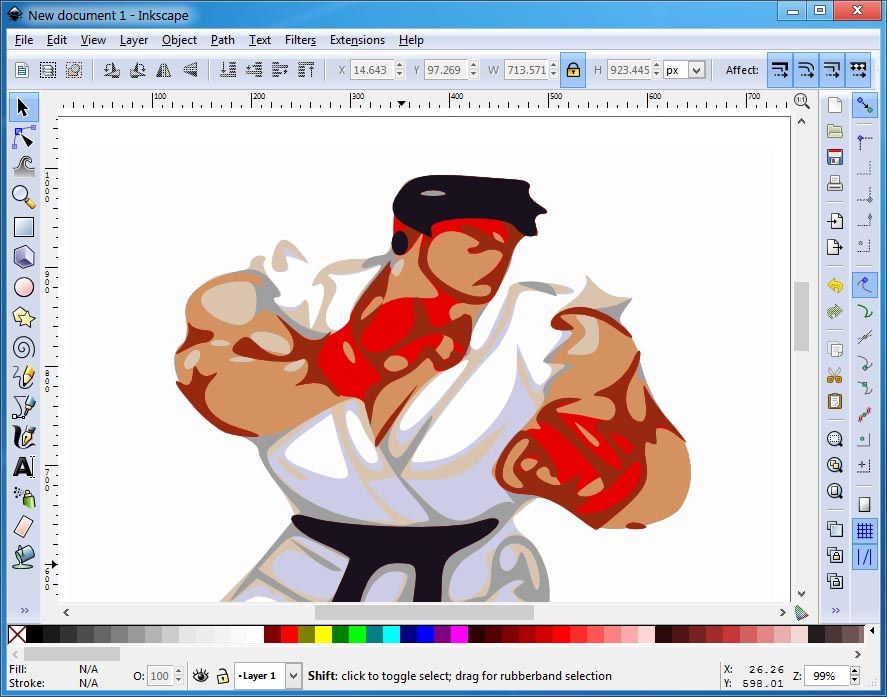
In the example images, we’ve used a very low-resolution sprite to emphasize the final result. The clearer the image, the better your results; for example, this method will work perfectly for a logo with simplified lines and flat colors, but might prove disastrous if you try to vectorize a photo. For the latter, it’s better to use the other method, the ‘artisanal’ one.
Manual vectorization
This method for vectorizing a flat image consists of placing it in the background and ‘tracing’ the outlines of its sections using vector brushes. Although in Inkscape there are loads of tools for creating geometric figures, there are three basic brushes:
- Draw lines freehand: This system is the ‘natural’ brush for any drawing tool, with the advantage that you can soften your strokes to get more homogenous lines by adjusting the drop-down ‘Soften’ bar that appears in the upper options.
- Draw Bézier curves and straight lines: This method lets you draw the start and end point of a line and later modify the curve as desired. In both this and the previous case, when you close a figure you can later fill it in with color and move it from one layer to another.
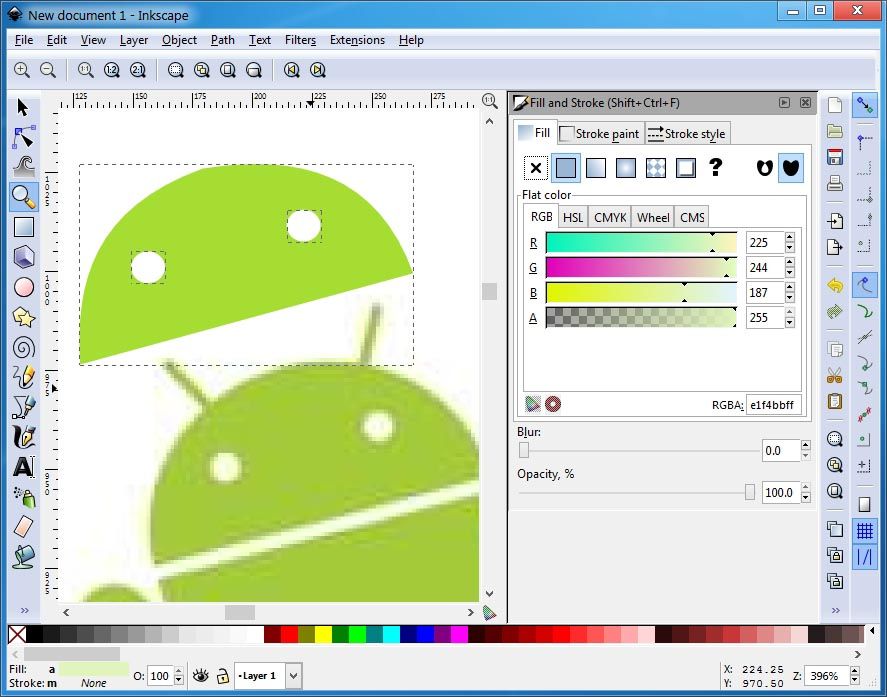
We’re not going to explain every one of the tools minutely, mainly because the Inkscape interface is quite intuitive, meaning if you know a little bit about graphic design tools like Photoshop or others like it, you’ll get the hang of it quickly.


Sure.