I’m sure all of you have seen at some point those small flat figures made out of different-colored plastic beads stuck together in a grid. Hama is the best-known of the many manufacturers of these pieces, and given that the result resembles a pixellated image, their source of inspiration and development process is closely related to the gaming world and pixel-art. These are a few tips to help you plan your designs to later create with beads using the free tool Paint.NET.
What are Hama Beads?
The concept is quite simple: First you have a bunch of small, cylindrical, colored beans and then a base with lots of slots to fit the pieces into. Once you compose the desired figure on the surface, you just have to pass an iron over the top with a piece of wax paper (or something like it) in between. When the beads heat up, they stick together, so you can remove all the fused pieces from the base together.
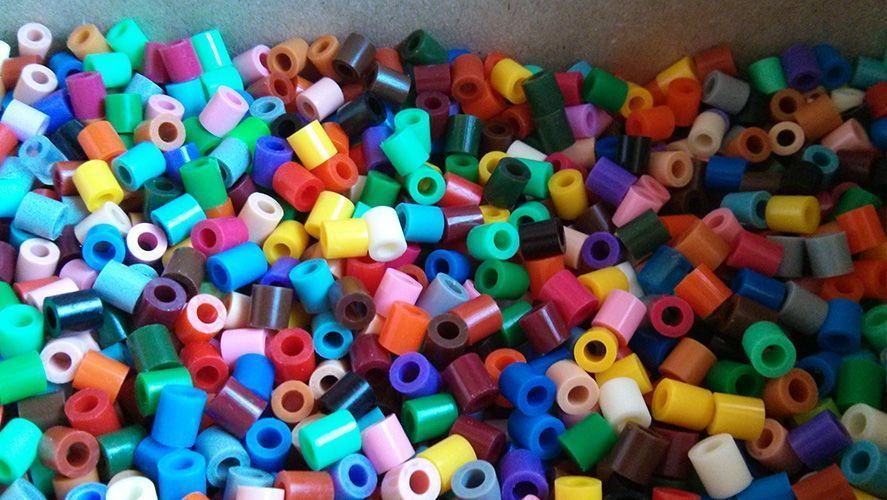
Although the standard size is no larger than 5 millimeters in diameter, there are also smaller and larger versions, and they can be used to create everything from decorative figures to stick in a frame to earrings, pendants, or even 3D figures with several faces. Getting ahold of the kits is quite straightforward, with bags of thousands of beads and templates for different shapes and sizes available in both physical shops and online stores. Even Amazon sells them (although come to think of it there’s few things Amazon doesn’t sell these days).
How do I create my Hama Beads figure?
You can obviously start creating figures freehand, but given how laborious the process is it’s more than advisable to have a template available for reference. While you can always go the analogue route using graphic paper, the most practical option is your PC. In this case, we’re going to use the freeware tool Paint.NET to create your template based on a pixellated sprite from a classic videogame, mainly for its potential as a pixel-art drawing software.
With a quick Google search you can find all sorts of images extracted from games, including pages focused on cataloguing this kind of material, as in the case of Sprite Database or The Spriter’s Resource. Keep in mind that the size of the grid will determine the maximum dimensions of your composition, so you’ll have to look for something that adapts to your needs.
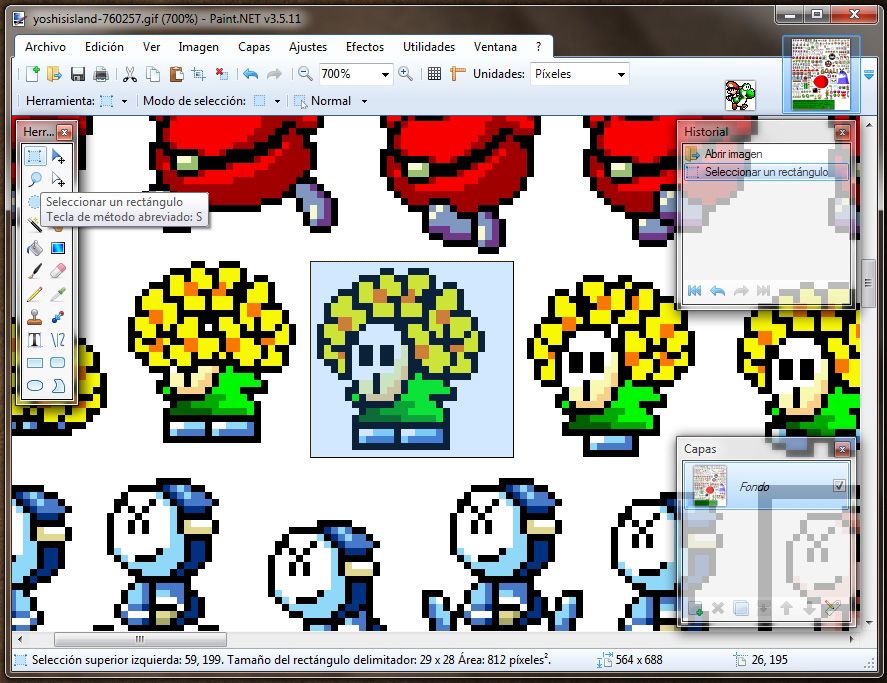
In the example, I’ve used a 29×29-pixel grid and searched for sprites of characters from the game Super Mario World 2: Yoshi’s Island for Super Nintendo. Once Paint.NET is open, I’ll drag the image (normally broken down into several animation frames, together called a sprite-set) to the program. Then selecting the triangular crop tool, I’ll crop the image I want while trying to keep it smaller than the aforementioned dimensions, guiding myself by the size of your crop, which is displayed at all times in the horizontal bar at the bottom of the window. (Although if you’re really handy with sprite-art, you can always retouch the image so it fits.)
The next step is to create the template itself. In File > New you’ll create an empty image with 29×29 pixels of resolution. You’ll see a very small square that you can zoom in on as much as necessary. A zoom of 1600% is a good reference, especially with an eye to the next step, which consists of setting a reference grid over the image to help you distinguish between the pixels and thus count the bead slots with greater precision, which will enormously speed up the process of setting the beads later.
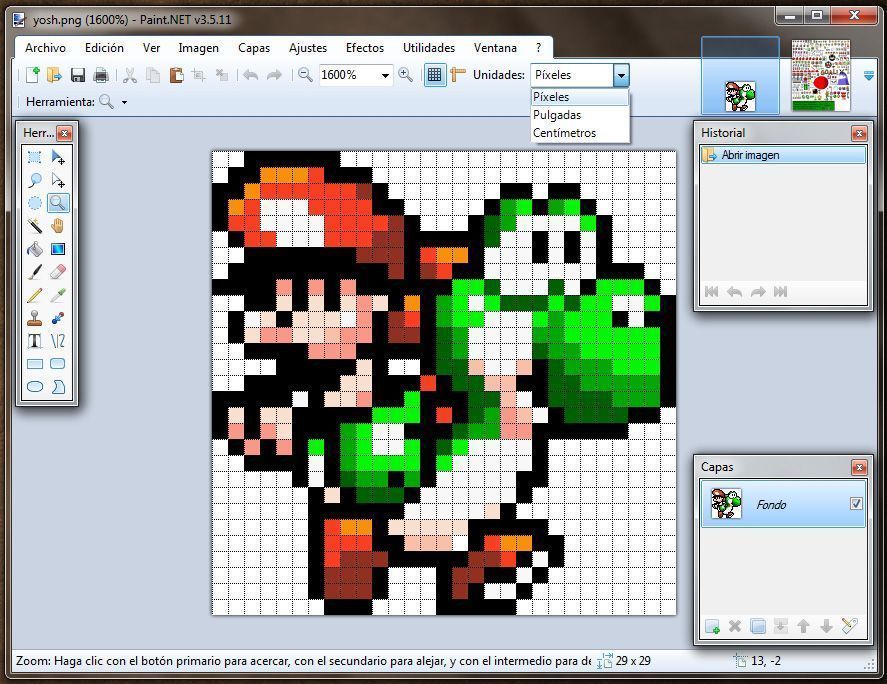
To turn on the grid, click on the grid icon in the upper part of the window and in the ‘Units’ drop-down menu select ‘Pixels’. Now you’ll see your grid and you just have to paste the crop of the other image you have open (in the upper right part of the window there are thumbnails of all the images you have open so you can swap quickly between them). With the crop selected, you’ll press CTRL + C, then swap to the empty image and press CTRL + V to paste it. You can use your keyboard arrows to center the image on the grid.
From there, and depending on the size of the project, you can refine your template image by changing the color palette according to the exact shades of beads you have, which have their own color reference codes. In any case, in most cases all this hassle is not necessary and you can select which bead colors correspond to your template as you place them in your design.
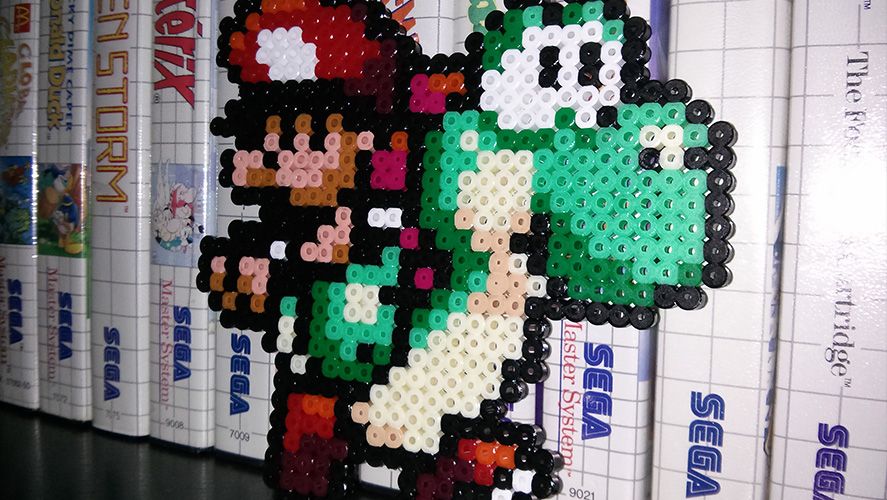
All that’s left is to have a bit of patience, place all the pieces in their corresponding slots, and warm them up with an iron so they seal together. A process that’s relaxing for some and exasperating to others but that gives results as cool as what you see in the image above.





Oh amaizing
Rfdnnbcfghtb