Your device, in addition to having a WiFi receiver, can also function as a WiFi access point aka— a hotspot. In this tutorial, we’ll teach you how to create a WiFi hotspot with your smartphone in simple steps and also, its many daily uses.
With the current data plans, as long as you don’t abuse them, this way of sharing WiFi is really useful. It could come in handy if you go on vacation and someone else has reached the monthly data limit, or if your plan is huge and someone else is about to run out of data. It’s a great way to share internet access so that everyone can browse without a problem.
Why use a WiFi hotspot?
It’s also recommended to know how to create a WiFi hotspot with your smartphone if you’re going to travel with your laptop and the place where you’re going doesn’t have WiFi. Whether you need to work or if you simply want to browse using your PC and you can’t find a network to connect to, your smartphone can be your savior.
The same thing applies if the WiFi goes out at home. If the network crashes but your phone’s data is still working, you can create your own WiFi hotspot from your smartphone to keep browsing. That said, you need to be careful not to let your data consumption get out of hand. Whatever you consume will be taken out of your mobile data plan. In any case, this is a really useful feature included on most smartphones and it’s easy to turn it on.

How to create a WiFi hotspot
How do you share your WiFi? It’s simple. Your device probably has the “Mobile Hotspot” option in the menu you see when you swipe down from the top of the screen. But if it doesn’t or if you want to set it up for the first time, we’re going to guide you through the settings menu in just a few steps so you can activate your own WiFi hotspot.
First, you’ll open the Settings on your smartphone. When you tap on the Settings icon, you’ll see a menu where you’ll have to have to look for the WiFi and internet options. Once you find that, you’ll see different options, for example, if you’re connected to a WiFi network, if airplane mode is activated or not, and the VPN and private DNS tools. You’ll have to look for the option for Mobile Hotspot and Tethering. Tap on that and you’ll find a new submenu with the options your device offers for sharing your internet connection.
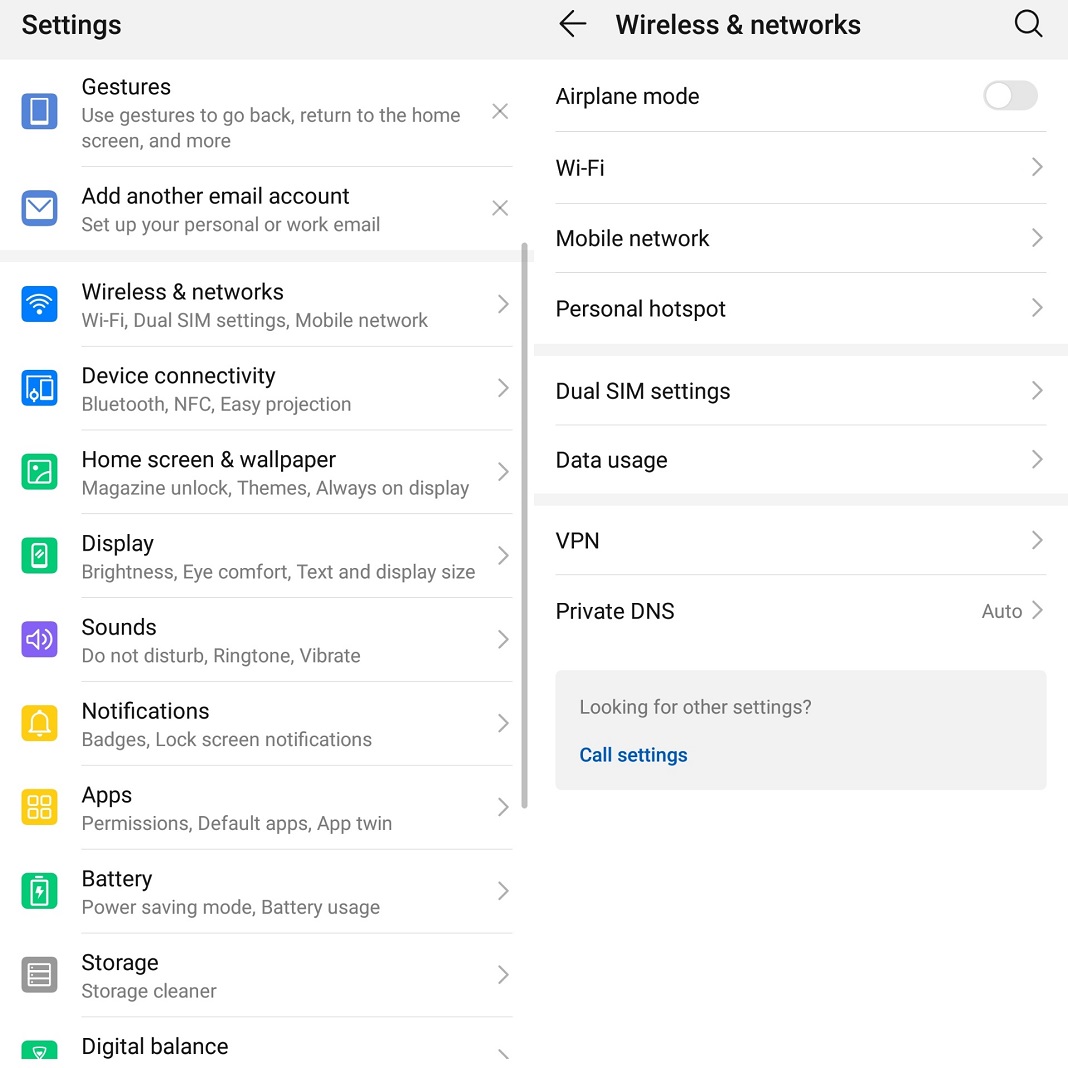
On this list, you’ll find various ways to share your connection, by USB or Bluetooth for example. But the option we care about and the one you should select is Mobile Hotspot, which will let you share your mobile data instantly.
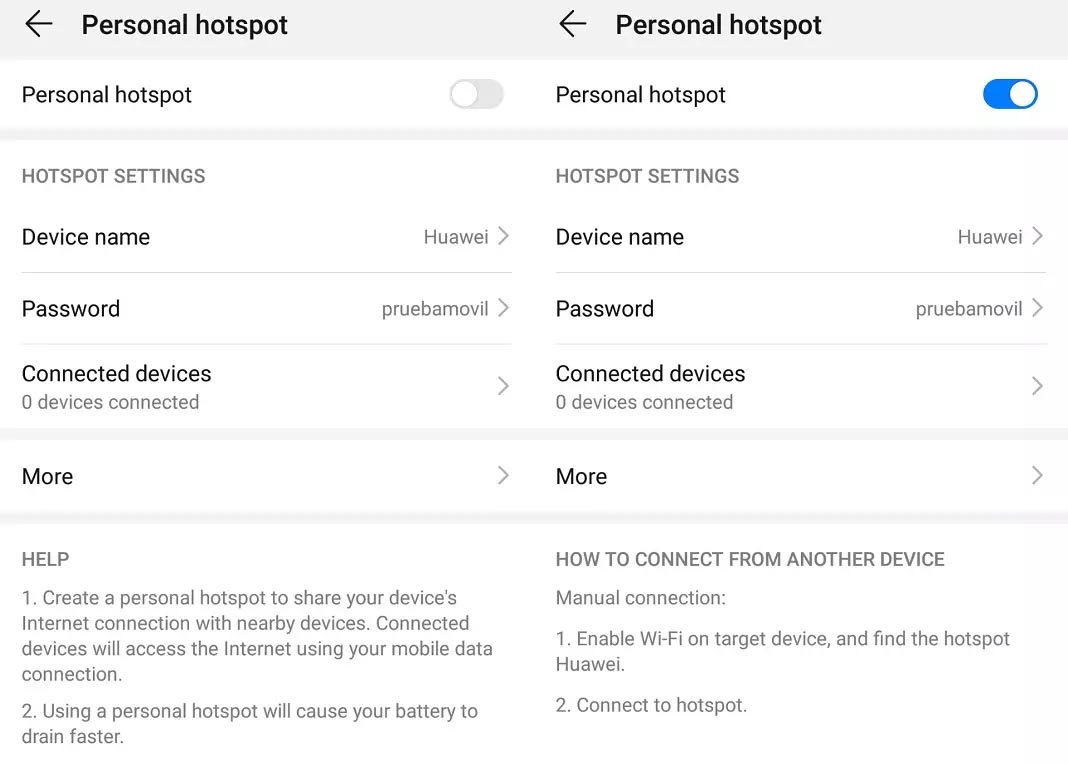
Once you tap on Mobile Hotspot, you’ll find all the tools necessary to modify, customize, and use your device as a WiFi hotspot. You can change the name so that you or the person you want to give permission to connect can find it quickly, as if it were a public WiFi network or one in your house.
You can also choose to protect your network so that uninvited third parties can’t connect. You can choose if the Security will be carried out through an encrypted protocol of if you don’t want to add security and instead create an open network.
Set the limits
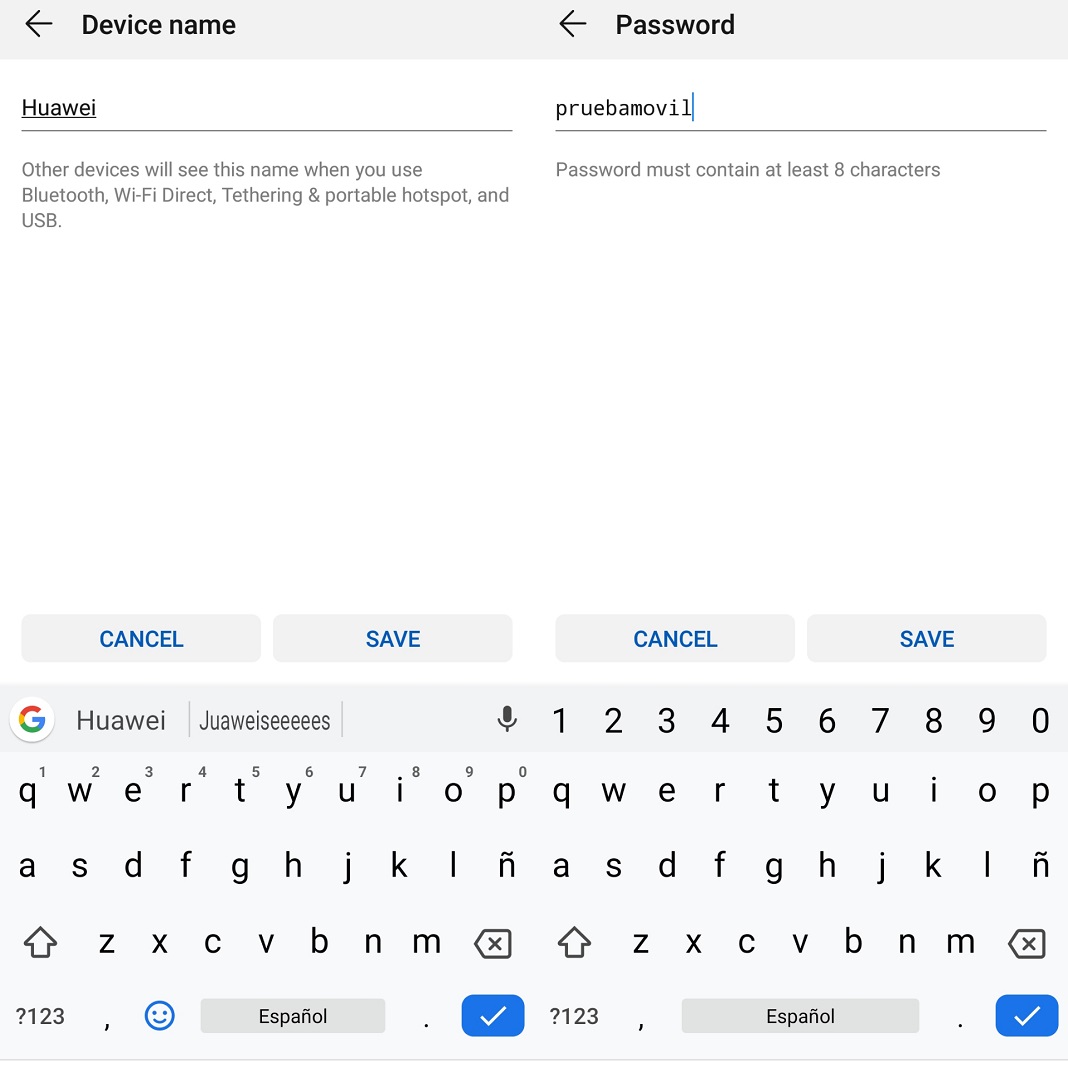
You can also add a password, which you’ll have to give to the other person to access it, just like a WiFi connection in your house. You’ll also choose the bandwidth for the hotspot and lastly, an option to disable the hotspot automatically in case no device has connected after five minutes. You can also block the max data that can be used by the other person while connected to your network.
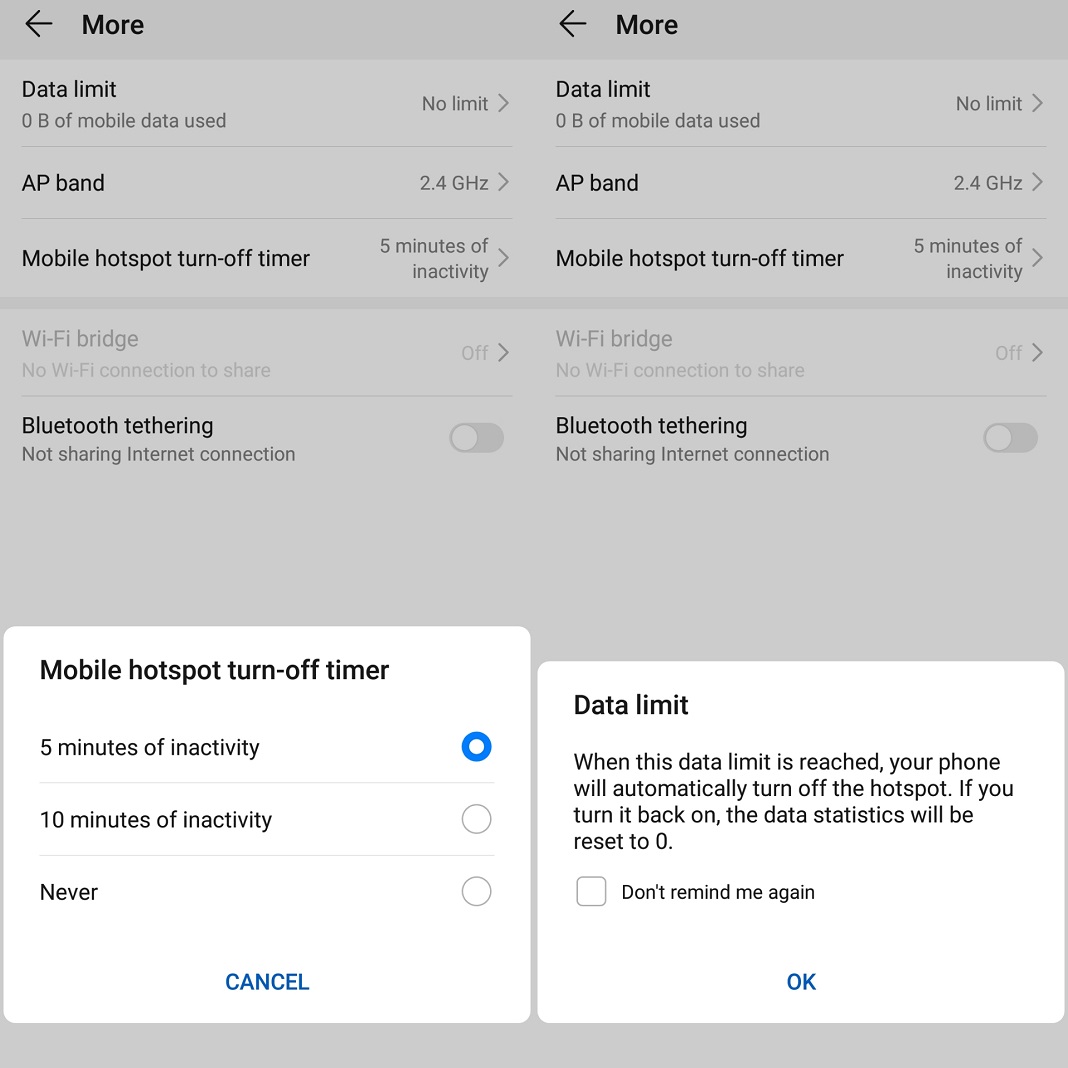
Once the network is set up, you can activate the hotspot and your smartphone will start working as a wireless access point. You’ll be notified each time a device connects and, from that moment on, you can share your WiFi with your own devices or your friends’.
To deactivate it, you just have to repeat the same steps you followed to reach the Mobile Hotspot menu and tap to disable it. From this moment on, your device will stop serving as a hotspot until you decide to turn it back on.



It is a good tips. Before I read the post I have no knowledge about wifi hotspot. The post is improve my knowledge on the mobile side. Thanks for the post.