There are various reasons you might be interested in recording in real time the audio output of programs or games running on your computer. By default, when you use a recording software, the source of capture is either an integrated microphone or one you have plugged into your input jack. Here I’m going to explain how to activate the Sound Mixer channel on your PC, and offer a few tips for recording audio on computers that have that channel blocked.

Activate disabled devices
Before the panic spreads, you need to do little fiddling. In the latest versions of Windows, all recording devices that do not use the microphone jack are disabled by default, meaning that when you go to choose Sound Mixer as the audio source from any recording software, it doesn’t show up.
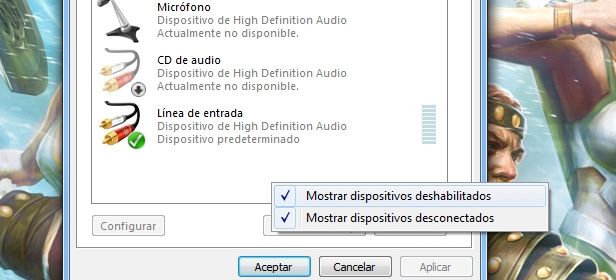
To activate it we have to access the Sound configuration menu, whether by typing into the Run bar the filename MMSYS.CPL or by right-clicking on the speaker icon on the desktop shortcut bar and selecting “Recording Devices.”

Then, right-clicking inside the box that lists your audio sources (where you might only find your microphone), you have to tick the options to “Show disabled devices” and “Show disconnected devices.” This should make more sources appear such as your CD/DVD drive to record audio when you insert a music disc or input jack, which is what comes out of your speakers. To assign a default audio source, double-click on the desired source.
The input jack doesn’t appear—what should I do?
In Windows 7 and 8, which come installed on certain machines (principally on particular brands of laptops, such as Sony VAIO), there is a huge problem: a totally nonsensical protection system prevents you from recording the sound the comes directly from your speakers, presumably to stymie those who would “illegally” copy music from CDs to other formats. But seriously—what happens to other users who need this functionality for the manifold other use cases out there?
Before taking drastic measures, it might be a good idea to try to completely erase the sound drivers that control your audio system (whether a card or integrated into the motherboard) using the device manager and reinstall the drivers from the official webpages of the manufacturers themselves rather that the ones installed by your operating system.
A virtual audio input jack
If this doesn’t work, there’s an app that can likely sort this mess out for you. Virtual Audio Cable is a set of drivers that lets you create virtual audio inputs and outputs; you can assign to it whichever sound source you want. That is, you can create a sound source that plays the sound from whichever input you want, leap-frogging the aforementioned protection system.
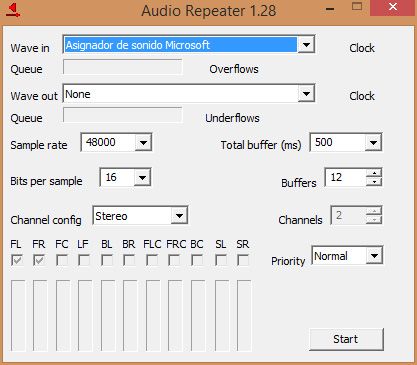
Once you’ve installed it, by accessing the Audio Repeater included in the app, you can select the input device that you want for the virtual input and output channels, which you can view by accessing the Sound menu as I explained earlier. Now, in both the sound player and recording devices fields you’ll see new sources called “Virtual Audio Cable”.

In addition, from the “Virtual Audio Cable Control Panel” you can configure all the values related to audio quality, delay, compression, or the comb filter within an audio spectrum analyzer. It’s not necessary to mess with any of this in order for the app to work, although the most experienced audio editors will be supremely grateful for all these options.
Download Virtual Audio Cable on Uptodown
http://virtual-audio-cable.en.uptodown.com/
Simulate audio input with a splitter
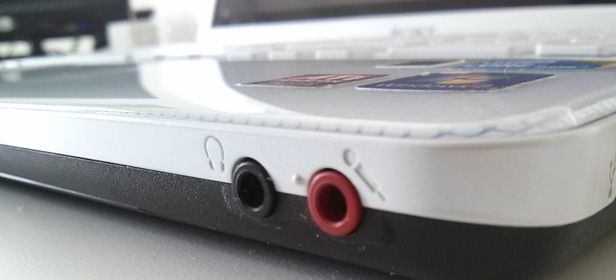
If the aforementioned program seems too annoying (though trust me, it’s not!), there is always a slightly less orthodox but equally functional alternative. This consists of connecting the actual speaker output jack to the microphone jack on your computer using a male-to-male jack cable, meaning that when you select the microphone input as your recording device, what your computer will actually capture is obviously what’s sounding from your speakers. The problem is that you can’t actually hear the sound coming from your computer, so you can’t control your recordings. There is another spartan solution to this problem.

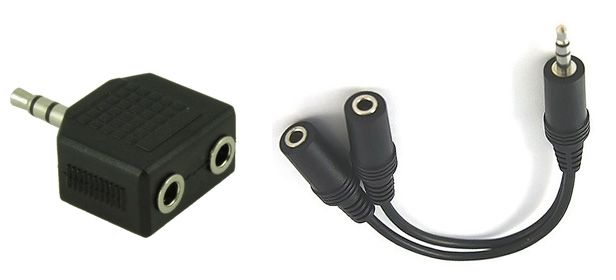
A jack signal splitter is a small device you can find in any electronics store or superstore at a very low price. You connect it to your speaker jack between the male-to-male cable and the connector itself, and then into the other connector you can plug in either speakers or headphones.
The only inconvenience with this system is that the audio quality might be weaker or become a bit noisy if you use a cable that is too long, or if you use several low-quality cables. Nevertheless, this can still get you out of a pinch if all the other methods described above have proved fruitless.


Is there a way to do this on a Kindle fire, which has no audio input whatsoever)?