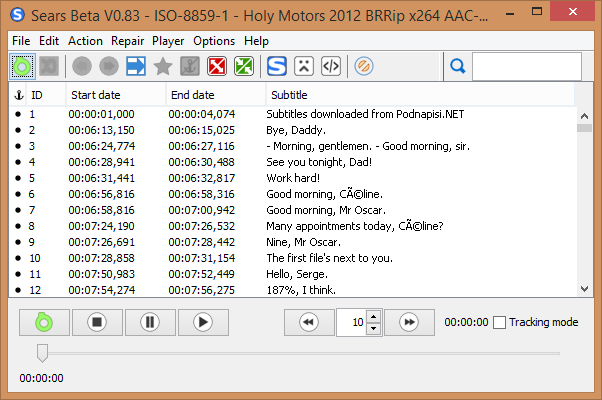
If you like watching your favorite international series or films in their original, undubbed versions, you may already be used to dealing with searching for subtitles and the problems that often arise with finding ones that “suit” properly on the video that you’re trying to play. When you’re dealing with a ripped TV series, for example, you’ll normally find several different versions of the same video, giving rise to issues with synchronization and delays between the audio and subtitles. To resolve this problem, you yourself can easily sync the subtitles thanks to free, easy-to-use programs such as Sears.
Although there are lots of similar programs available that you can use, such as Subtitle Workshop or VirtualDub, Sears is undoubtedly one of the best options out there for synching subtitles quickly. The only requirement of this free program for Windows is that you have Java Runtime Environment installed on your machine.

Here I’m going to give you a simple, step-by-step tutorial:
- First, open any video player and note down the exact minute and second when the first sentence or credit sequence that appears in the subtitles begins.
- Launch Sears and then open the subtitle file by going to File > Open File.
- Check the first line of your subtitles and note down the time that begins as well. The difference in times between when the first snippet of audio begins and when the first subtitle appears is the amount of time you’ll need to set the delay for in the subtitles track.
- Now select all the lines of subtitles. Start by clicking on the first line, then scroll down to the last one and click while holding down Shift.
- Now it’s time to proceed to the synching itself: Click on Action > Delay and type in the time difference you obtained before. There are two possibilities here: If the audio starts before the subtitles, you’ll put in a positive number. And if the text appears before the sound, you’ll put a minus sign in front of the time.
- Finally, save the modified subtitle file using File > Save As…


