
Although most contemporary video games use their own online connection systems, there are still many that require you to do long, drawn-out configurations “by hand” to get the games up and running. You need look no further than the famous Minecraft to find a game that’s rather impractical when it comes to creating multiplayer worlds that other players can connect to remotely. In order to streamline and massively simplify this task, I recommend using Hamachi.
For all practical purposes, what Hamachi does is simulate a local network connection between remote machines. If you’re not used to dealing with firewalls, NAT connections, and all that other jargon related to network structures, then Hamachi is undoubtedly the best route to take, not just for gaming but also for sharing both files and hardware resources.

How to create a virtual network in Hamachi
Once you’ve installed the program, you’re going to access a configuration window that will prompt you to create a free new user account. After that, you’ll click the “on” button in the upper part of the window, next to which you’ll see the virtual IP address that Hamachi has assigned to you. This is going to be your identification when it comes times to connect other users and what they will see when they log on for a network session.
The next step is to create or join a chat room. All users in the same chat room will share a virtual local network, meaning they will be visible among themselves as if they were physically connected to the same network. You can connect to an external network just by going to Network > Join an existing network, where you just have to type in the name of the desired network and the password that the network creator has assigned to it.

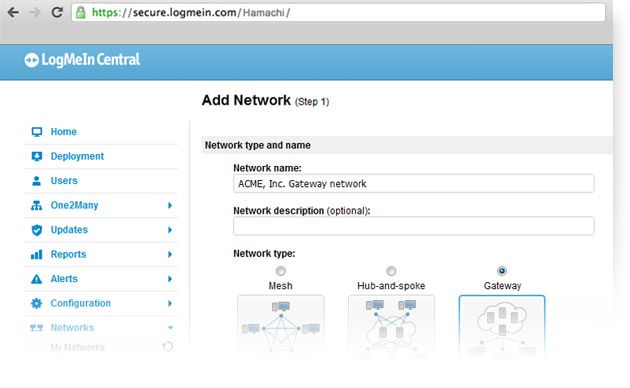
To set up your own network, you’ll need to go to Network > Create a new network. There, you’ll type in the network name and your desired password. (These are the same details you’ll need to supply to anyone you want to add to your network.)
As others join, you’ll see them appearing in a drop-down tab in the main Hamachi window. An icon next to each person’s name will indicate whether he is connected, and every user’s virtual IP will also appear next to his handle.
This means that if you now access the game in question and launch a gaming session on the local network, any users already in your network will be able to remotely connect without having to do any annoying configurations to their firewall, port forwarding, or other fiddly details that really aren’t many people’s cup of tea. Do you want to have a group gaming session of a video game whose servers have been shut down? Well, then, set up a local session yourself. Fancy setting up a Minecraft server in a few easy steps? Yep, that’s not a problem either, using Hamachi.
There are other advanced configuration options that are accessible only from the control panel on the official Hamachi website. To log onto it, you’ll have to create a user account based on an email address that you supply and that will be associated with your details and your open chat rooms. From there you can also change your network topology, which by default will come as a star (with all users directly connected to every other user) to a concentrator or even a virtual link gateway.
This gaming experience will be much more complete if you add voice chat to talk to your friends while you play. Programs like Mumble, TeamSpeak, or Ventrilo allow you to create virtual chat rooms using a system similar to Hamachi’s. But for now we will leave the lesson on how to configure these servers using your own computer for another day.


