It’s been 20 years now since the first PlayStation arrived here in Spain. Since then we’ve churned through several generations of the console that on multiple occasions have revived Sony classics as HD remakes. But you don’t have to be up to date on this ubiquitous current game-recycling trend to enjoy some of the best classics. ePSXe is the best PlayStation emulator out there for PC, and can be easily configured to make the games look much better than on the original machine. Here is a tutorial on how to set it up.
The appeal of ePSXe is that, unlike what happens with emulators for other machines (like PCSX2 for PlayStation 2), it doesn’t require a Bios to function, meaning you just need to keep an eye on the graphics calibration to adjust it to the power of your machine and, where appropriate, the mapping of the controls if you’re using a gamepad (which is more than advisable). To access the video setup, go to Config > Video. It includes two different plugins for rendering, although by default the so-called Soft Driver comes activated, with quite skimpy setup options that are nonetheless very good for running 2D titles. It’s best to turn to another option, Pete’s OpenGL2 Driver, to give a boost to 3D rendering. Open the pull-out menu, select that driver, and click Configure.
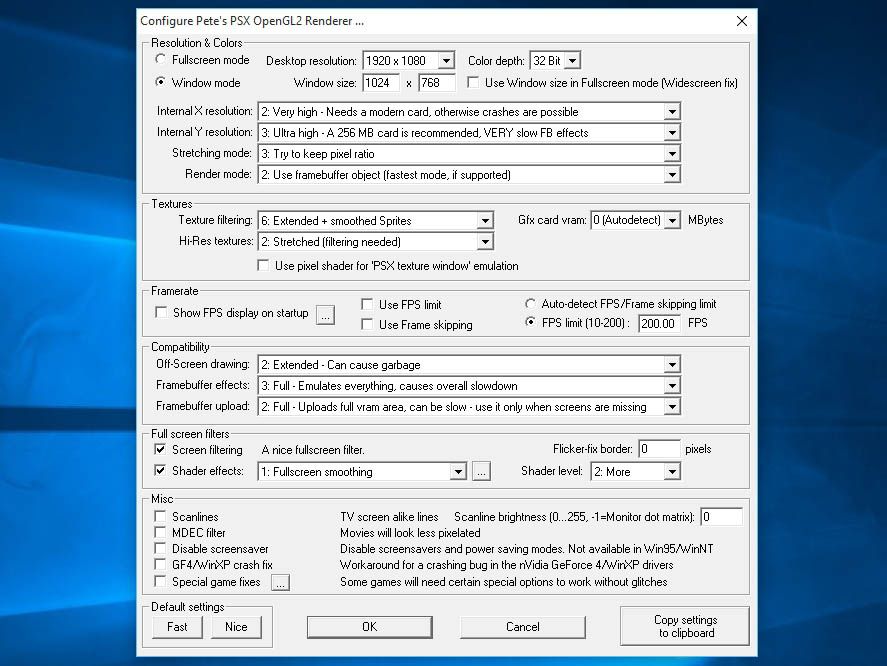
Here we need to dig in deep. These are all the sections and what they do:
- Resolution & Colors: Here you can choose between viewing games in fullscreen or in the window. Keep in mind that PlayStation has an aspect ratio of 4:3, meaning at certain resolutions, if you don’t maintain the pixel ratio, the image will ‘stretch’. In Internal resolution X and Y the most sensible thing to do is tick option 1: High, and on Stretching Mode option 3: Try to keep pixel ratio. This ensures that the game maintains a decent aspect ratio regardless of the resolution. The Render Mode usually goes well with option 2.
- Textures: Texture filtering certainly doesn’t work miracles on flat images superimposed over 2D environments, but it still makes far-away objects look better. More than anything it’s useful to make text legible on the screen. Loading this part isn’t usually that heavy on the system, so here we’re going to tick Texture filtering in option 6 and set the Hi-Res textures to 2.
- Framerate: If you don’t go over the top with the other parameters you can leave this as it is. Or if you want to maintain constant fluidity you can mark the FPS limit and set a value of your choice in the corresponding box. Anything beyond 60 FPS is not going have much visible impact.
- Compatibility: Modifying the loading of the framebuffer affects the way the pixel drawings are done. By default you can leave the three options in positions 2, 3, and 2 and only modify them if you get graphics breaking or strange textures on the screen, which currently are a problem in very few games.
- Full-screen filters: Post-processed filters make everything look prettier and hide the rough edges. By activating screen filtering and choosing option 1 in the Shader effects you’ll get a discreet blur similar to the classic bilineal filtering of emulators for 2D consoles.
All that done, you can now load your games. Although you can insert your CDs directly into the reading drive, it’s more than advisable to create an ISO of them using a program like ImgBurn. The other recommendation is to search for a USB gamepad (the one for Xbox 360 is an ideal option) and map the controls, or even turn to old-school PSX controllers and get an adapter for a few bucks.
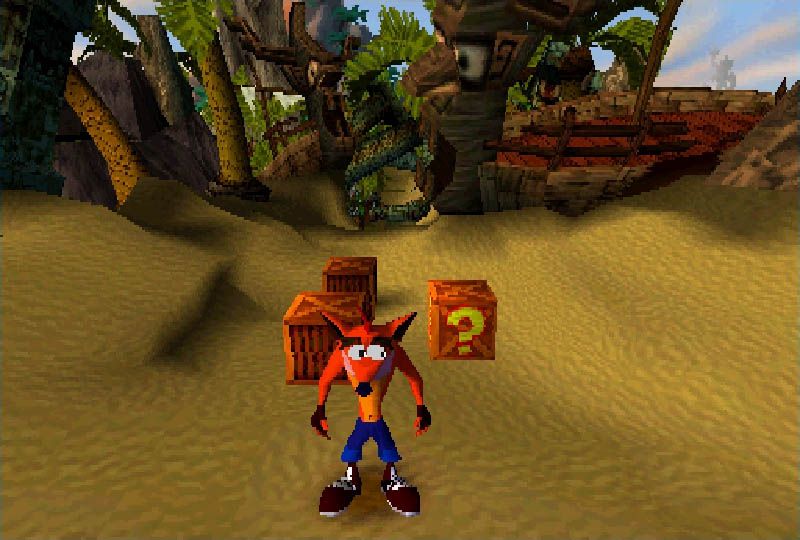
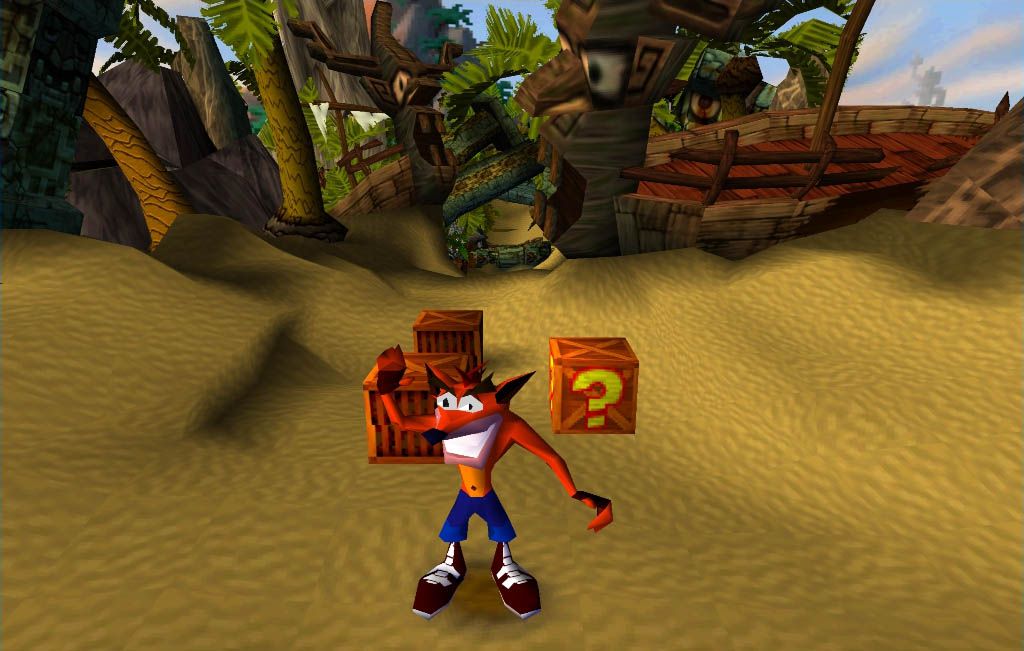
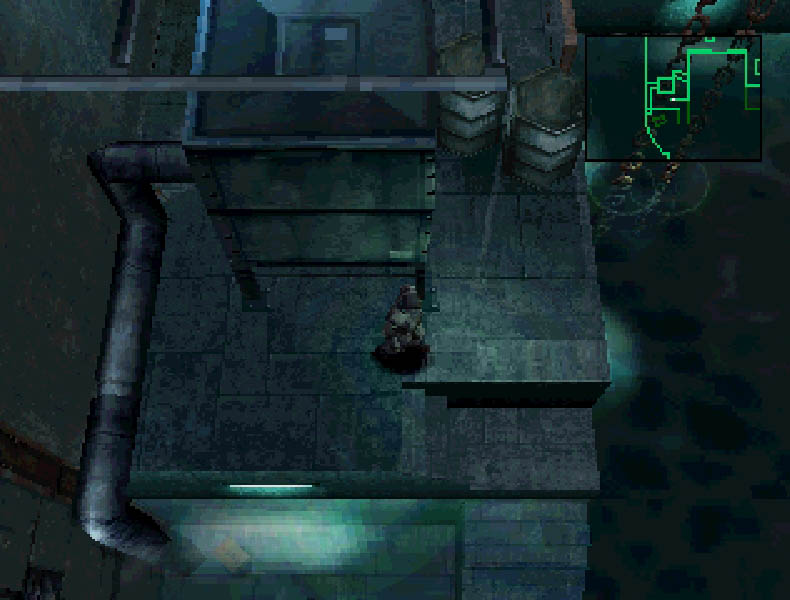
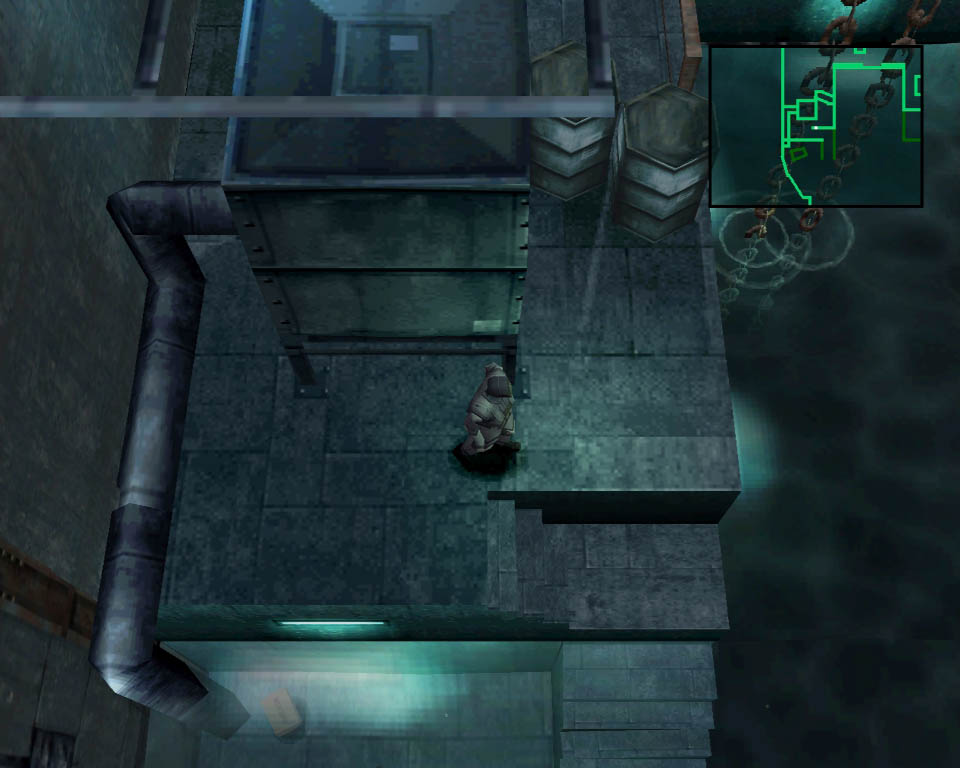
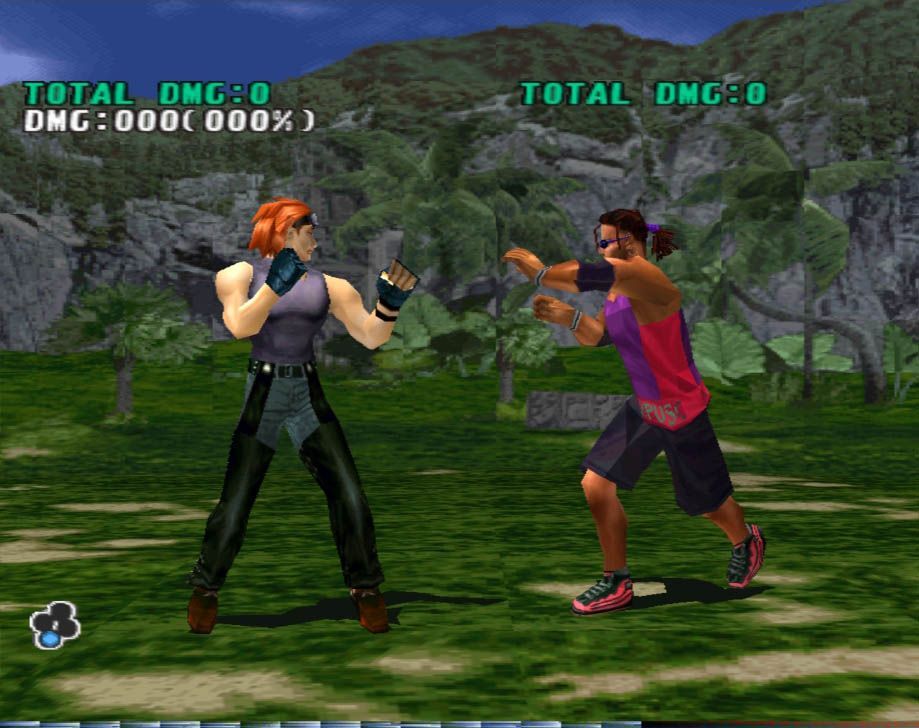
Here are some screenshots comparing the native resolution and rendering with the filters applied from three PlayStation classics: Metal Gear Solid, Crash Bandicoot, and Tekken 3.

Also on Uptodown | How to set up PlayStation 2 emulator PCSX2


[…] read MORE […]
Thank you for the guid and screen shots to show how worth it this is!
Thanks now my games look so much better