Development environments focused on video games are a dime a dozen, as we’ve seen before, but Stencyl is undoubtedly one of most balanced tools out there in terms of good results and ease of use. It would be madness to try to present all the potential of this tool in a single article, so here we’re going to limit ourselves to providing an orientation for Stencyl users as to its enormous possibilities.
Stencyl structure
The main obstacle faced by amateur developers when starting with a framework of this sort is fear of the unknown, that abyss of nothingness where you have to start molding your project from zero. Obviously the Internet provides an inexhaustible heap of knowledge to delve into any tool, but the learning curve is always more accessible if someone holds your hand through the first steps, not to mention that in the realm of software development doing your preliminary reading is almost as important as knowing how to handle code.
Stencyl plays with the idea of object-oriented programming languages in that it distributes the parts of your project as completely modular and independent entities. In other words, if you create a behavior for an enemy in your game, you can easily export that to any other project, as the Stencyl structure was designed exactly for that purpose. In fact, this flexibility is what provides the logic for the axis that we’ll explain in greater detail below: the Stencyl store.
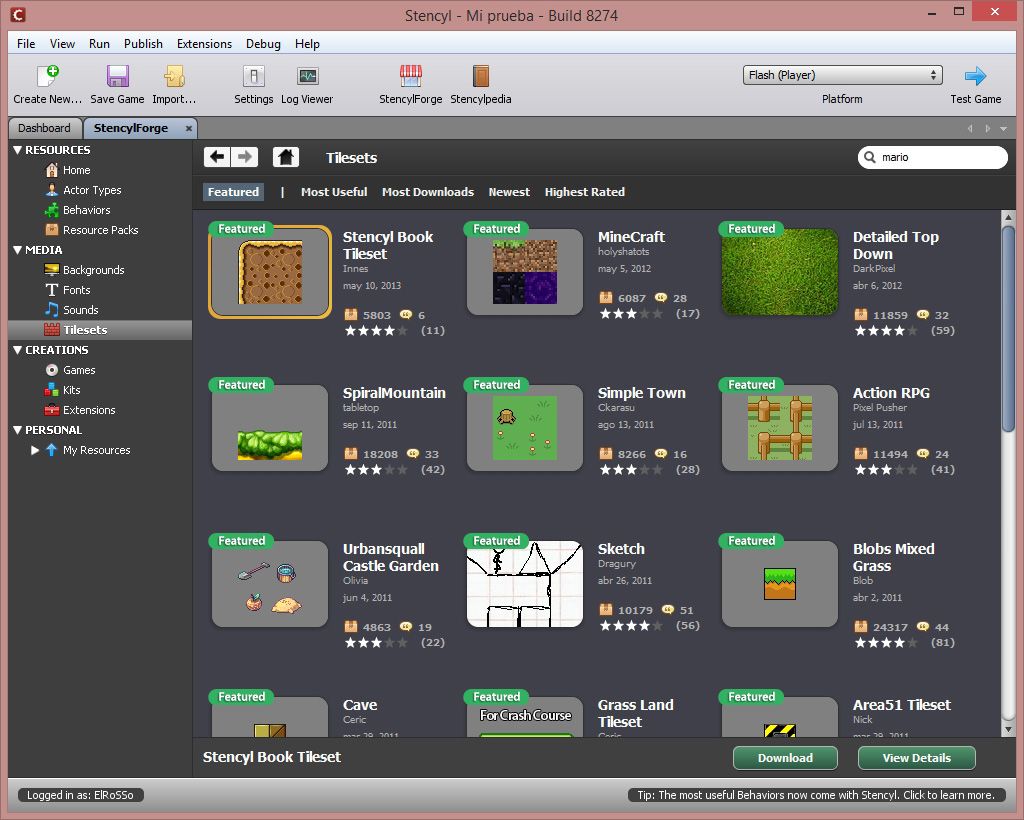
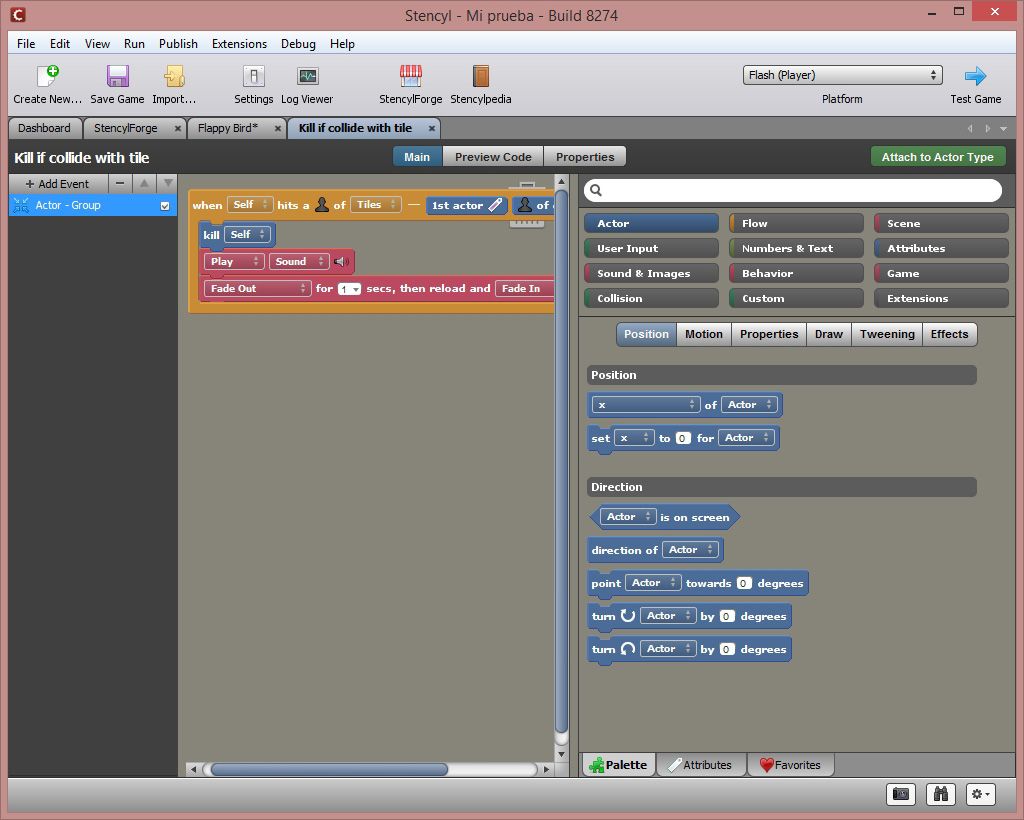
A project is divided into modules, with elements listed independently. These include: actors, backgrounds, sources, scenes, sounds, and tilesets, as well as behaviors related to actors, scenes, and the general logic of the game overall. All these resources can be entered externally using the intuitive drag-and-drop system to specify how each element behaves, but if you go to StencylForge (the platform’s free resource market), you can insert into your own game resources that have been created and shared by other users. In the attached images you can see how someone has created the control logic for the bird in Flappy Bird, so you could insert that into your game and it will come with a preset behavior that you can link with the rest of the elements in your project.

There are assistants for everything and nothing is left to the devices of the user in terms of trying to understand the mechanics. If you’re inserting a sound effect it will specify the shape and the format; if you’re inserting a tileset to use in your scenes you’ll have a crop assistant so you can select the size of the different blocks… and so on. Perhaps the most ‘complicated’ thing (but this is very much in airquotes) is the pseudolanguage, although this is only the case for people who’ve never seen a programming language in their lives, as with even the most minimal understanding of algorithms you can do whatever you like. The flow of each script is brilliantly represented such that the control structures you use can be digested more easily, since you can interpret them visually.
Your first project
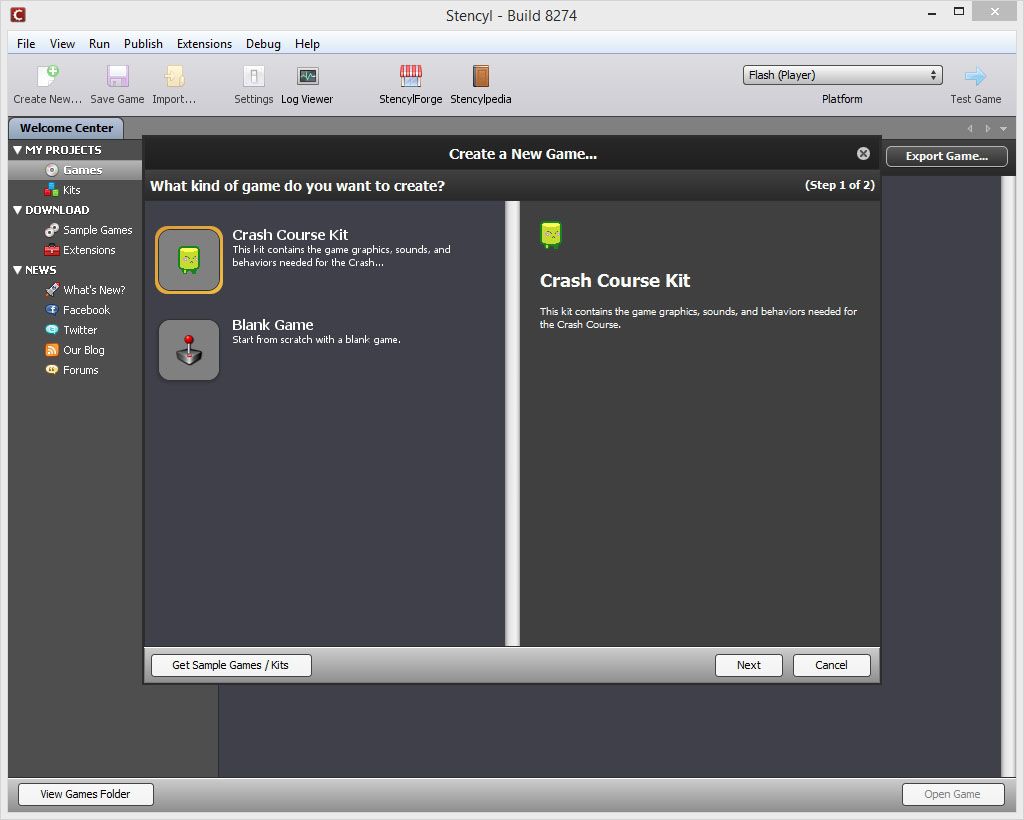
Stencyl holds your hand all the way through your first project. In fact, in the start window it will recommend that you start a game tutorial to create the preset project ‘Crash Course’, the resources for which can be downloaded from the official website to import them right into your project. As we’ve already mentioned, every resource is modular, to the point that, beyond objects, characters, or scenes, you can even import a control interface for your game. In other words, if for example you want to make a 2D platformer, as long as one exists you can import a module with the entire control code for the physics and collisions already developed, whether you’ve created it yourself for a previous game or found one in StencylForge.
The best way to learn how to develop games is by digging into other people’s projects, so once you’ve finished with Crash Course you can download some of the many other available examples and even use them as a base for your own project. Alongside any resource you download you’ll find its usage license, and there’s no shame whatsoever in using a Creative Commons license.
Free or paid version?
Now for the million-dollar question in terms of the tool’s possibilities. The free version of Stencyl is fully functional, but it only lets you export your projects in Flash, whether as an independent file in SWF or via the Chrome Web Store or the Stencyl Games website, with the sole requirement that you display the tool’s logo for a few seconds before the game starts.
There are two levels for the paid version. The indie license costs $99 and lets you export your projects as a Windows, Mac, or Linux .exe, and also removes the watermark. The Studio version costs $199 and includes, besides all the aforementioned, the possibility of publishing your games on Android and iOS, with the added benefit of incorporating its own advertising and in-app purchases system. Even still, you won’t need to choose one of these licenses blindly, as the free version lets you export and test your projects on all platforms to test without releasing them (in the case of mobile versions with an emulator for each SDK).


[…] Android you have to pay $199 annually, which if you break down by month is still cheap as chips. In this post we explain how to take your first steps in the […]