
The two tools that Android users most for sharing photos and videos are, no surprise here, Facebook and Instagram. The possibilities offered by the integrated cameras in these two social networks are constantly growing. Plus, it’s becoming increasingly common to spruce up posts with beautiful and fun filters. Until now, it was the developers who periodically posted new effects for our Stories. However, now we can create our own filters using Spark AR Studio.

The time has come to surprise your followers
Spark AR Studio is a program from PC and Mac that lets you create and render your own effects using augmented reality. Although this software may seem a little complicated to use at first, after you play around with it for a few hours, you’ll be able to easily create your own filters that are full of personality. On the program’s home screen, you have some templates to give shape to other projects you’ve previously created. The software is completely free and can be downloaded from Uptodown to start exploring the enormous possibilities it has to offer.
Spark AR Studio offers endless options
As soon as you open Spark AR Studio on your computer, you’ll notice the immense number of possibilities the program has to offer. If you don’t know anything about rendering objects in 3D, the software may be a bit intimidating at first. However, in our case, we decided to create a filter for Instagram Stories using the Uptodown logo. We’re going to show that the process isn’t really as complicated as it may seem.

Creating a mask
To create a filter for Instagram or Facebook where the mask appears over someone’s face, you have to complete the following steps:
- Create a new project in Spark AR Studio.
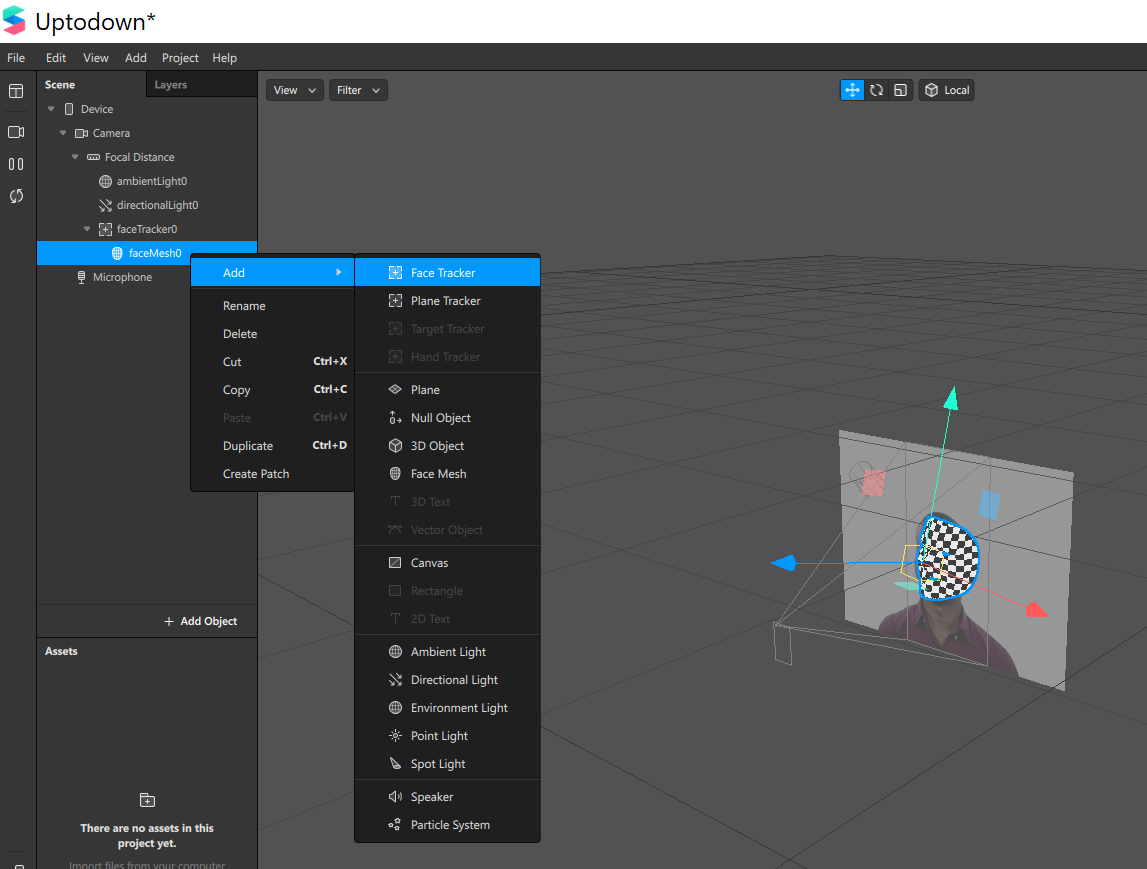
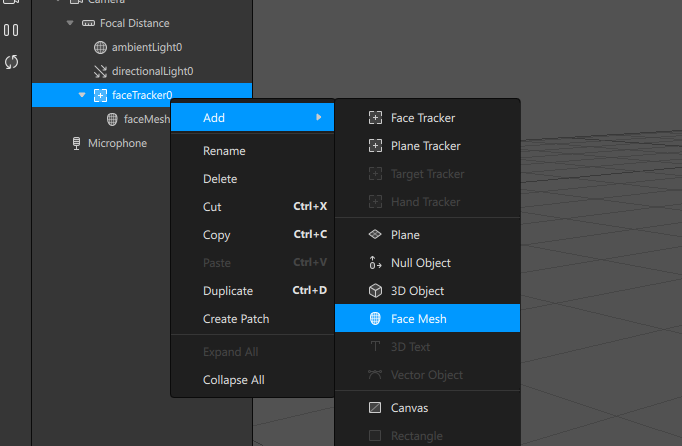
- Click Add > Scene Understanding > Face Tracker.
- On the tab that appears, you right click and then click on Add > Face Mesh.
- With Face Mesh selected, you go to the left column and click on Materials. The purpose of this is to make the face look clearer and smoother.
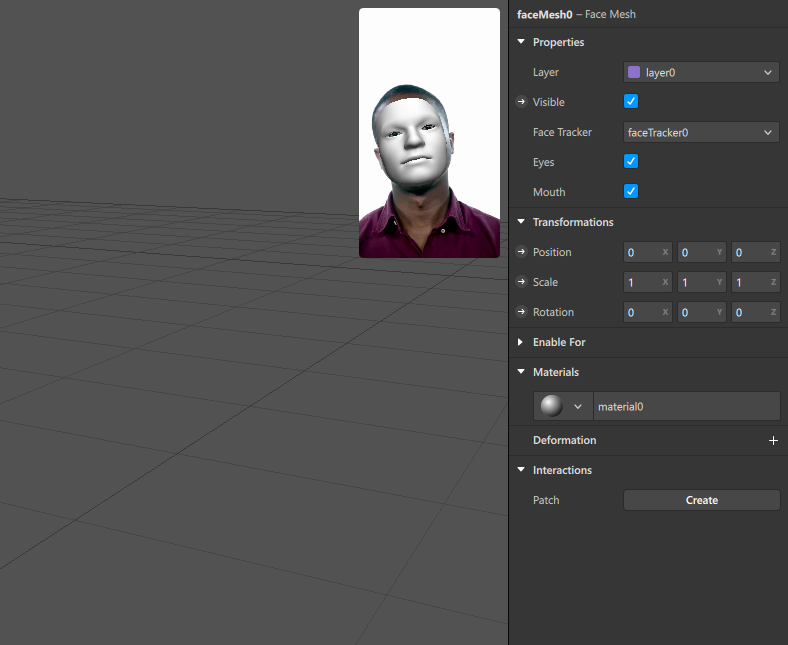
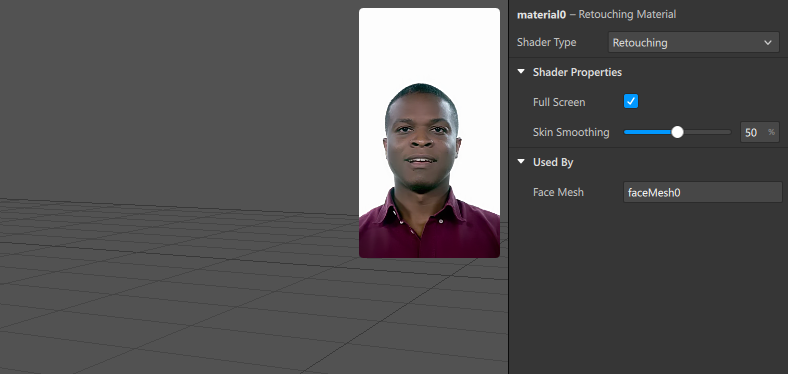
- After that, you’ll have to mark the layer material0 (on the lower left) and in Shader Type (in the upper right), you’ll select Retouching.
The next step is to have the image you want to use as a mask ready in .png format. To cut out the background, you can use Adobe Photoshop or simply access websites like removebg to delete the background easily. When you return to Spark AR Studio, you’ll continue with the last steps:
- Add a new mask by clicking on the layer faceTracker0 > Add > Face Mesh.
- With this new mask selected, you have to go to the right part and click on Materials > Create New Material.
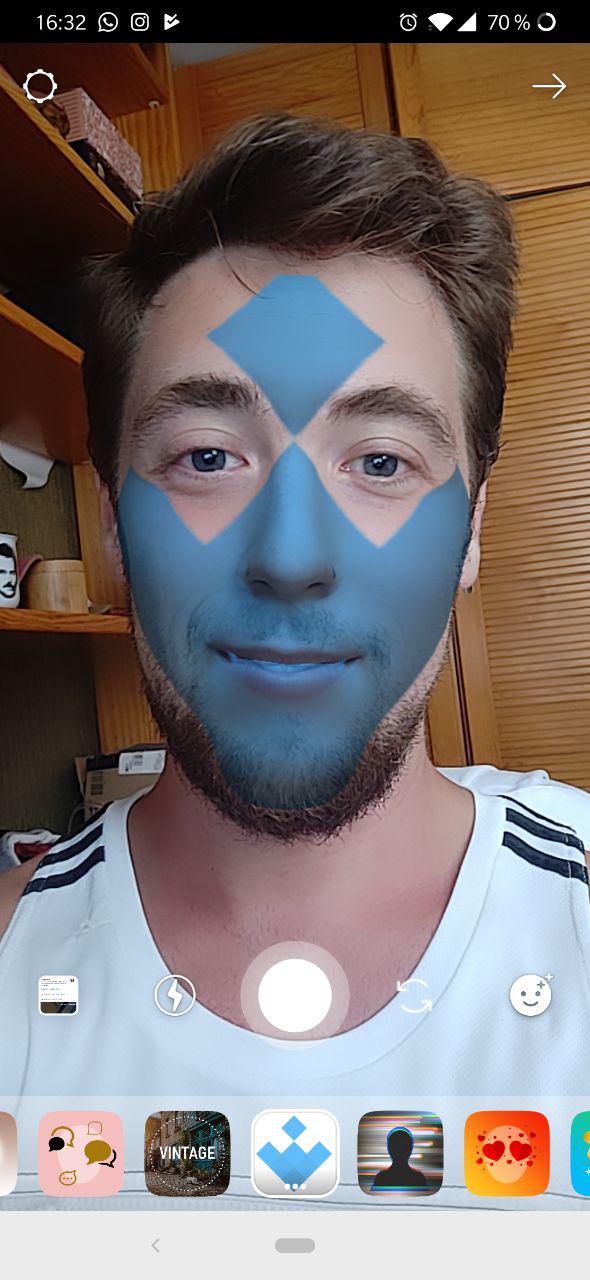
- Now you have to go to the bottom left in material1 and go back to the right side to click on Texture > Choose File. It’s here when you’ll upload the .png file that you’ve generated. In our case, we used the Uptodown logo and it already appears on the model’s face.
Export the result without a problem
Once you’ve finished the process, it’s time to export the filter to see how it looks on Facebook or Instagram. To do this, you click on File > Export and you’ll get a file that you have to store on your PC.
After this, you’ll go to Spark AR Hub from the browser and upload the exported file with your project. Also, once you reach this point, you have to choose if you want to use the filter on Facebook or Instagram Stories since you can only use it on one or the other. Also, you’ll have to select a name for the effect and a thumbnail. When this is all ready, you’ll save the draft and you’ll see a link that will take you to the view of the effect in Instagram or Facebook.
If you’re happy with the result, you can send this effect so that Facebook will review it and let you post it. That said, it’ll be necessary to send a demo video of it. In any case, with the link generated, you’ll have a daily trial limit of 200 users per day.
You can also see your projects on Android
Lastly, it’s important to mention that Spark AR Studio also has a tool for Android that you can use to view your filters you’ve created on a smartphone. To do this, you just have to install Spark AR Player on your smartphone and connect it to the PC via USB cord to send the file using the software. You can do this by clicking on Send to device. In short, Spark AR Studio is a great software for creating your own effects. Surprising all your followers in your Instagram or Facebook Stories is now easier than ever.


