
Creating a professional image production can be a complex and tedious process if you don’t have the knowledge required. This difficulty increases if you actually want to edit a video using your smartphone. Adobe Premiere Rush lets you create absolutely incredible montages, even if you can’t use a PC. Unlike other similar apps, this one includes a totally user-friendly interface. Adobe rolled up their sleeves and got to work to offer you more than enough features so you can be proud of your videos. All it takes is editing a sequence of clips to realize that Premiere’s adaptation for Android smartphones is something everyone will be talking about.
An outstanding interface that makes editing easier
Users who normally edit videos on their computer are usually reluctant when it comes to editing videos with touchscreen devices. The enormous amount of elements that need to be managed during any professional editing process prompt anyone to work on large screens and pretty powerful computers. However, Adobe Premiere Rush is here to show you that you can link layouts and add effects efficiently using your smartphone.
All the elements in this new Premiere version have been simplified to decrease their complexity levels. A window strip on the upper part of the screen, a timeline mid-screen and a toolbar on the lower side of the screen. Three basic areas where you can let your creativity fly and make the most out of the videos you record.
How to create a project with Adobe Premiere Rush
As soon as you enter Adobe Premiere Rush you’ll notice that the project creation process is really similar to the PC version. However, your smartphone will offer a number of features when importing videos, before you start working on the montage. In order to start the project, all you have to do is following these simple steps:
- Open Adobe Premiere Rush and tap on the plus sign (+)
- Tap on Add Media in order to import videos that are stored in your smartphone’s memory or the cloud.
- Tap on Record video or take a picture if you’d like to capture the images at that moment using your Android’s camera.
- Once you’ve selected the images or videos, tap on the Create button that’s located on the lower side of the screen and name the project.
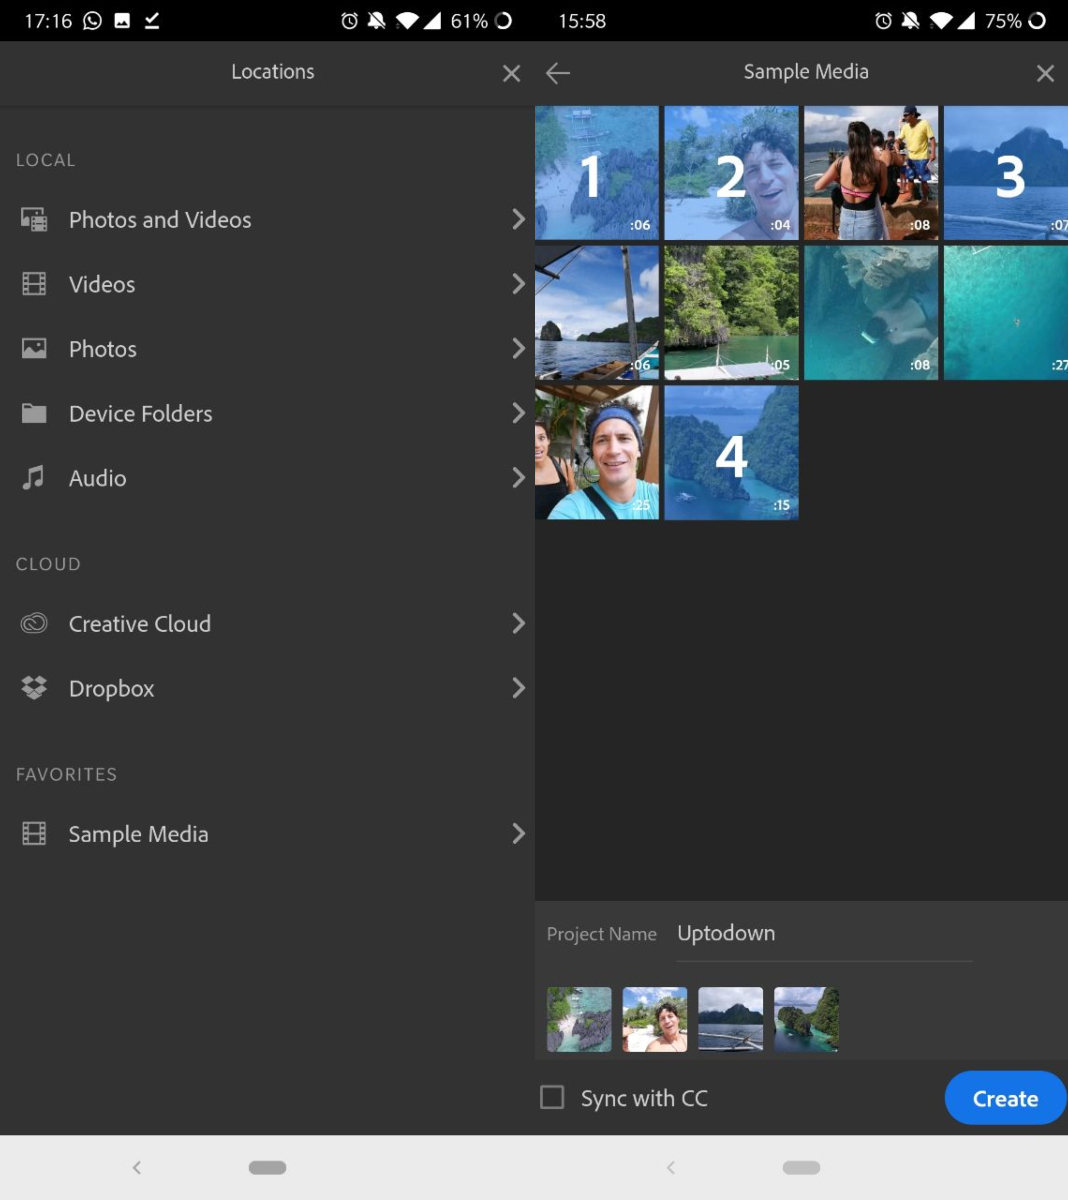
It should be noted that if you activate the synchronization with CC, you can link your projects in the mobile version to your desktop. The Adobe system digs deeper and deeper in order to connect platforms, which could be useful to you if you work with multiple supports.
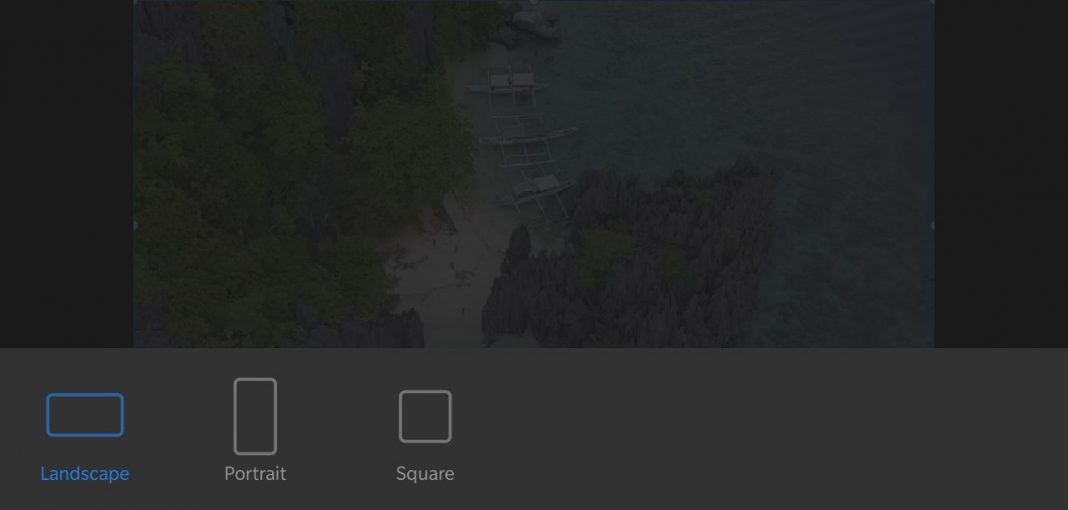
Choose the correct aspect ratio
After you import the media and name your project, you’ll access the Adobe Premiere Rush workspace. We’d advise that you first think about the correct aspect ratio for your montage before you start exploring the possibilities that this app offers. Adobe offers three styles to choose from, depending on your needs. For example, if you want to edit a video for your Instagram Stories, you can do so in landscape orientation.
An incredibly optimized workspace
As soon as you’ve chosen an aspect ration, you’ll be ready to start editing your videos. Adobe Premiere Rush will embed each clip imported for the project into the timeline. This feature makes sure that you don’t have to drag them separately like you would in the desktop version. Nevertheless, if you want to add more files, later on, you can do so by creating a new individual import.
In order to choose any video on the temporary timeline, just tap on it. The clip will automatically turn orange. If you want to interact with it, just trace gestures to expand or reduce the duration. You can also crop videos with Adobe Premiere Rush by tapping on the scissors icon. If you tap on the orange margins you’ll separate the video into two or more pieces.
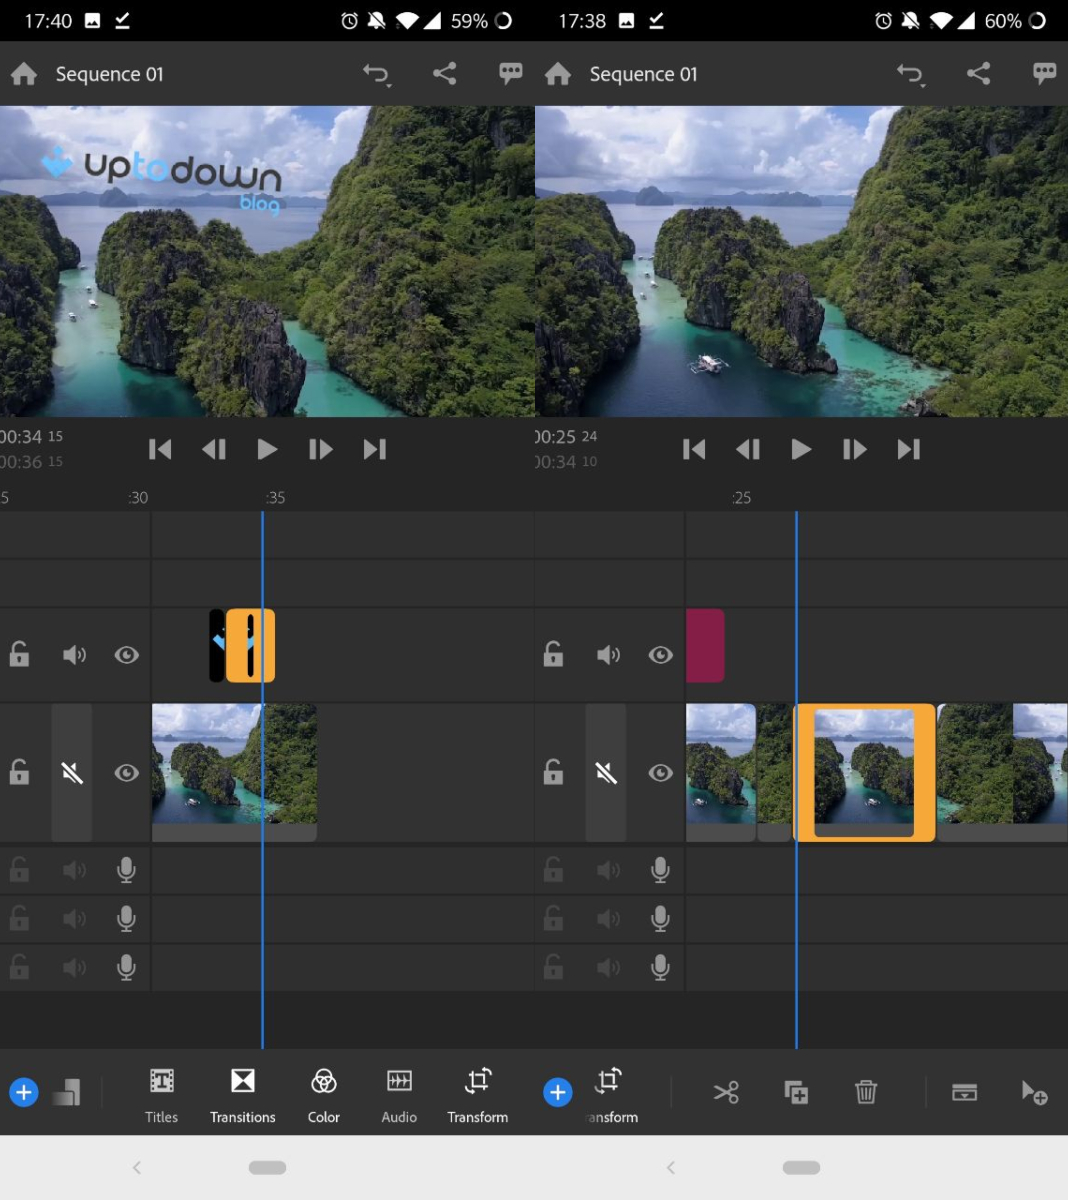
Duplicate clips to save the original
One of the most interesting features when editing a video with your smartphone is duplicating a clip. By doing so, you’ll make and save a copy of the original, in case you’re not satisfied with the postproduction of any of the fragments. In order to multiply the clip in the temporary timeline, follow these simple steps:
- Tap on a specific clip of the timeline for a couple of seconds.
- Choose the Duplicate option
The duplicated clip will appear just after the original piece. In order to delete any of the two fragments, just tap on Eliminate on the menu.
Add titles with Premiere Rush
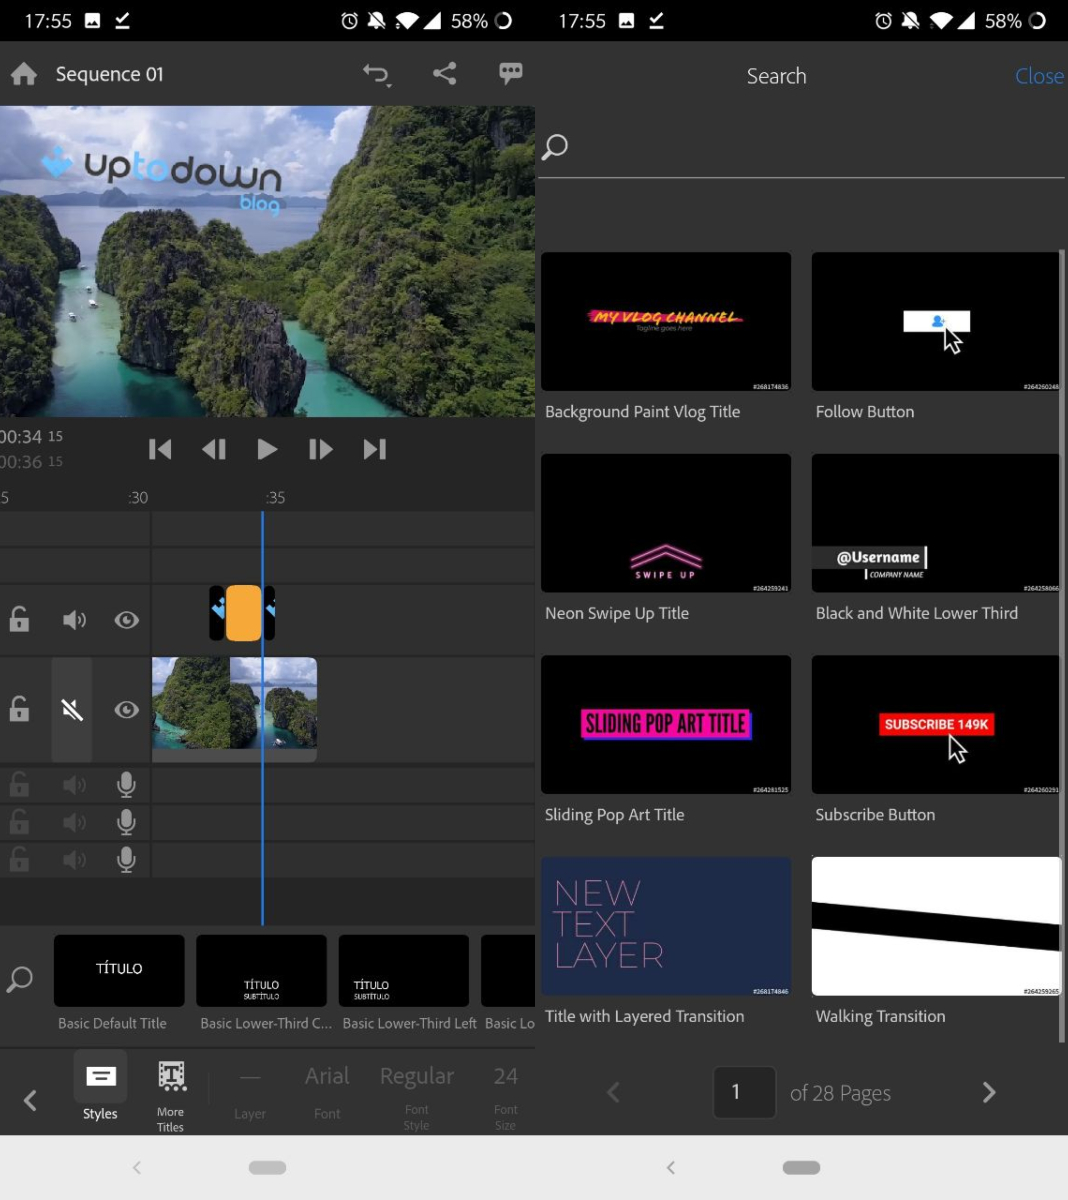
One of the more negatives aspects of Adobe Premiere’s desktop version is its Add Titles feature. It takes up a bunch of resources and it’s not as useful as we’d like it to be. However, the mobile version is a lot easier to use. The best part is that there are a bunch of different fonts you can use.
If you’re wondering how to add titles with Adobe Premiere Rush, just follow these simple steps:
- Locate the blue line on the clip where you’d like to add the title.
- Tap on Title in order to display the corresponding options.
- A title clip will be added to the timeline.
- Choose your favorite style and modify its parameters such as size, font, and color by tapping on the corresponding layer.
- If you tap on More Titles, you can download new title templates from the Adobe online libraries.
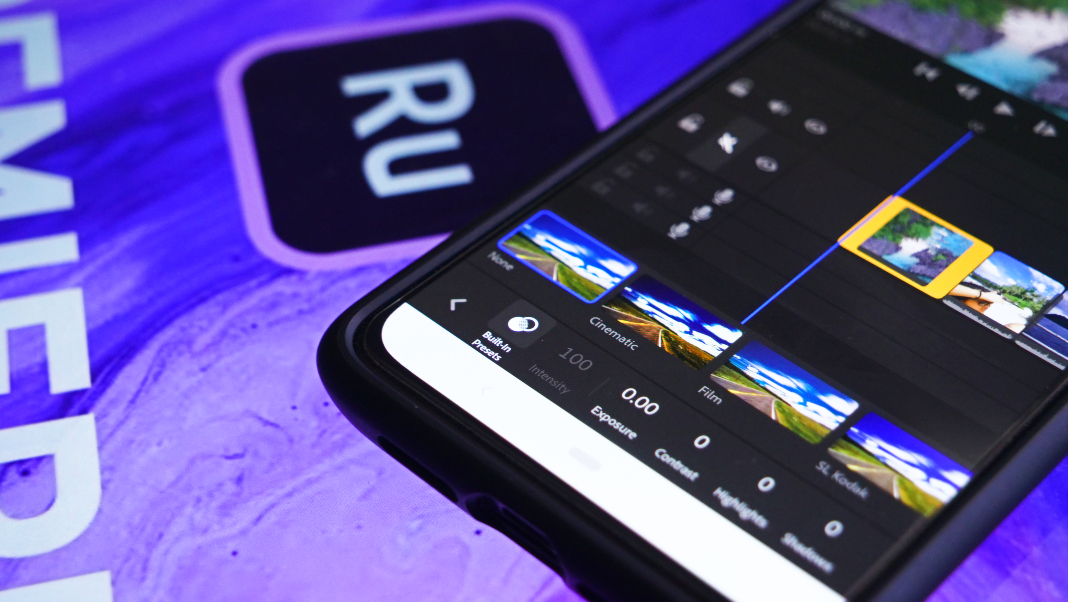
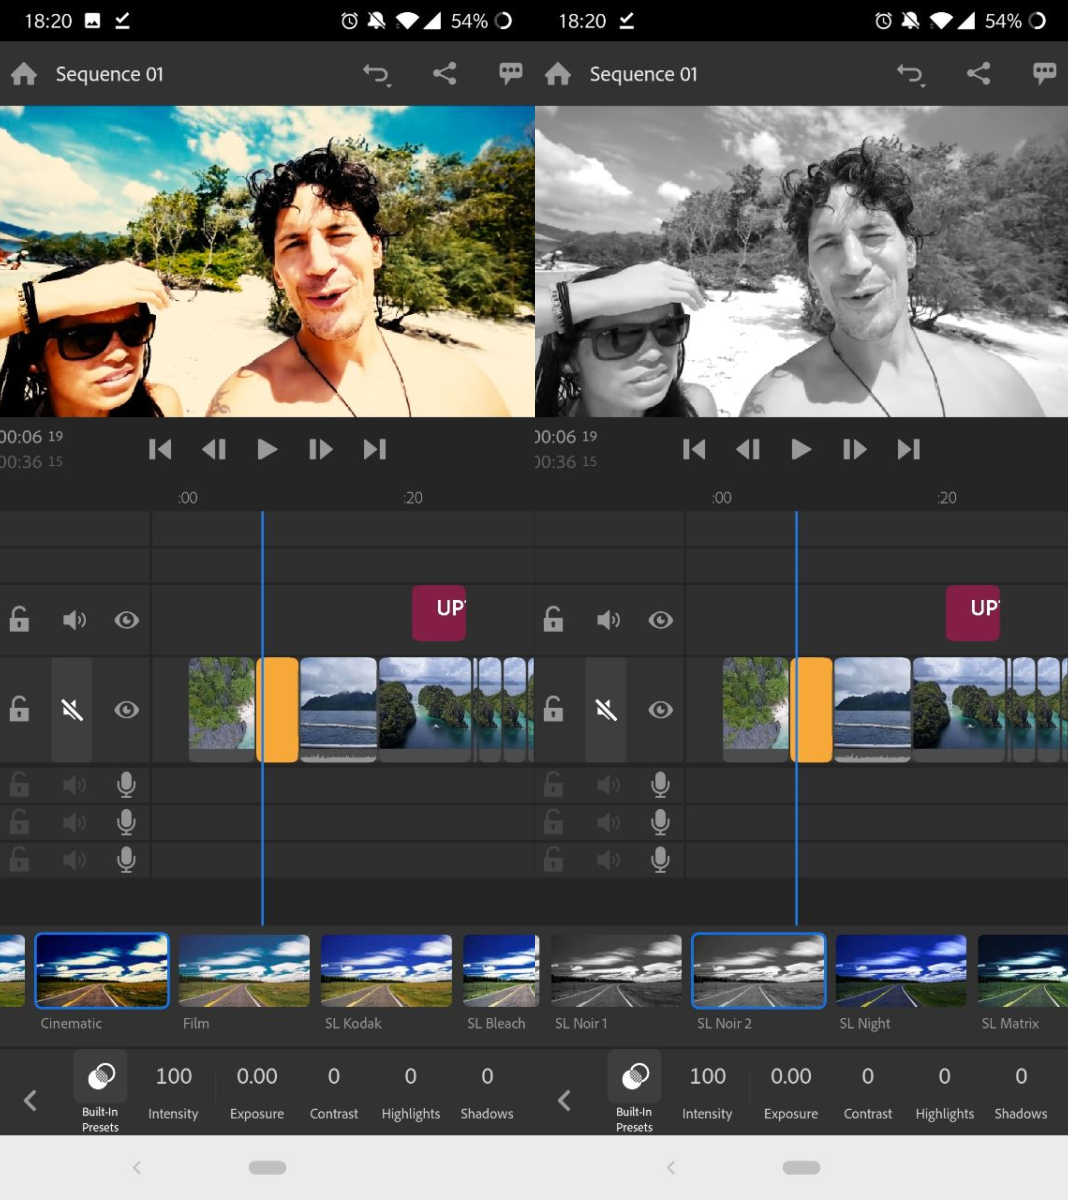
Apply transitions, color, and sounds
You can also add transitions and use color filters to adjust the pictures using the bar located on the lower side of the screen. The tool itself includes presets, but you can also modify some parameters manually: contrast, shadow, intensity or exposure. Basically, you can use this tool to show off your color grading skills.
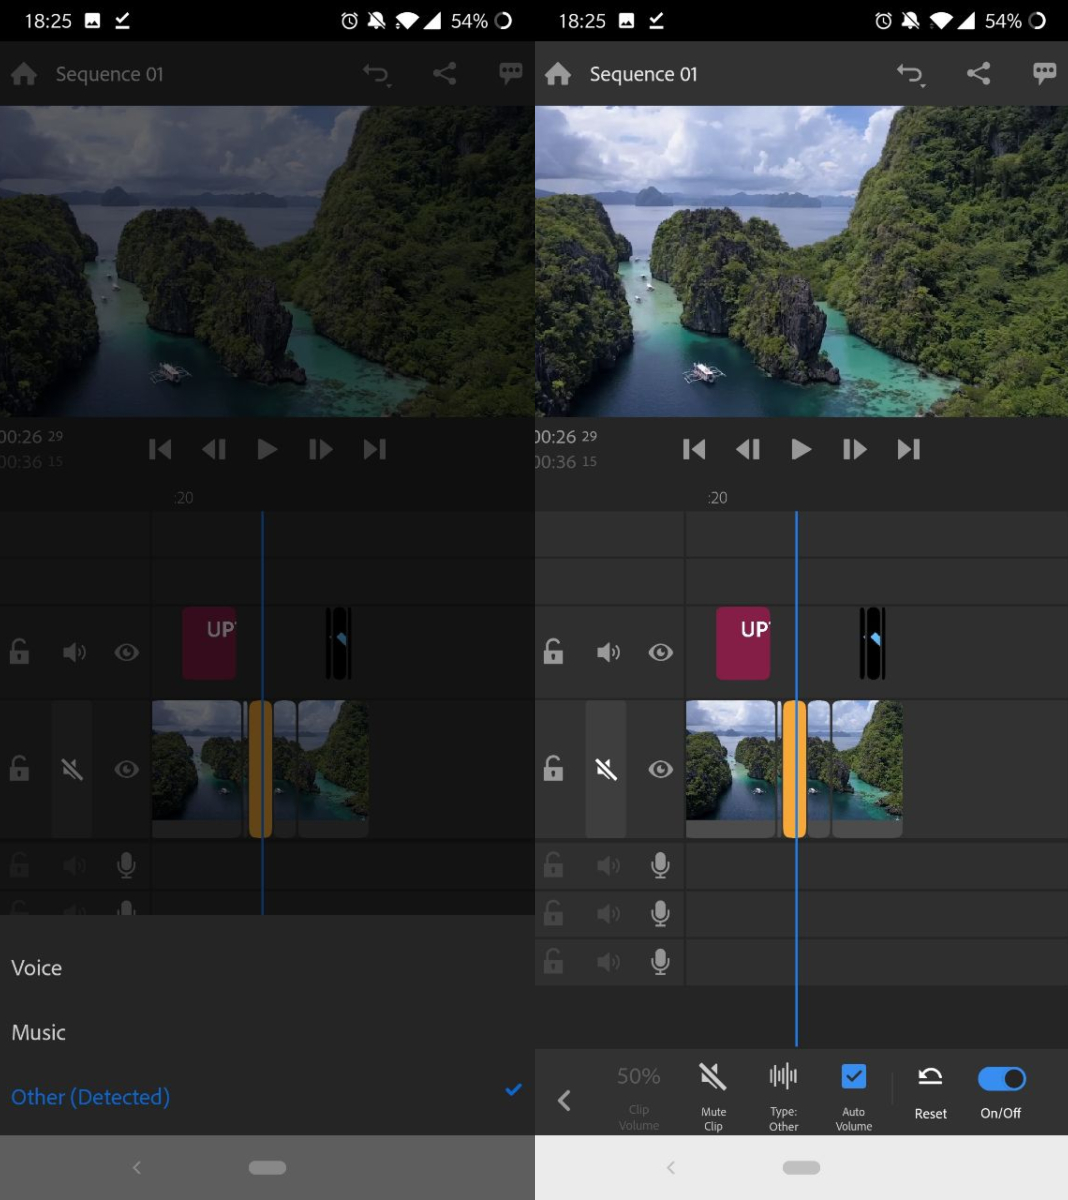
The soundtrack in Adobe Premiere Rush doesn’t go unnoticed either. There are tracks to add audio to the timeline. Also, the method to silence or activate each one is the same as with the desktop version. All you have to do is tap on the microphone icon or the speaker, depending on whether you want to listen to some audio tracks or others.
Export your masterpiece
In order to export the final montage, you need to tap on the icon located on the upper right side of the screen. Then, you’ll see different options you can choose from:
- Tap on the Export icon
- Choose between the Automatic export adjustment or Other options in order to choose manually.
If you tap on Other Options, you can export the video with either one of these resolutions:
- 720p and match the frame speed
- 720p to 30 fps
- 1080p and match the frame speed
- 1080p to 30 fps
After choosing one of these options, your montage will start exporting to its target folder. Currently, you still can’t use 4k but we don’t rule out that future updates of this free Adobe Premiere Rush version will include it. We have to say, this smartphone version of the popular video editing program has totally impressed us. Even more so when you realize that you don’t have to listen to your computer’s fans working at max speeds when you’re trying to finish a project.
Adobe Premiere Rush for Android [APK] | Download


