
It’s time to get over our collective fear of Linux, and even more so considering the long history of Ubuntu as the leading distribution for your average user thanks to its easily understandable interface for anyone coming from Windows or Mac OS. We’ve already explained how both systems can operate side by side on different partitions of a hard disk, but perhaps a good way to convince you to take the leap is by trying it without leaving Windows. In this tutorial we explain step by step how to configure VirtualBox for any virtualized version of Ubuntu 14.04 on Windows or Mac.
What you need
We’ve already explained several times on the blog what virtualization is all about: simulating a virtual computer based on software and installing any operating system on it that can run from within one window inside another, sharing the resources of the base computer for its operation. That is, if you have 8GB of RAM, you can reserve 2GB for your virtual machine, or can also assign part of your hard drive to the creation of a virtual unit. The requirements will vary depending on the operating system that you want to virtualize.
To do all this, the elements that you’re going to need (all of them free) are the following:
- An ISO image of the desired version of Ubuntu (or you can use a physical disk where you’ve saved it). Depending on whether your computer is compatible at the hardware level with advanced virtualization functions, you can run either the 32- o 64-bit version. Whether you opt for Ubuntu or any other “flavor” from among the many available is up to you.
- VirtualBox, the free virtualization tool from which you’re going to configure your “fictitious” unit.
Configure your virtual machine
After launching VirtualBox you’ll create your new virtual machine by clicking on the “New” button. Next, it will ask you how much memory you want to save for your virtual machine. Although for Ubuntu 512MB of RAM is enough, it’s advisable to allocate 1 or even 2GB if it’s available.

When it comes to space, the 8GB recommended by default will be more than enough to test the operating system, and you can even specify if you want to save that space or make the file on the virtual hard drive grow dynamically according to your own needs. To be on the safe side, it’s always advisable to set the amount beforehand. The configuration assistant will propose several settings options, but if you want to make any changes you can do so later.

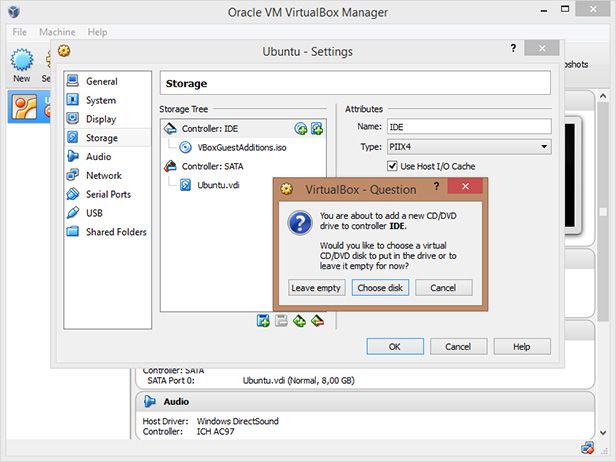
If you’ve already burned the Linux distribution you want on a DVD, it will be automatically detected once you start the virtual unit and the installation will start. In any case, you can also launch the ISO image directly by setting it up as if it were a virtual unit. To do so, on VirtualBox (and with the virtual machine turned off), go to Settings > Storage and set up a new IDE controller by selecting the ISO as the content.
Both the mouse and the keyboard will be used in the same way on both operating systems, as will any USB connections and your Internet connection. We’ll leave for a later tutorial the option to share folders between the operating system server and client, although this can be done quite straightforwardly from the Settings > Shared Folders section.
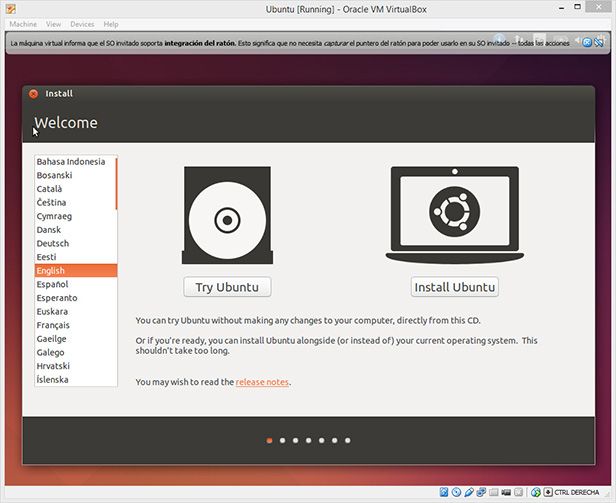
Linux installation
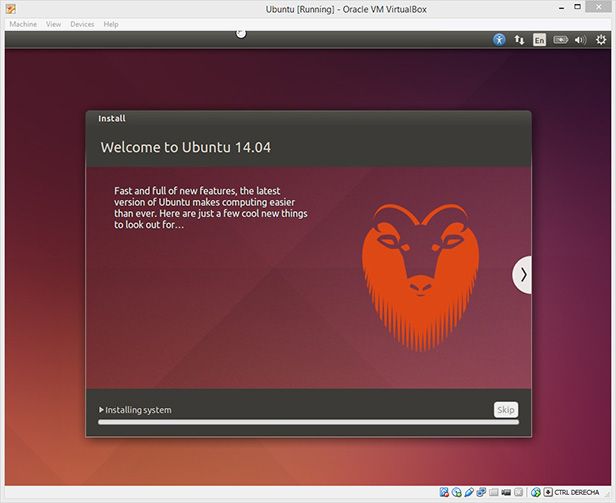
The installation process for any Ubuntu-based distribution is very intuitive and user-friendly, even for beginners. It will ask you to set the installation language, the access password, and your timezone, among other things. When it asks you if you want to format the unit where it’s going to be installed, you should say yes. Don’t worry, the virtual unit is totally separate from your hard drive. It’s simply a file with a VDI extension found on your hard drive that passes for a physical unit.
Once the installation is finished you’ll have to restart the virtual unit. If you’ve set up the ISO manually you’ll have to deactivate it from the Settings menu in VirtualBox.
Set up your desktop to increase the resolution
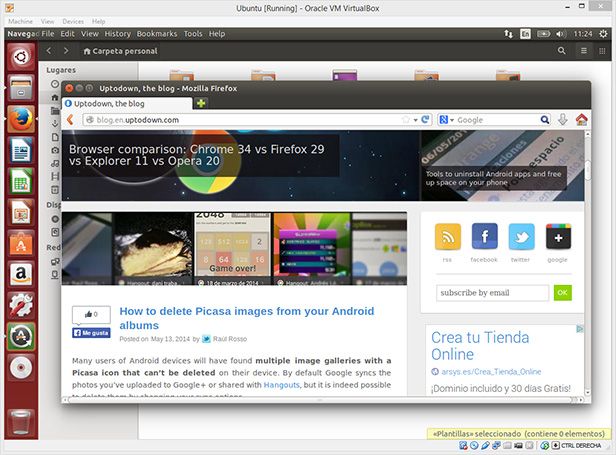
By default, the resolution of the virtualized Ubuntu will be 640×480, by all accounts much too small to do almost anything. To make the browser window adaptable and be able to run the operating system in full screen in your monitor original resolution, you’ll have to install the “Guest Additions,” a set of virtualization controllers that lets you do this.
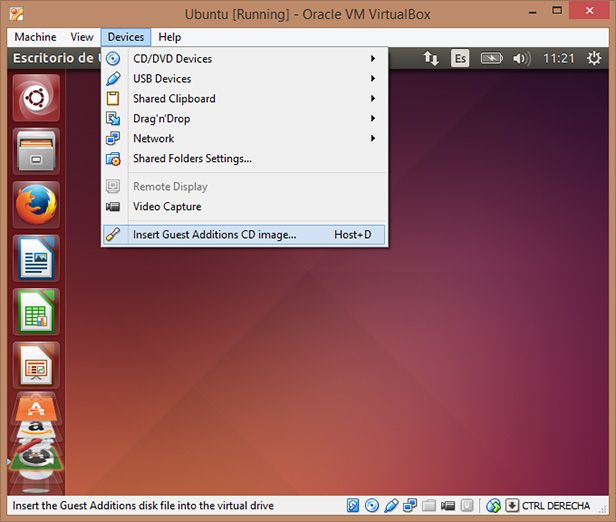
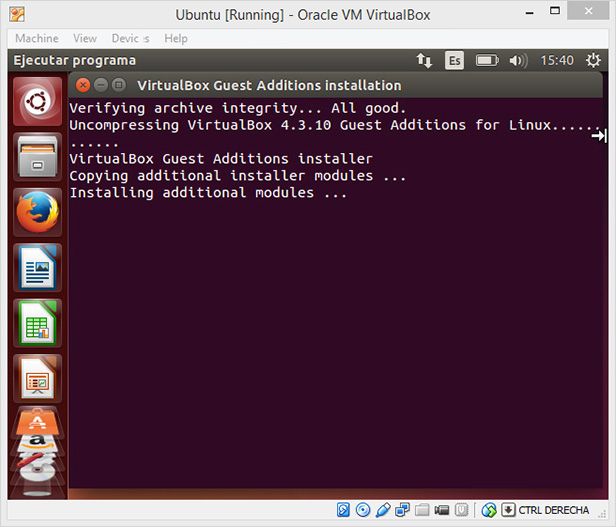
To that end, in the upper menu on the virtualization window you’ll go to option Devices > “Insert Guest Additions CD image.” When you do it, a virtual disk will automatically be set up that, when it auto-launches, it will open a terminal window and will install the necessary files after asking you for the administrator password you selected during the Ubuntu installation. When it finishes, after restarting your virtual machine, you’ll have a fully-performing Ubuntu OS at your disposal.


Valuable information. Lucky me I discovered your website accidentally,
and I am shocked why this twist of fate didn’t happened earlier!
I bookmarked it.