The Android-x86 project has now been in effect for several months. It’s a free and open initiative to take the Android operating system to computers with AMD and Intel processors instead of limiting it to the ARM architecture that is standard on smartphones and tablets. When you use the Linux kernel, it’s possible to install and run Android natively on desktop computers. In this tutorial we’re going to virtualize Android 4.4 Kit-Kat using VirtualBox, although you can extend to a real installation of the operating system on a computer by burning the ISO onto your hard disk or running it via USB.
The procedure is very simple, and if you’ve already taken baby steps on VirtualBox before (here is a tutorial for virtualizing Ubuntu), you shouldn’t run into any difficulties. That said, although the latest version of Android-x86 can run version 4.4 Kit-Kat truly fluidly and with most of the basic functions, its compatibility with third-party applications is still a bit green. Meaning if you want to play Android games on your computer, it’s probably better to use more specialized alternatives like BlueStacks.
Configuring the virtual machine
- You’ll need to have VirtualBox installed and the ISO image for Android-x86 downloaded on your computer.
- Now you’ll proceed to create your virtual computer by clicking on the ‘New’ icon from the VirtualBox main menu. These are the characteristics you’ll need to specify: Linux Version 2.6, 1GB of assigned RAM (2014MB), VDI hard drive with dynamic reserved storage system and a minimum size of 6GB to give yourself some breathing room.
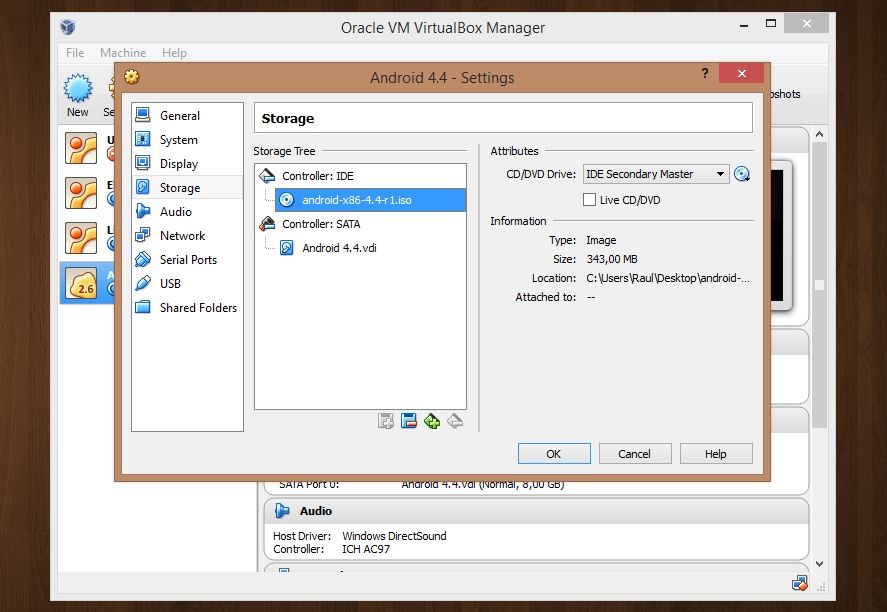
- Now you set the image so that the virtual system launches from the ISO. To do so, select your virtual machine and go to Settings > Storage > IDE Controller > Empty and click on the CD icon on at the side. Select the ISO from the filepath you’ve downloaded it to and click Accept.
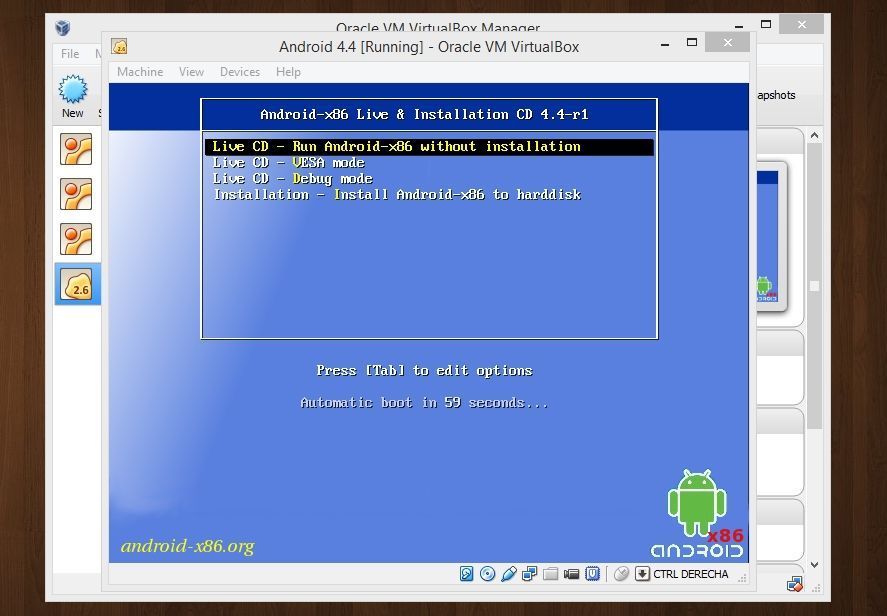
- Start the virtual machine.
Android installation
- In the menu that appears, select the option ‘Installation – Install Android-86 to hard disk’.
- Select ‘Create/Modify’ with your arrow keys to create an installation partition (you have to press Enter to confirm each action). Click ‘New’, choose it as ‘Primary’ and tick ‘Bootable’. Finally, click ‘Write’ to confirm all the actions.

- Exit the partitions menu by clicking ‘Quit’.
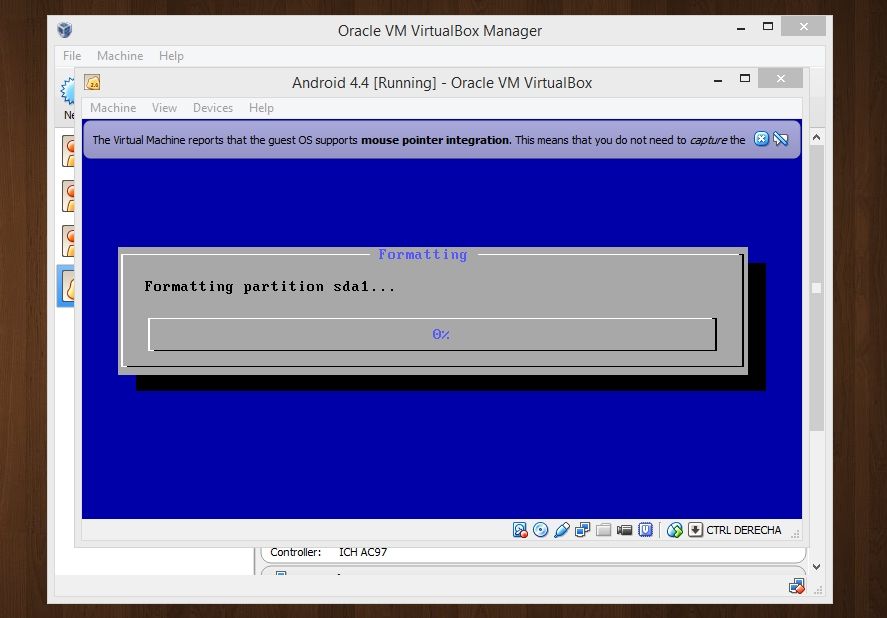
- Select the recently created partition, which will be called sda1 by default, and choose ext3 format. During the installation, click ‘Yes’ on all the options that appear.
- When it finishes, and before restarting your computer, you’ll unmount the ISO by clicking on the disk icon in the lower right part of the screen.
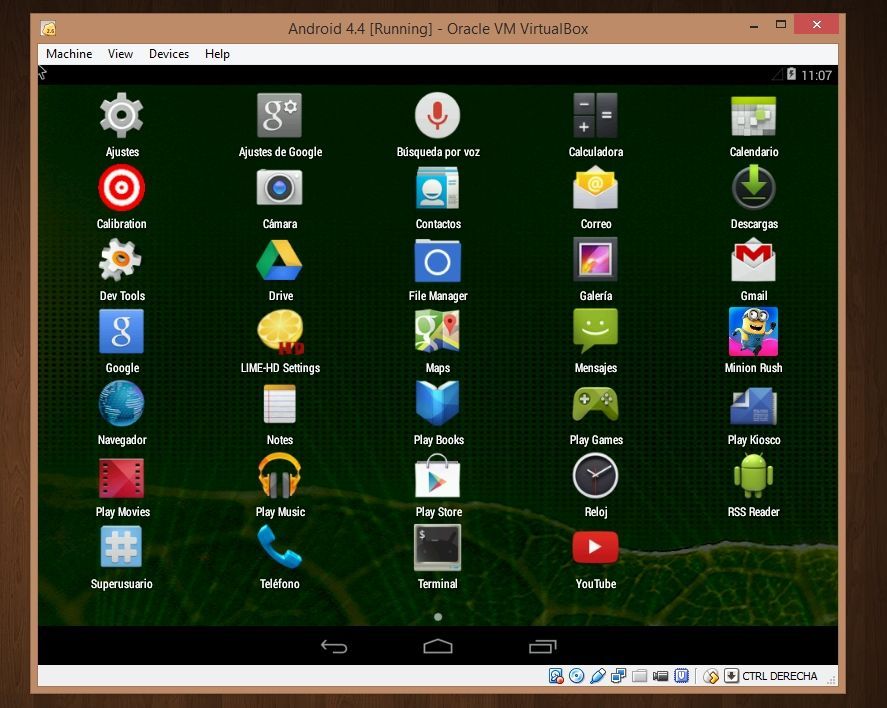
- Now you do the restart and in the GRUB select Android-x86 4.4.
Post-installation details
- During the first Android startup it will ask for your standard configuration preferences for language and location, as well as the details to associate your Google user account.
- It’s possible to control the Android menus with either your PC’s arrow keys or mouse, although it’s advised to avoid the integrated mode using Machine > Disable mouse integration.
- Although the WiFi connection is disabled, the Internet connection will be shared with the virtualized system. To verify it, you just have to log in to the YouTube or Google Play application.
- Some apps will force the screen to rotate horizontally, meaning it’s advisable to block this feature from Settings > Display> Auto rotate screen.


A
Nshta no
Settings > Screen
Does not exist
Sorry, it was Settings > Display > Auto rotate screen.
On my machine (Surface Pro 2) it does everything until the point of first Android start-up. It hangs on the Android logo…
I have followed all steps exactly (4 times now…). What might be wrong here?
What about trying with Bluestacks? Here you can see how it works http://blog.en.uptodown.com/bluestacks-best-way-use-android-apps-pc/
Great how to get Android on Linux…. and it works. LOL! Yes it works 5 Stars.
I see the wordage…. “1GB of assigned RAM (2014MB)”
which either should be
1GB of assigned RAM (1024MB)
OR 2GB of assigned RAM (2048MB) Right!
Frankly, I’m running 3GB of assigned RAM (3072MB)
And yes I used a for real calculator on all that math! Lol!
Again thank you very much for your fine support on running Android on Linux.