We’ve already talked before Sweet Home 3D, a free multiplatform program that lets you create 3D plans of your house for either decorative or professional planning purposes, while being very accessible for users who’ve never worked with interior design assistance tools. Here we’re going to explain step by step how to create a 3D model of your house based on a blueprint, including the floors and the walls as well as the placement of furniture and lighting.
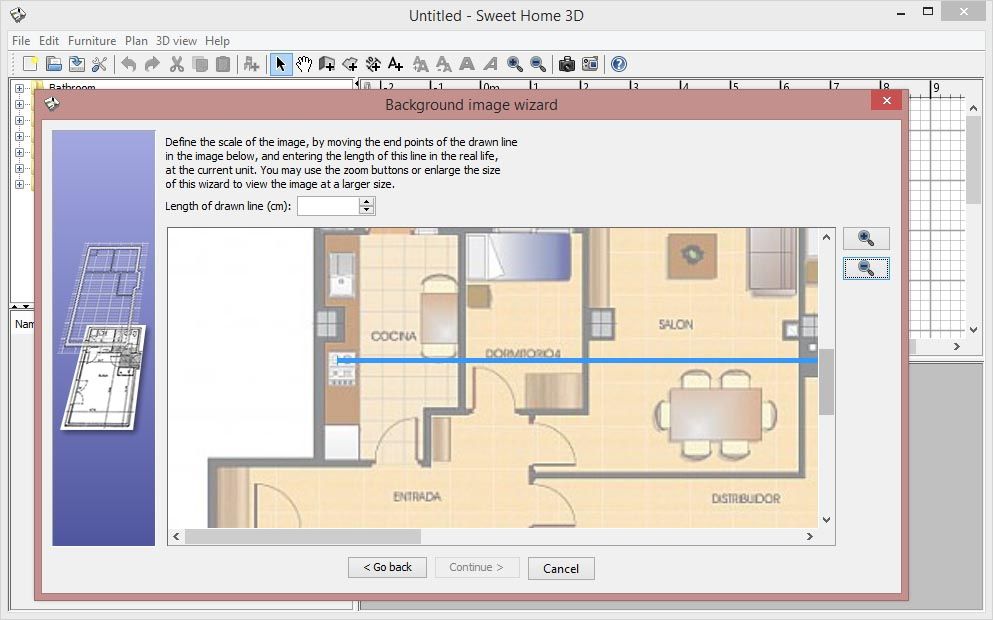
- The first thing to do is import your reference image from Grid > Import background image. As we’ll see in a second, it doesn’t matter if you don’t know all your house’s measurements. If you know just one main measurement or the square metereage of one room you can calculate the rest.

- Now you have to select a reference measure based on a measurement line whose start and end points you can drag with your mouse. Thus, if for example you know how many meters long one of your rooms is, you’ll create a line segment of exactly that length and label it with the number of centimeters in the field for that purpose above it. Or if you know the square meters but not the length and width you just have to use a simple formula to determine it: area = side 1 x side 2. From the plane itself you can use a ruler to determine the difference between the two lengths, meaning it will be something like area = side 1 x (side 1 + difference between the two). Solve using the values you have available and then—voilà!
- Now you have to select the origin coordinates on the plane, which won’t have many implications for your design beyond serving as the center of the plane for the rulers and guides in the program.
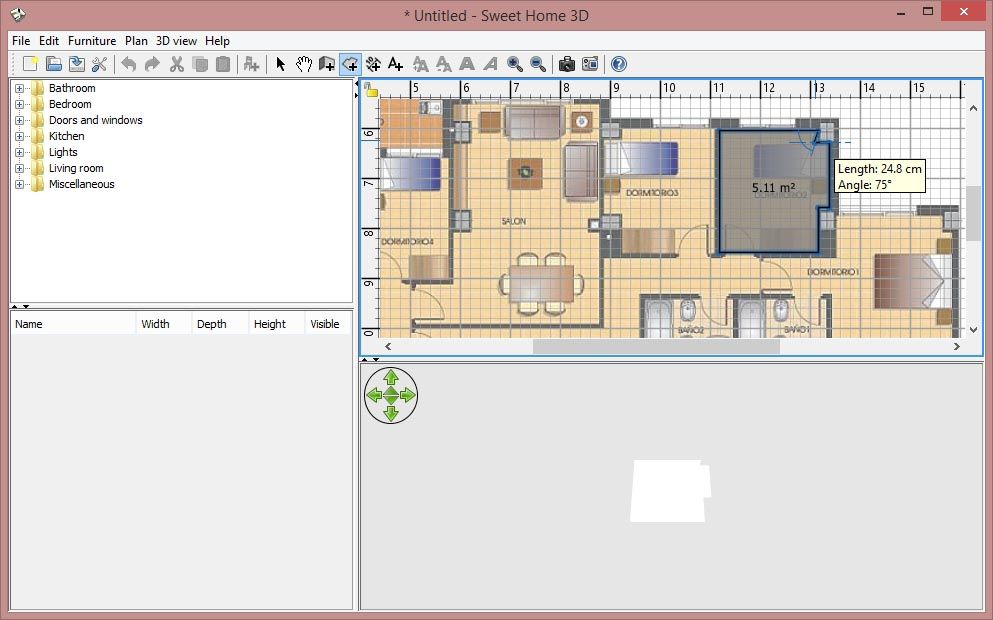
- Now you’ll see your flat image in the grid window and can start drawing your floors. To do so, click on the upper “Create rooms” icon and draw the outline of the room in question point by point (double-clicking on the last point will close the figure). The grid makes it so that right angles are created automatically, meaning you don’t have to be very skilled to do this. Also as you increase the size of the floor you’ll see the total square meterage of the room, ideal for checking whether you’ve done your calculations correctly in the previous step.
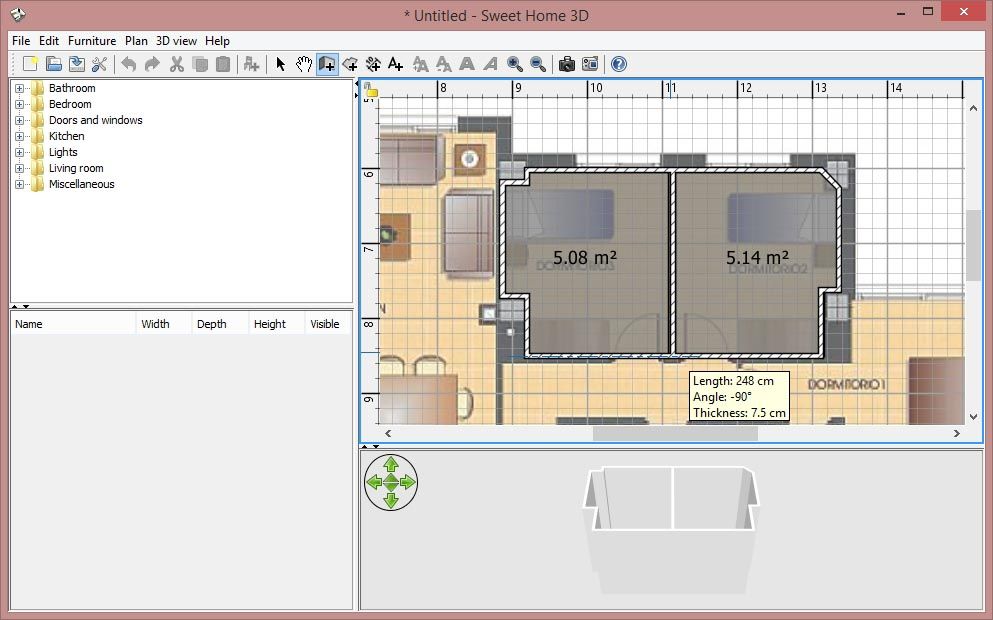
- Now that you have your floors, it’s time to draw the walls using a procedure practically identical to the last one, clicking on each angle with your mouse. Keep in mind that some walls might come out looking thicker than you try to draw them, which you can fix by double-clicking on the wall in question and modifying that setting from the corresponding option.
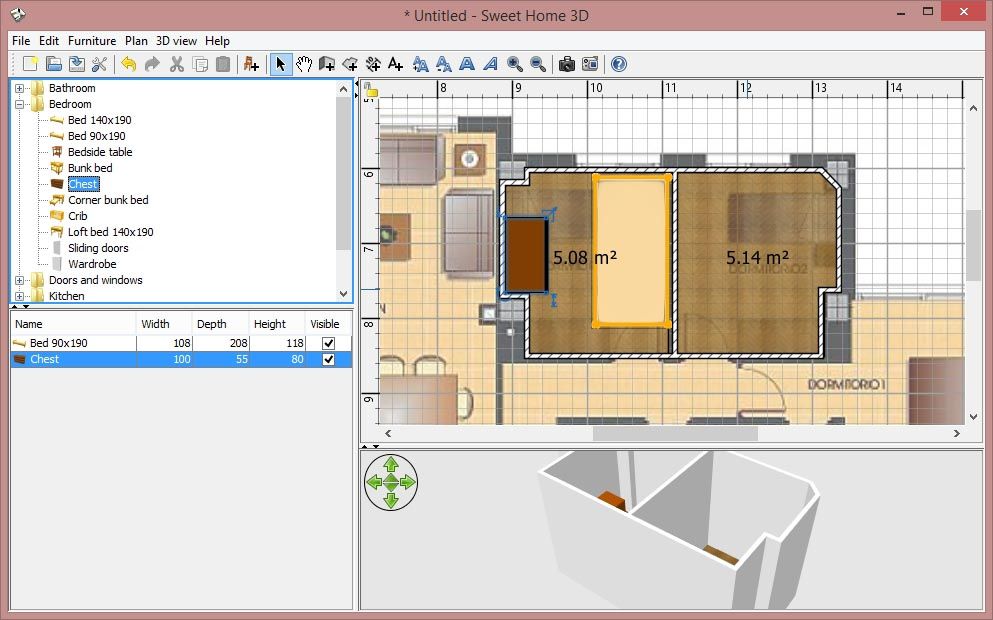
- Placing the furniture might be the most fun part: you can set them wherever you like by dragging them from the tree menu in the left secion, where the furniture is organized into themed folders.
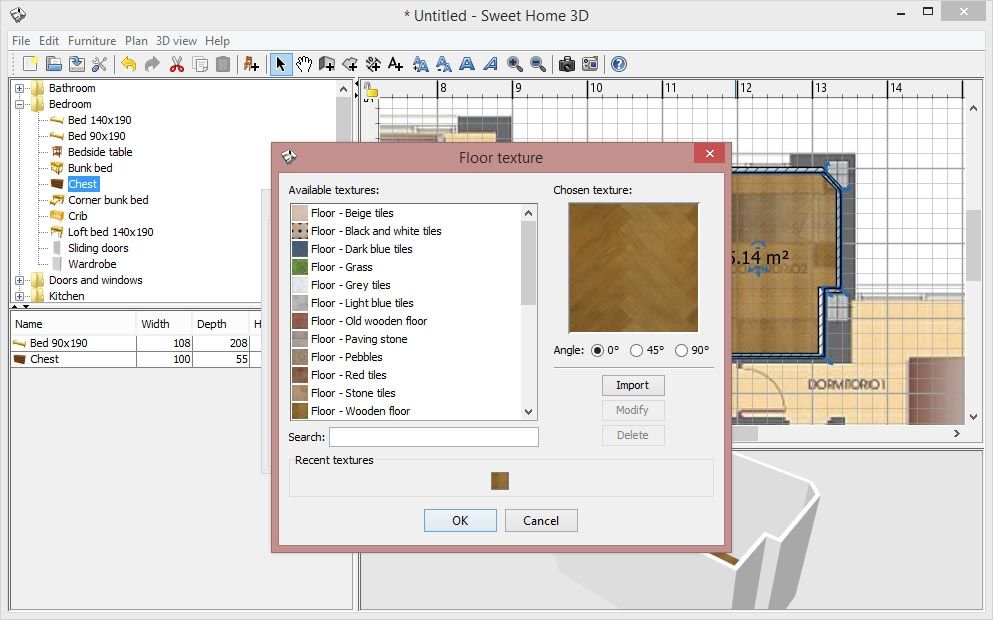
- Both the walls and the furniture offer a high level of customization. For example, the latter can be resized so it looks like the furniture you want to put in your house in real life, and you can also change the color and texture of all of them via the aforementioned menu that pops up when you double-click on an object.
- All these features together let you create a 3D representation quite close to real life, which is quite useful for moving or planning changes to your décor. In any case, if what’s included in the program isn’t enough, you can import both images for textures and complete 3D models from either Sweet Home 3D’s official webpage or third-party pages, where you can find everything from free furniture packs to enormous paid lots of furniture with the entire IKEA catalogue.


