The look of the Steam platform has been in constant evolution since its release in 2003 as an exclusive launcher for games created by the Valve studio. While its aesthetic and browsing system don’t have any big hangups, many don’t know that it’s also possible to completely customize its appearance with user-created themes. Here we explain how to change themes on Steam and recommend some of the best-known ones out there.
- Some themes sometimes use specific fonts that may not be included in Windows. If that’s the case, the first thing to do is copy them into the Windows > Fonts folder.
- After that, copy the file that contains the theme itself into the Steam/Skins subfolder at the filepath where you have the client installed, by default C:/Program Files.
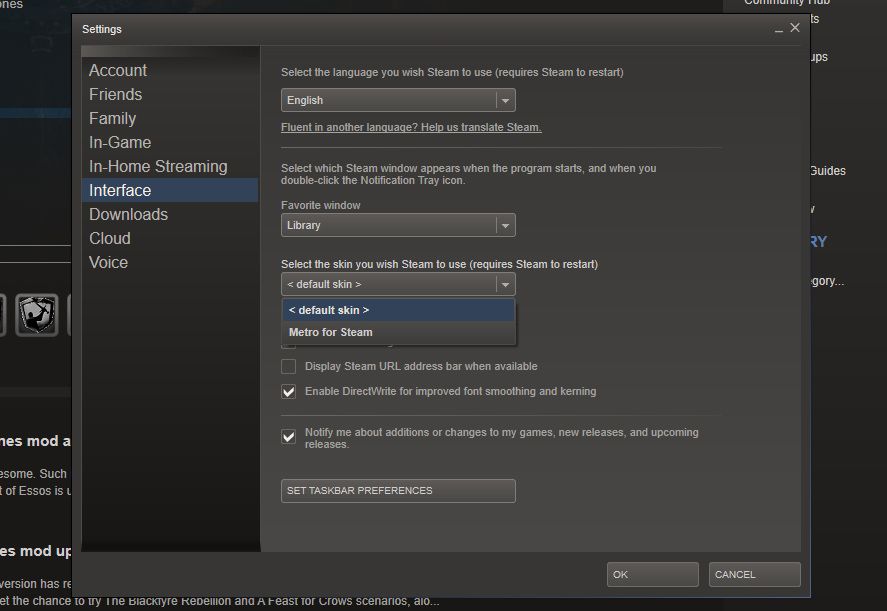
- Now you have to access the client and select the desired theme from the ones you have installed. To do so, go to Steam > Parameters > Interface and in the ‘Appearance’ menu select the one you want.
- Finally, you have to restart the client for the changes to take effect.

There are many webpages the collect these themes, such as SkinYourSteam, which offers a large collection of themes, with some of the highest-rated being Metro for Steam, Pixel Vision, and MikuSkin.