Google Photos recently added the possibility to create shared albums through its photo management and sync tool. This means that besides being able to send full galleries to other users, you can let them add images to work on them collaboratively. For those who haven’t entirely gotten their ducks in a row with this tool, here is a small tutorial on the subject.
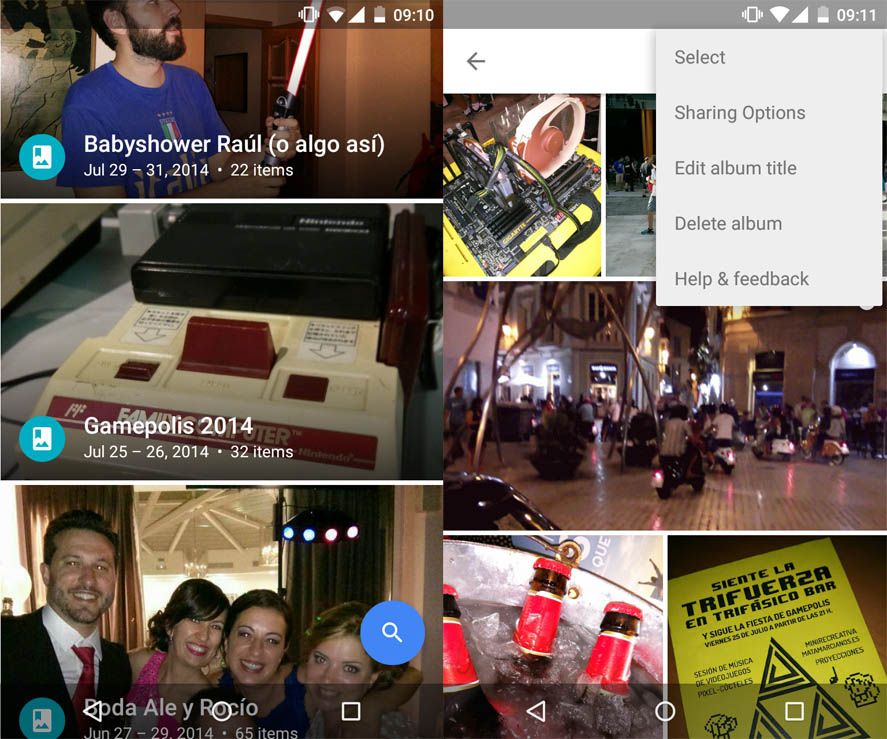
The first thing to do is the most obvious: have your photo albums created and ready. Google Photos sequentially stores all the images from your Android (or ones you upload through the web client), so the best way to locate a specific event is by organizing the pics into separate galleries. To do so you just have to select a group of photos, open the top menu, and choose the option to create a new album or add them to an exisiting one.

How to share an album
- If you use the official Google Photos app you’ll be taken to your collections menu with a tap from within the left pullout bar. There you’ll find your albums along with your videos and stories (the latter two are auto-created by Google). Tap your albums to access the ones you want to share. From here you’ll open the menu with the three dots at the top right and click Share options.
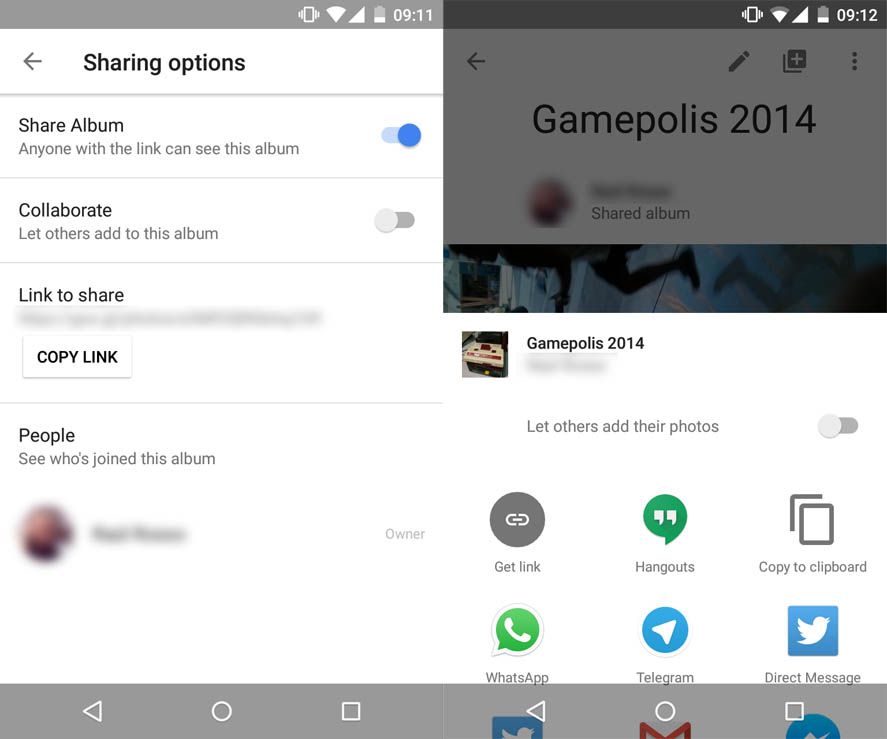
- When you tick the Share album switch you’ll get an array of options. If you tick the option to collaborate you’ll allow other users, besides being able to view the gallery, to add new photos (don’t worry, they can’t delete anything). Underneath you’ll find an auto-generated URL that you can send to people so they can access the gallery. Underneath that you can view all the users who’ve entered the gallery via the link.
- The other way to share images and galleries is via the Share button itself. You’ll get the list of apps that the post can interact with, as well as three icons: Create new shared album, Add to a shared album, and Create link. We don’t really need to explain each of these, I suspect.

Also on the desktop
If you want to do this process from the web client, it’s basically the same: you access the album in question and activate the Share option. It’s really a very efficient solution to sending cobbled-together batches of compressed photos via mass file-sending services where the recipient ends up dizzy when it comes to putting all the content back together.
More information | Google Photos Help


Nice :)
هلوووووو